Dockhand User Manual
Welcome to Dockhand, a modern, powerful Docker management application. This manual covers all features and functionality to help you get the most out of Dockhand.
In the free edition, all authenticated users have full admin access to all environments and features. There are no role restrictions - if you can log in, you can do everything.
The Enterprise edition adds Role-Based Access Control (RBAC), allowing you to define custom roles with specific permissions and restrict access to individual environments. See the Enterprise features section for details.
Quick start
Get Dockhand running in minutes with Docker:
docker run -d \
  --name dockhand \
  --restart unless-stopped \
  -p 3000:3000 \
  -v /var/run/docker.sock:/var/run/docker.sock \
  -v dockhand_data:/app/data \
  fnsys/dockhand:latest
Or with matching paths (required for stacks with relative file paths):
# Create the directory on the host
mkdir -p /opt/dockhand

# Use matching paths with DATA_DIR
docker run -d \
  --name dockhand \
  -p 3000:3000 \
  -v /var/run/docker.sock:/var/run/docker.sock \
  -v /opt/dockhand:/opt/dockhand \
  -e DATA_DIR=/opt/dockhand \
  fnsys/dockhand:latest
Or using Docker Compose:
services:
  dockhand:
    image: fnsys/dockhand:latest
    container_name: dockhand
    restart: unless-stopped
    ports:
      - "3000:3000"
    volumes:
      - /var/run/docker.sock:/var/run/docker.sock
      - dockhand_data:/app/data

volumes:
  dockhand_data:
Then open http://localhost:3000 in your browser.
If your compose stacks use relative volume paths (like ./config.yml:/config.yml), you need to use matching paths instead of a named volume. See Data storage & volume paths for the recommended setup.
On first launch, authentication is disabled. Go to Settings > Authentication to enable authentication and create your first admin user.
Docker socket permissions
Dockhand needs access to Docker to manage containers. By default, the Dockhand container runs as a non-root user, which may not have permission to access the socket on your host system.
If you see a "permission denied" error when trying to add your local environment, you'll need to configure socket access. Here are the options:
Match the Docker group GID
Find your host's Docker group ID and run Dockhand with that group:
# Find the Docker group ID on your host (Linux)
stat -c '%g' /var/run/docker.sock
# On macOS, use: stat -f '%g' /var/run/docker.sock
# Example output: 999

# Run Dockhand with the matching group
docker run -d \
  --name dockhand \
  --restart unless-stopped \
  --group-add 999 \
  -p 3000:3000 \
  -v /var/run/docker.sock:/var/run/docker.sock \
  -v dockhand_data:/app/data \
  fnsys/dockhand:latest
Or using Docker Compose:
services:
  dockhand:
    image: fnsys/dockhand:latest
    container_name: dockhand
    restart: unless-stopped
    group_add:
      - "999"  # Replace with your host's Docker GID
    ports:
      - "3000:3000"
    volumes:
      - /var/run/docker.sock:/var/run/docker.sock
      - dockhand_data:/app/data

volumes:
dockhand_data:Run as root user
SimplestRunning as root (0:0) bypasses all permission checks. This is the simplest solution but gives the container full root privileges:
docker run -d \
  --name dockhand \
  --restart unless-stopped \
  --user 0:0 \
  -p 3000:3000 \
  -v /var/run/docker.sock:/var/run/docker.sock \
  -v dockhand_data:/app/data \
  fnsys/dockhand:latest
Or using Docker Compose:
services:
  dockhand:
    image: fnsys/dockhand:latest
    container_name: dockhand
    restart: unless-stopped
    user: "0:0"
    ports:
      - "3000:3000"
    volumes:
      - /var/run/docker.sock:/var/run/docker.sock
      - dockhand_data:/app/data

volumes:
dockhand_data:Running as root is convenient but less secure. Anyone with access to Dockhand can potentially access the Docker daemon with full privileges. Use Option 6 in production environments where security is a concern.
Run as custom user with PUID/PGID
RecommendedUse the PUID and PGID environment variables to run as a specific user. The entrypoint starts as root, fixes permissions, then drops to your user:
services:
  dockhand:
    image: fnsys/dockhand:latest
    container_name: dockhand
    restart: unless-stopped
    environment:
      - PUID=1000  # Your user ID (run: id -u)
      - PGID=1000  # Your group ID (run: id -g)
    group_add:
      - "999"  # Docker group GID for socket access
    ports:
      - "3000:3000"
    volumes:
      - /var/run/docker.sock:/var/run/docker.sock
      - dockhand_data:/app/data

volumes:
  dockhand_data:
Find your user/group IDs:
# Get your user and group IDs
id -u  # PUID (e.g., 1000)
id -g # PGID (e.g., 1000)The entrypoint starts as root, creates the user, fixes volume permissions with chown, then drops privileges. This means named volumes work correctly without manual permission setup.
Run with user: directive (advanced) Since 1.0.5
Alternatively, use Docker's user: directive to never run as root. This requires manual permission setup:
services:
  dockhand:
    image: fnsys/dockhand:latest
    container_name: dockhand
    restart: unless-stopped
    user: "1000:1000"
    group_add:
      - "999"  # Docker group GID for socket access
    ports:
      - "3000:3000"
    volumes:
      - /var/run/docker.sock:/var/run/docker.sock
      - ./data:/app/data  # Must use bind mount, not named volume

volumes:
  dockhand_data:
Important: Before starting the container, create the data directory with correct ownership:
# Create data directory owned by your user (1000:1000)
mkdir -p ./data
chown 1000:1000 ./data

# Start the container
docker compose up -d
Named volumes are created with root ownership. When using user: directive, use bind mounts instead and ensure the directory is writable by your user. Consider using PUID/PGID (Option 3) instead.
Change socket permissions on host
Not recommendedYou can make the Docker socket world-readable, but this exposes it to all users on the host:
# NOT RECOMMENDED - makes socket accessible to everyone
sudo chmod 666 /var/run/docker.sockThis change affects all processes on the host, not just Dockhand. Any user or container can now access Docker. The permission resets on Docker daemon restart.
Docker socket proxy
Most secureIf you want truly secure access, place a proxy between Dockhand and the actual Docker socket. This filters which API calls are allowed. A popular tool for this is tecnativa/docker-socket-proxy.
services:
  socket-proxy:
    image: tecnativa/docker-socket-proxy
    container_name: socket-proxy
    restart: unless-stopped
    environment:
      # Required for Dockhand core functionality
      - CONTAINERS=1
      - IMAGES=1
      - NETWORKS=1
      - VOLUMES=1
      - EVENTS=1
      - POST=1
      - DELETE=1
      # Required for dashboard host info and disk usage
      - INFO=1
      - SYSTEM=1
      # Required for vulnerability scanning
      - ALLOW_START=1
      - ALLOW_STOP=1
      - ALLOW_RESTARTS=1
      # Required to view container logs, AND for vulnerability scanning:
      # Dockhand reads the scanner container's output through the logs API
      - ALLOW_LOGS=1
      # Optional: enable for the container terminal, volume browsing,
      # and the in-container file browser (all use the Docker exec API)
      # - EXEC=1
      # Optional: enable if you use Backups behind the proxy (the backup
      # helper streams files via the archive API)
      # - ALLOW_ARCHIVE=1
    volumes:
      - /var/run/docker.sock:/var/run/docker.sock:ro
    networks:
      - socket-proxy

  dockhand:
    image: fnsys/dockhand:latest
    container_name: dockhand
    restart: unless-stopped
    depends_on:
      - socket-proxy
    ports:
      - "3000:3000"
    volumes:
      - dockhand_data:/app/data
    networks:
      - socket-proxy
      - default

networks:
  socket-proxy:
    internal: true

volumes:
dockhand_data:The container terminal, browsing a volume's contents, and the in-container file browser all run a command inside a container through the Docker exec API. With EXEC left disabled (as above), the proxy blocks those calls and Dockhand reports 403 Forbidden — Request forbidden by administrative rules. If you need any of these features, uncomment - EXEC=1 and restart the proxy. Everything else works without it.
The backup helper runs behind the same proxy and needs the archive API, which the defaults above do not allow: it streams stack files and metadata in and out of a throwaway container. With it disabled the helper is blocked and a backup fails. If you use Backups behind the proxy, uncomment - ALLOW_ARCHIVE=1 and restart the proxy. (ALLOW_LOGS=1 is already enabled above — the helper also reads its own logs to confirm the backup succeeded.)
See the full list of environment variables for additional options.
After starting the stack, configure Dockhand to use the proxy:
- Go to Settings > Environments
- Add a new environment or edit the default one
- Set connection type to Direct
- Set the host to
socket-proxy:2375 - Save the environment
The proxy acts as a firewall for the Docker API. It allows only necessary commands (list, start, stop containers) but can block dangerous ones (docker run --privileged, system commands). Dockhand connects to the proxy via a private Docker network, isolated from the raw socket.
The socket proxy container itself requires elevated privileges to access the Docker socket (typically --privileged or additional AppArmor/SELinux rules), which transfers some security risk to the proxy container.
More importantly: even with a socket proxy, anyone who gains access to Dockhand still has significant capabilities — starting/stopping containers, deleting volumes, pulling images, viewing logs, and more. The proxy limits the most dangerous operations but doesn't make Dockhand "safe to expose publicly".
Always restrict access to Dockhand itself at the network layer: a private network (LAN, VPN like Tailscale or WireGuard) or an external authenticating proxy that gates traffic before it reaches Dockhand (such as Authelia or oauth2-proxy). Dockhand's own login is not designed to be the last line of defence against the public internet. Treat it as an admin interface that should never be directly exposed.
Recommendations by environment
Home lab or private server behind a VPN (Tailscale/WireGuard):
Option 1 (GID matching) or Option 2 (root) is acceptable. The risk is manageable assuming your network is secure and you trust the Dockhand application code.
Public-facing server or production environment:
Consider using a Socket Proxy (Option 4) or restricting access via a VPN.
Security summary
| Method | Container User | Socket Access | Security Level | Risk |
|---|---|---|---|---|
| Option 1 (GID) | Non-root | Direct | Low/Medium | Root-equivalent if app is exploited |
| Option 2 (Root) | Root | Direct | None | Immediate root if app is exploited |
| Option 3 (chmod) | Any | Direct | None | All host users can access Docker |
| Option 4 (Proxy) | Non-root | Filtered | Higher* | Blocks dangerous API calls, but depends on enabled endpoints |
* Higher than direct socket access, but actual security depends on proxy configuration (which API endpoints are enabled) and container hardening.
Platform notes
Docker on Windows uses a named pipe instead of a Unix socket. In your volume mount, replace the socket path with:
-v //./pipe/docker_engine://./pipe/docker_engine
The permission options above (GID matching, chmod) do not apply to Windows.
Dockhand works with Podman. Map the Podman socket to the Docker socket path inside the container:
-v /run/podman/podman.sock:/var/run/docker.sock:Z
The :Z suffix enables SELinux relabeling (required on RHEL, Fedora, CentOS). For rootless Podman, the socket is typically at /run/user/$UID/podman/podman.sock.
If using Hawser for remote environments, apply the same socket mapping to the Hawser service.
Deployment examples
When you publish a port with Docker (e.g. -p 5432:5432), Docker manipulates iptables rules directly, bypassing UFW and firewalld. This means services you think are firewall-protected may actually be exposed on your public IP.
Always bind published ports to localhost if they should not be publicly accessible:
ports:
  - "127.0.0.1:5432:5432"  # Only accessible from the host
  # NOT "5432:5432"         # Exposed on ALL interfaces
This applies to any service running alongside Dockhand (databases, caches, admin panels), not just Dockhand itself. When using a reverse proxy (Traefik, Nginx), Dockhand does not need published ports at all — see the examples below.
Behind a reverse proxy (Traefik)
When running behind Traefik or another reverse proxy, you don't need to expose ports directly:
services:
  dockhand:
    image: fnsys/dockhand:latest
    container_name: dockhand
    restart: unless-stopped
    user: "0:0"
    volumes:
      - /var/run/docker.sock:/var/run/docker.sock
      - dockhand_data:/app/data
    networks:
      - proxy  # Must match your Traefik network
    labels:
      - "traefik.enable=true"
      - "traefik.http.routers.dockhand.rule=Host(`dockhand.example.com`)"
      - "traefik.http.routers.dockhand.entrypoints=websecure"
      - "traefik.http.routers.dockhand.tls=true"
      - "traefik.http.routers.dockhand.tls.certresolver=letsencrypt"
      - "traefik.http.services.dockhand.loadbalancer.server.port=3000"
      - "traefik.docker.network=proxy"  # Required if container has multiple networks

networks:
  proxy:
    external: true  # Assumes Traefik network already exists

volumes:
  dockhand_data:
With Nginx reverse proxy
Example Nginx configuration for proxying to Dockhand:
server {
    listen 443 ssl http2;
    server_name dockhand.example.com;

    ssl_certificate /etc/ssl/certs/dockhand.crt;
    ssl_certificate_key /etc/ssl/private/dockhand.key;

    location / {
        proxy_pass http://localhost:3000;
        proxy_http_version 1.1;
        proxy_set_header Upgrade $http_upgrade;
        proxy_set_header Connection "upgrade";
        proxy_set_header Host $host;
        proxy_set_header X-Real-IP $remote_addr;
        proxy_set_header X-Forwarded-For $proxy_add_x_forwarded_for;
        proxy_set_header X-Forwarded-Proto $scheme;
    }
}Dockhand uses WebSockets for the terminal and real-time updates. Make sure your reverse proxy is configured to handle WebSocket connections (the Upgrade and Connection headers).
With Tailscale (VPN-only access)
The simplest and usually most secure approach: Traefik listens on 80/443, but ports are only accessible within your Tailnet (no public port exposure on the host).
services:
  tailscale:
    image: tailscale/tailscale:latest
    hostname: homelab-gw
    environment:
      - TS_AUTHKEY=${TS_AUTHKEY}
      - TS_STATE_DIR=/var/lib/tailscale
    volumes:
      - tailscale_state:/var/lib/tailscale
      - /dev/net/tun:/dev/net/tun
    cap_add:
      - net_admin
      - sys_module
    restart: unless-stopped

  socket-proxy:
    image: tecnativa/docker-socket-proxy
    environment:
      - CONTAINERS=1
      - SERVICES=1
      - NETWORKS=1
      - EVENTS=1
    volumes:
      - /var/run/docker.sock:/var/run/docker.sock:ro
    networks: [socket_proxy]
    restart: unless-stopped
    security_opt:
      - no-new-privileges:true

  traefik:
    image: traefik:v3
    network_mode: service:tailscale
    depends_on: [socket-proxy]
    command:
      - --api.dashboard=true
      - --providers.docker=true
      - --providers.docker.endpoint=tcp://socket-proxy:2375
      - --providers.docker.exposedbydefault=false
      - --entrypoints.web.address=:80
      - --entrypoints.websecure.address=:443
    volumes:
      - traefik_data:/data
    restart: unless-stopped

  dockhand:
    image: fnsys/dockhand:latest
    labels:
      - traefik.enable=true
      - traefik.http.routers.dockhand.rule=Host(`dockhand.homelab-gw.ts.net`)
      - traefik.http.routers.dockhand.entrypoints=websecure
      - traefik.http.routers.dockhand.tls=true
      - traefik.http.services.dockhand.loadbalancer.server.port=3000
    networks: [default]
    restart: unless-stopped
    volumes:
      - dockhand_data:/app/data

networks:
  socket_proxy:
    internal: true

volumes:
  tailscale_state:
  traefik_data:
  dockhand_data:
This works because Traefik "inherits" the Tailscale network via network_mode: service:tailscale, so ports 80/443 are reachable at the Tailscale address (MagicDNS) but not exposed publicly.
Using PostgreSQL database
Dockhand can also use PostgreSQL instead of the default SQLite:
docker run -d \
  --name dockhand \
  --restart unless-stopped \
  --user 0:0 \
  -p 3000:3000 \
  -e DATABASE_URL=postgres://user:password@postgres-host:5432/dockhand \
  -v /var/run/docker.sock:/var/run/docker.sock \
  -v dockhand_data:/app/data \
  fnsys/dockhand:latest
The database schema is created automatically on first run. Just ensure the database exists and the user has sufficient privileges.
Switching from SQLite (default) to PostgreSQL does not migrate existing data. You will start with a fresh database.
Managing remote Docker hosts
Dockhand can manage Docker hosts beyond your local machine. There are several ways to connect to remote environments. Configure connections in Settings → Environments.
| Connection Type | Use Case | Requirements |
|---|---|---|
| Local socket | Same machine as Dockhand | Docker socket mounted |
| Direct TCP | Remote Docker with exposed API | Docker API on port 2375/2376 |
| Hawser Standard | LAN/homelab with static IPs | Hawser agent on remote host |
| Hawser Edge | VPS, NAT, dynamic IP, firewalled hosts | Hawser agent (outbound only) |
Hawser is a lightweight agent that enables secure remote Docker management without exposing the Docker API directly. It's especially useful for:
- Hosts behind NAT or firewalls (Edge mode - no inbound ports required)
- VPS or cloud instances with dynamic IPs
- Secure access without exposing Docker TCP port
- Homelab environments across different networks
See the Hawser section for detailed setup instructions.
System requirements
| Component | Requirement |
|---|---|
| Docker Engine | 20.10 or later |
| Docker API | 1.41 or later |
| Memory | 512 MB minimum, 1 GB recommended |
| Browser | Chrome, Firefox, Safari, Edge (latest versions) |
| Database | SQLite (default) or PostgreSQL 14+ |
Environment variables
Dockhand can be configured using the following environment variables. All are optional.
| Variable | Default | Description |
|---|---|---|
DATA_DIR |
/app/data |
Directory for persistent data (database, stacks, git repos). See Data storage |
STACKS_DIR |
unset | Store local (socket / direct) stack files in a flat STACKS_DIR/{stack}/ layout instead of DATA_DIR/stacks/{env}/{stack}/. Optional. See Custom stacks directory |
DATABASE_URL |
unset (SQLite) | PostgreSQL connection URL. When unset, SQLite is used. Format: postgres://user:password@host:5432/dbname |
ENCRYPTION_KEY |
auto-generated | Base64-encoded AES-256 key for credential encryption. See Encryption |
PUID |
1000 |
User ID to run as (entrypoint fixes permissions then drops to this UID) |
PGID |
1000 |
Group ID to run as |
SKIP_DF_COLLECTION |
false |
Disable disk usage collection. Useful for NAS devices where Docker's /system/df is slow. See Troubleshooting |
DOCKER_API_VERSION |
auto | Override Docker API version for CLI commands. Required for older Docker daemons (e.g. Docker 24.x with API 1.43). See Troubleshooting |
DISABLE_LOCAL_LOGIN |
false |
Hide local username/password login form. Only SSO/OIDC and LDAP providers remain visible. See Disabling local login |
DISABLE_WHATS_NEW |
false |
Set to true to suppress the "What's New" popup shown after an upgrade. Can also be toggled per-instance in Settings → General Since 1.0.37 |
HOST_DATA_DIR |
auto-detected | Host filesystem path to Dockhand's data directory. Used for translating relative volume paths in compose stacks. Only needed if auto-detection fails and you can't use matching paths. See HOST_DATA_DIR |
HOST_DOCKER_SOCKET |
auto-detected | Host-side path to the Docker socket. Used when spawning scanner containers that need the socket bind-mounted. Only needed if auto-detection fails (e.g., rootless Docker where the container mount path differs from the host path) |
COMPOSE_TIMEOUT |
900 |
Timeout in seconds for Docker Compose operations (up, down, pull, etc.). Default is 900 seconds (15 minutes). Increase for slow networks, large stacks, or when a service has a long stop_grace_period - a recreate stops the old container first and must be allowed to exceed that grace period, so set this above it Since 1.0.19 |
DNS_RESULT_ORDER |
ipv4first |
DNS address family preference for Dockhand's own outbound requests (OIDC discovery, registry checks, webhooks). Defaults to IPv4-first, which avoids IPv6 connection hangs on Docker networks without IPv6 routing. Set to verbatim (or ipv6first) on hosts where the container's IPv4 egress is broken but IPv6 works, to allow IPv6 fallback. See Troubleshooting Since 1.0.38 |
HTTPS_MODE |
off |
Set to on to enable the native HTTPS listener. See Native HTTPS Since 1.0.33 |
HTTPS_CERT_PATH |
unset | Path inside the container to the PEM-encoded server certificate. Required when HTTPS_MODE=on Since 1.0.33 |
HTTPS_KEY_PATH |
unset | Path inside the container to the PEM-encoded private key. Required when HTTPS_MODE=on Since 1.0.33 |
HTTPS_CA_PATH |
unset | Optional path to a PEM-encoded CA chain to present alongside the server certificate Since 1.0.33 |
HSTS_MAX_AGE |
31536000 |
Strict-Transport-Security max-age in seconds, applied only when HTTPS_MODE=on. Default is 1 year. Set to 0 to disable the header Since 1.0.33 |
EXPORT_METRICS |
false |
Set to true to expose Prometheus metrics at /metrics. See Prometheus metrics Since 1.0.37 |
PORT |
3000 |
The port Dockhand's HTTP (or HTTPS) server listens on inside the container. |
COOKIE_SECURE |
auto | Forces the Secure flag on the session cookie (true/false). When unset it is auto-detected from X-Forwarded-Proto. Set true when terminating TLS at a proxy that does not forward that header, or login can fail over HTTPS. |
TRUST_FORWARDED_HEADERS |
false |
Trust X-Forwarded-For / X-Real-IP for the client IP. Enable only behind a trusted reverse proxy - needed for correct client IPs in the activity log and for API-token rate limiting. |
DISABLE_METRICS |
false |
Set to true to skip CPU/memory metrics collection entirely (with DISABLE_EVENTS also set, the background collector is not started). |
DISABLE_EVENTS |
false |
Set to true to skip container-event collection (start/stop/health/OOM). Disables event-driven notifications. |
GIT_REPOS_DIR |
$DATA_DIR/git-repos |
Where git-stack repositories are cloned. Override to place clones on a different volume. |
DOCKHAND_HOSTNAME |
container hostname | Overrides the hostname Dockhand reports. An Enterprise license is validated against the host it was issued for, so set this when the container's hostname does not match the licensed host. |
RESTIC_TIMEOUT |
0 (no timeout) |
Wall-clock cap in milliseconds for a single restic operation (backup, restore, list, prune). 0 means no cap - a large backup can run as long as it needs, and is stopped only by cancelling it. Set a positive value to force-stop an operation that runs longer than that. |
Prometheus metrics Since 1.0.37
Dockhand can export a detailed set of Prometheus metrics covering the state of every connected environment and Dockhand's own internals. Point Prometheus at it and build dashboards or alerts in Grafana.
Metrics collection is disabled unless EXPORT_METRICS=true is set. When disabled, /metrics returns 404.
Enabling
services:
  dockhand:
    image: ghcr.io/finsys/dockhand:latest
    environment:
      - EXPORT_METRICS=true
    # ...
Metrics are then served at http://<dockhand>/metrics in the standard Prometheus text exposition format.
Access control
The endpoint follows Dockhand's own authentication state:
- Auth disabled —
/metricsis public (like the health endpoint), so a scrape on a trusted network works out of the box. - Auth enabled — a valid session or an API token is required. Create an API token in Settings and have Prometheus send it as a bearer credential.
The metrics expose environment names, host names, the database engine/version and CVE counts. When Dockhand auth is disabled, /metrics is unauthenticated — keep it on a private network (LAN/VPN) or behind an authenticating proxy so only your Prometheus can reach it.
Prometheus scrape config
scrape_configs:
  - job_name: dockhand
    metrics_path: /metrics
    static_configs:
      - targets: ['dockhand:3000']
    # Only when Dockhand auth is enabled:
    authorization:
      type: Bearer
      credentials: <your-api-token>
What's exported
All series are prefixed dockhand_. Per-environment series carry env and env_id labels. Collection is cached for ~15 seconds so a tight scrape interval never hammers your Docker hosts, an unreachable environment is skipped rather than failing the scrape, and CPU/memory are reused from the collector (no extra load).
- Environment state —
dockhand_env_up(1/0, ideal for alerting), containers bystateandhealth,containers_count,container_restarts_total,updates_available. - Images & storage —
images_count,images_dangling,image_bytes,volumes_count,networks_count,stacks_count. - Resources —
env_cpu_percent,env_memory_used_bytes,env_memory_total_bytes(from the metrics collector). - Vulnerabilities —
dockhand_vulnerabilities{severity},vulnerabilities_count,images_scanned, plus scan freshness (scan_oldest_age_seconds,scan_avg_duration_seconds) to spot stale or slow scans. - Activity —
container_events_total,container_events_today, andcontainer_events_by_action{action}(start, die, oom, health-change, …). - Scheduled tasks —
schedule_executions{type,status}, plusschedule_last_run_seconds{type}andschedule_last_success_seconds{type}to catch a scheduler that stopped firing or keeps failing. - Inventory —
environments,users,registries,git_repositories,config_sets. - Internals —
build_info,uptime_seconds,hawser_agents_connected+hawser_agent_info+hawser_pending_requests,jobs{status},scan_queue,vuln_cache_entries,scheduler_running+scheduler_active_jobs,api_tokens{state}(total / expired / never-used), plus the standard Node.js process metrics (heap, event-loop lag, GC, file descriptors). - Database —
database_info{type,version}(engine + version),database_size_bytes,database_rows{table}for high-churn tables, anddatabase_stat{stat}(Postgres: connections / max_connections; SQLite: freelist bytes) for tuning.
Fire when any environment goes offline: dockhand_env_up == 0. Or on critical CVEs: dockhand_vulnerabilities{severity="critical"} > 0.
Native HTTPS Since 1.0.33
For deployments where a reverse proxy in front of Dockhand isn't viable — bare appliances, hosts with restricted resources, or organizations whose compliance posture requires end-to-end TLS — Dockhand can terminate TLS itself.
The native HTTPS listener is disabled by default. Existing deployments behind Traefik, nginx, Caddy, or any other reverse proxy are unaffected.
When enabled, Dockhand reads your PEM-encoded certificate and key at startup and uses them for all inbound traffic: the UI, the REST API, server-sent event streams (dashboard, container logs), and WebSockets (container terminal, Hawser Edge agents). Bring your own certificate; Dockhand does not generate self-signed certificates and does not run HTTP and HTTPS in parallel.
Docker run
docker run -d \
  -v /host/certs:/etc/dockhand/certs:ro \
  -e HTTPS_MODE=on \
  -e HTTPS_CERT_PATH=/etc/dockhand/certs/cert.pem \
  -e HTTPS_KEY_PATH=/etc/dockhand/certs/key.pem \
  -p 443:3000 \
  fnsys/dockhand:latest
Docker Compose
services:
  dockhand:
    image: fnsys/dockhand:latest
    volumes:
      - /host/certs:/etc/dockhand/certs:ro
    environment:
      - HTTPS_MODE=on
      - HTTPS_CERT_PATH=/etc/dockhand/certs/cert.pem
      - HTTPS_KEY_PATH=/etc/dockhand/certs/key.pem
    ports:
      - "443:3000"
Startup logging
On startup Dockhand logs the certificate's subject, issuer, Subject Alternative Names, and validity window so you can confirm the right file was mounted. A warning is printed if the certificate is within 30 days of expiry, and an error is logged (and the process exits) if the file is unreadable or not a valid PEM:
[HTTPS] mode=on
[HTTPS] cert=/etc/dockhand/certs/cert.pem
[HTTPS] key=/etc/dockhand/certs/key.pem
[HTTPS] ca=(none)
[HTTPS] cert subject: CN=dockhand.example.com
[HTTPS] cert issuer:  CN=Let's Encrypt R3
[HTTPS] cert SAN:     DNS:dockhand.example.com
[HTTPS] cert valid:   Apr 10 00:00:00 2026 GMT → Jul  9 23:59:59 2026 GMT
[HTTPS] cert expires in 64 day(s)
[HTTPS] HSTS enabled: max-age=31536000
Listening on https://0.0.0.0:3000/ with WebSocket
Hawser Edge agents
If you enable HTTPS with a self-signed or internal CA-issued certificate, Hawser Edge agents connecting in to Dockhand need to trust that certificate. Set CA_CERT on the agent to the path of a PEM file containing your CA (mount it into the agent's container), or skip verification with TLS_SKIP_VERIFY=true (insecure, testing only). Agents must also use a wss:// URL in DOCKHAND_SERVER_URL. See Hawser TLS configuration.
Dockhand runs as a non-root user inside the container, so it cannot bind directly to ports below 1024. Keep the internal port at the default (3000) and use Docker's port mapping (-p 443:3000) to expose it on the standard HTTPS port.
Custom CA certificates
If your OIDC provider, Docker registry, or other service uses a self-signed or internal CA certificate, mount the certificate file and set NODE_EXTRA_CA_CERTS:
Adding a custom CA certificate
Docker Compose:
services:
  dockhand:
    image: fnsys/dockhand:latest
    volumes:
      - ./my_ca.crt:/app/certs/my_ca.crt:ro
    environment:
      - NODE_EXTRA_CA_CERTS=/app/certs/my_ca.crt
Docker run:
docker run -d \
  -v ./my_ca.crt:/app/certs/my_ca.crt:ro \
  -e NODE_EXTRA_CA_CERTS=/app/certs/my_ca.crt \
  fnsys/dockhand:latest
This appends the custom CA to Node.js built-in trusted certificates. All existing public CAs (Let's Encrypt, etc.) remain trusted.
Multiple custom CAs
To trust multiple CAs, concatenate them into a single PEM bundle:
cat ca1.crt ca2.crt > custom-cas.crtThen mount and reference the bundle:
volumes:
  - ./custom-cas.crt:/app/certs/custom-cas.crt:ro
environment:
  - NODE_EXTRA_CA_CERTS=/app/certs/custom-cas.crt
Enterprise / corporate environments
If your organization manages CA certificates at the OS level (custom base image with certs baked into the system store), you can tell Node.js to use the system OpenSSL CA store instead of its built-in one:
environment:
- NODE_OPTIONS=--use-openssl-caWhen using --use-openssl-ca, NODE_EXTRA_CA_CERTS is ignored. You must manage CAs via the system bundle (e.g. update-ca-certificates in a custom image).
Git operations Since 1.0.27
When NODE_EXTRA_CA_CERTS is set, Dockhand automatically creates a merged CA bundle that combines your custom certificate(s) with the system CA store. This merged bundle is passed to Git via GIT_SSL_CAINFO, so Git stack operations work with both self-signed repositories (e.g. Gitea, Forgejo, GitLab CE on your LAN) and public repositories (GitHub, GitLab.com, Codeberg.org) at the same time.
No additional configuration is needed — just set NODE_EXTRA_CA_CERTS and both HTTPS Git clones and Node.js requests will trust your custom CA alongside all public CAs.
On the first Git operation, Dockhand reads the system CA bundle (e.g. /etc/ssl/certs/ca-certificates.crt), appends your custom certificate(s), and writes a merged bundle to /tmp/dockhand-merged-ca-bundle.crt. This file is cached for the lifetime of the process. Check the container logs for [Git] entries to see which CA sources were merged and how many certificates are included.
Data storage & volume paths
Dockhand stores all persistent data (database, stack files, git repositories) in its data directory. By default this is /app/data inside the container, but can be configured with the DATA_DIR environment variable.
What's in DATA_DIR
Everything Dockhand persists lives under this one directory:
$DATA_DIR/
├── db/
│   └── dockhand.db        # SQLite database (only when not using PostgreSQL)
├── .encryption_key        # key that decrypts stored secrets (tokens, registry creds)
├── stacks/
│   └── {environment}/{stack}/   # compose + .env for internal & git stacks
├── git-repos/             # cloned git repositories
├── scanner-cache/         # grype / trivy vulnerability DB cache
└── tmp/                   # transient files (e.g. TLS certs during compose ops)
Custom stacks directory Since 1.0.46
STACKS_DIR changes where Dockhand keeps stack files on its own filesystem for local environments (Docker socket or direct connection). By default those files live under DATA_DIR/stacks/{environment}/{stack}/, grouped by environment. Set STACKS_DIR to keep them in a single flat directory of your choosing instead:
docker run -d \
  --name dockhand \
  -p 3000:3000 \
  -v /var/run/docker.sock:/var/run/docker.sock \
  -v /opt/stacks:/opt/stacks \
  -e STACKS_DIR=/opt/stacks \
  fnsys/dockhand:latest
With STACKS_DIR set, a stack named web is stored at /opt/stacks/web/ instead of DATA_DIR/stacks/{environment}/web/. Because the layout is flat (no per-environment folder), local stack names must be unique across your local environments - creating a second web is rejected with a clear error.
- It only changes Dockhand's own local storage layout. Hawser stacks are stored on the agent host, not in this directory, so their paths and deployments are the same with or without
STACKS_DIR- the setting simply has nothing to change for them. - Only affects new and redeployed stacks. Existing stacks are not moved - Dockhand does not migrate files on startup. Stacks you created before setting
STACKS_DIRkeep working from their old location. - The directory must already exist and be writable. If it is missing or not writable, Dockhand logs a warning and falls back to
DATA_DIR/stacks. - Pairs well with matching paths: mount
STACKS_DIRat the same path on the host and inside the container so relative volume paths resolve without translation.
Because the SQLite database and .encryption_key live under DATA_DIR, repointing it to a new location gives Dockhand an empty database — and any stored secrets (Hawser tokens, registry credentials) become unreadable, because the key that decrypts them is at the old path. If you move DATA_DIR by hand, copy db/ and the hidden .encryption_key file across first. The Moving Dockhand's data recipe below copies everything for you.
Recommended setup: matching paths
When deploying compose stacks with relative volume paths (like ./config.toml:/config.toml), the Docker daemon on the host needs to find these files. The simplest and most reliable approach is to use matching paths inside and outside the container:
# Create the directory on the host
mkdir -p /opt/dockhand

# Use matching paths with DATA_DIR
docker run -d \
  --name dockhand \
  -p 3000:3000 \
  -v /var/run/docker.sock:/var/run/docker.sock \
  -v /opt/dockhand:/opt/dockhand \
  -e DATA_DIR=/opt/dockhand \
  fnsys/dockhand:latest
With this setup, paths like /opt/dockhand/stacks/mystack/config.toml exist at the same location on both the host and inside the container - no translation needed.
When docker-compose runs inside Dockhand, it resolves ./config.toml to an absolute path. The Docker daemon on the host receives this path and looks for it on the host filesystem. With matching paths, the file exists exactly where Docker expects it.
Example with mismatched paths:
- Dockhand started with
-v /opt/dockhand:/app/data - Compose file has
./ca.pem:/ca.pem - Dockhand resolves this to
/app/data/stacks/mystack/ca.pem - Docker daemon looks for
/app/data/stacks/mystack/ca.pemon host → not found!
Example with matching paths:
- Dockhand started with
-v /opt/dockhand:/opt/dockhand -e DATA_DIR=/opt/dockhand - Compose file has
./ca.pem:/ca.pem - Dockhand resolves this to
/opt/dockhand/stacks/mystack/ca.pem - Docker daemon looks for
/opt/dockhand/stacks/mystack/ca.pemon host → found!
If you already have Dockhand running with a named volume (e.g., started with -v dockhand_data:/app/data), see Moving Dockhand's data to another directory for migration instructions.
Automatic path translation (local only)
When Dockhand runs on the same host where you deploy stacks, it can automatically detect and translate paths by querying the Docker API. So if you use different paths (e.g., -v /opt/dockhand:/app/data), Dockhand will attempt to rewrite relative volume paths at deployment time. This works in most cases, but matching paths is more reliable.
Neither matching paths nor automatic path translation work for remote direct (TCP/HTTPS) connections, because the stack files only exist on the Dockhand host — not on the remote Docker host. For remote environments with relative volume mounts, use Hawser agent, which transfers the files to the remote host before deploying.
HOST_DATA_DIR fallback
Automatic path detection can fail in certain environments:
- cgroups v2 - Modern Linux distributions (Ubuntu 22.04+, Fedora 31+) use cgroups v2 where container ID detection may not work
- Custom hostname - If you set
--hostnameon the Dockhand container, the fallback detection method won't work - Rootless Docker - Container introspection may behave differently
- Podman or other runtimes - Detection is designed for Docker and may not work with alternatives
If you see [Startup] Could not detect host data path in the logs and can't use matching paths, you can manually specify the host path with the HOST_DATA_DIR environment variable:
# Find where Docker stores your named volume
docker volume inspect dockhand_data --format '{{.Mountpoint}}'
# Output: /var/lib/docker/volumes/dockhand_data/_data

# Start Dockhand with HOST_DATA_DIR
docker run -d \
  --name dockhand \
  -p 3000:3000 \
  -v /var/run/docker.sock:/var/run/docker.sock \
  -v dockhand_data:/app/data \
  -e HOST_DATA_DIR=/var/lib/docker/volumes/dockhand_data/_data \
  fnsys/dockhand:latest
This tells Dockhand where the data volume is located on the host filesystem, enabling it to translate relative volume paths in compose stacks correctly.
Remote deployments
For remote Docker environments, relative volume paths need the files present on the remote host. Hawser environments handle this automatically (the agent writes the files). Direct TCP environments can too - set a Remote stacks directory on the environment and Dockhand stages the files onto the remote host before deploying; without it, the files must already exist there (matching paths). Automatic in-place path translation only applies to local socket deployments.
Options for remote deployments with relative paths:
- Use absolute paths that exist on the remote host
- Pre-create files on the remote host before deployment
- Use Git stacks where the repository is cloned directly on the remote host (via Hawser agent)
Credential encryption
Dockhand encrypts sensitive credentials at rest using AES-256-GCM authenticated encryption. This protects registry passwords, Git credentials, SSH keys, OIDC client secrets, LDAP passwords, and other sensitive data stored in the database.
Automatic encryption
Encryption is automatic and transparent - no configuration required for basic usage:
- A random 256-bit encryption key is generated on first startup
- The key is stored in
$DATA_DIR/.encryption_keywith permissions0600(readable only by the owner) - All sensitive fields are encrypted before being written to the database
If you lose the .encryption_key file and haven't set ENCRYPTION_KEY environment variable, your encrypted credentials cannot be recovered. Always include the key file in your backups, or use the environment variable approach described below.
Using ENCRYPTION_KEY environment variable
You can provide your own encryption key via the ENCRYPTION_KEY environment variable. This approach offers several advantages:
- Key is stored in your secrets manager (Vault, Docker secrets, etc.) instead of on disk
- Key file is automatically deleted when env var is provided - key never touches disk
- Easier to manage in containerized environments
Migration workflow
If you have an existing Dockhand installation with an auto-generated key file and want to switch to using ENCRYPTION_KEY:
- Copy your existing key from the key file:
Bash
# Read the existing key and encode as base64 cat /opt/dockhand/.encryption_key | base64 - Store the key in your secrets manager or Docker secrets
- Set the environment variable and restart Dockhand
- On startup, Dockhand detects the matching key and deletes the key file
- From now on, the key only exists in memory - never on disk
Migration from an auto-generated key file to ENCRYPTION_KEY is a one-time operation. Once the key file is deleted, Dockhand relies entirely on the environment variable. You must keep your key stored securely (e.g. in a secrets manager or Docker secrets) — if you lose it, encrypted credentials cannot be recovered.
Generating a key
Generate a 32-byte (256-bit) random key encoded as base64:
openssl rand -base64 32Then provide it when starting Dockhand:
docker run -d \
  --name dockhand \
  -e ENCRYPTION_KEY="your-base64-encoded-key-here" \
  -v /var/run/docker.sock:/var/run/docker.sock \
  -v /opt/dockhand:/opt/dockhand \
  -e DATA_DIR=/opt/dockhand \
  fnsys/dockhand:latest
Encrypted fields
The following sensitive data is encrypted at rest:
- Registry credentials - passwords for Docker registries
- Git credentials - passwords, SSH private keys, SSH passphrases
- Environment settings - Hawser tokens, TLS private keys
- OIDC configuration - client secrets
- LDAP configuration - bind passwords
- Notification settings - SMTP passwords
- Stack secrets - environment variables marked as secrets
Sidebar
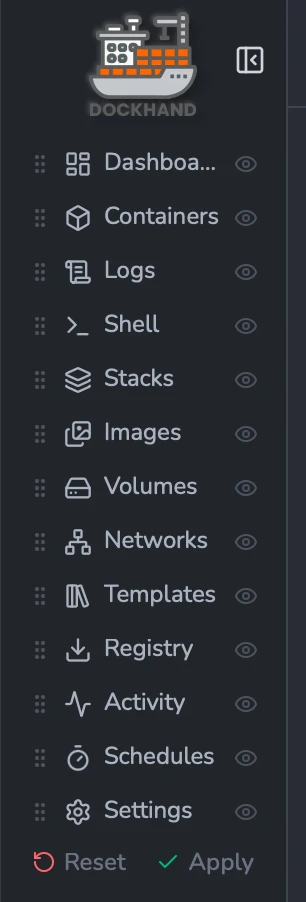
The sidebar is Dockhand's main navigation menu — your entry point to the Dashboard, Containers, Logs, Shell, Stacks, Images, Volumes, Networks, Templates, Registry, Activity, Schedules, and Settings. Use the button at the top of the sidebar to collapse it and reclaim screen space.
Customizing the menu
The menu is customizable. Hover over the version number at the bottom of the sidebar and click the pencil (Edit) icon to enter customize mode.
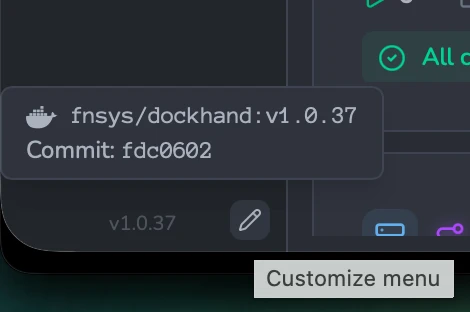
In customize mode you can:
- Reorder items - drag the handle on the left of any item to move it up or down.
- Hide or unhide items - toggle the eye icon on the right of an item.
- Apply - save your changes, or Reset to restore the default menu.
Dashboard
The dashboard provides a real-time overview of all your Docker environments. Each environment is displayed as a tile that can be resized and repositioned to suit your workflow.
Environment tiles
Each environment tile displays key information at a glance:
- Header - Environment name, icon, and connection status
- Container counts - Running, stopped, and total containers
- Resource metrics - CPU and memory usage with progress bars
- Health status - Warning banner for unhealthy or restarting containers
- Activity summary - Today's events and recent activity
- Top containers - Containers sorted by CPU usage (larger tiles)
Status indicators
Tiles display status icons in the header:
| Icon | Status | Description |
|---|---|---|
Shield (green glow) |
Scanner enabled | Vulnerability scanning is active for this environment |
Activity (amber glow) |
Activity collection | Container events are being tracked |
WifiOff (red) |
Offline | Environment is unreachable |
Tile sizing
Tiles can be resized to show more or less information. Drag the corner of any tile to resize it.
| Size | Content |
|---|---|
| 1x1 (Compact) | Header, container counts, CPU/Memory bars |
| 2x1 (Wide compact) | Same as 1x1 with more horizontal space |
| 1x2 (Standard) | Container stats, health banner, resource metrics, resources summary |
| 1x3 (Detailed) | All 1x2 content + recent events list (8 items) |
| 1x4+ (Extra tall) | All 1x3 content + top containers by CPU |
| 2x2 (Square) | Two columns: stats on left, top containers on right |
| 2x3 (Wide tall) | Two columns: stats + events, containers + charts |
| 2x4+ (Full) | Two columns with CPU/Memory charts and disk usage breakdown |
Layout management
The dashboard provides several ways to organize your tiles:
Auto-layout presets
Use the dropdown in the header to quickly apply preset layouts:
- Compact - All tiles at 1x1 size
- Standard - All tiles at 1x2 size
- Detailed - All tiles at 1x3 size
- Full - All tiles at 2x3 size
Drag and drop
Drag tiles by their header to reposition them. The layout is automatically saved to your browser's local storage.
Label filtering
If you've assigned labels to environments, you can filter the dashboard to show only environments with specific labels. Click the label pills at the top of the dashboard to toggle filtering.
Dashboard data is streamed in real-time using Server-Sent Events (SSE). CPU and memory metrics are collected every 30 seconds by default; container events appear instantly in stream mode (or on the poll interval in poll mode).
Containers
The Containers page provides comprehensive management of all Docker containers across your environments.
List view
The container list displays all containers with sortable columns:
| Column | Description |
|---|---|
| Name | Container name (click to inspect) |
| Image | Image tag used by the container. When an update is available, an arrow icon appears in front of the image name; a release-notes icon (Since 1.0.34) also appears when Dockhand can infer a changelog URL — see Changelog links below |
| State | Running, Stopped, Paused, Restarting, Created |
| Health | Health check status (if configured) |
| Uptime | Time since container started/stopped |
| CPU % | Real-time CPU usage percentage |
| Memory | Current memory usage |
| Network I/O | Received / Sent bytes |
| Disk I/O | Read / Write bytes |
| IP Address | Container's IP address |
| Ports | Published port mappings (host:container) |
| Stack | Compose project name (if part of a stack) |
Search and sort
Use the search box to filter containers by name, image, or stack. Click column headers to sort. Press Esc to clear the search.
Bulk operations
Select multiple containers using the checkboxes, then use the bulk action buttons:
- Start - Start all selected stopped containers
- Stop - Stop all selected running containers
- Restart - Restart all selected containers
- Remove - Delete all selected containers
Changelog links Since 1.0.34
When a container has an update available, Dockhand surfaces a release-notes icon next to the image name that links to the project's changelog. See Settings → General → Show changelog links for how the URL is resolved, how to override it with a dockhand.changelog.url label, and how to turn the feature off.
Reverse-proxy URL surfacing Since 1.0.34
If you run Traefik, Pangolin, or caddy-docker-proxy as your reverse proxy, Dockhand reads their labels and surfaces the resulting public URL as a clickable pill next to a container's ports — no dockhand.url label needed. See Settings → General → Honor reverse-proxy labels for the full label vocabulary, the precedence rules, and how to turn it off.
Icons Since 1.0.44
Dockhand can show an app logo next to each container instead of a generic box. When the global setting is on, it matches a logo automatically from the container's image name (for example lscr.io/linuxserver/freshrss resolves to the FreshRSS logo). Matching is deliberately conservative: if it isn't confident, it leaves the generic icon rather than guessing wrong.
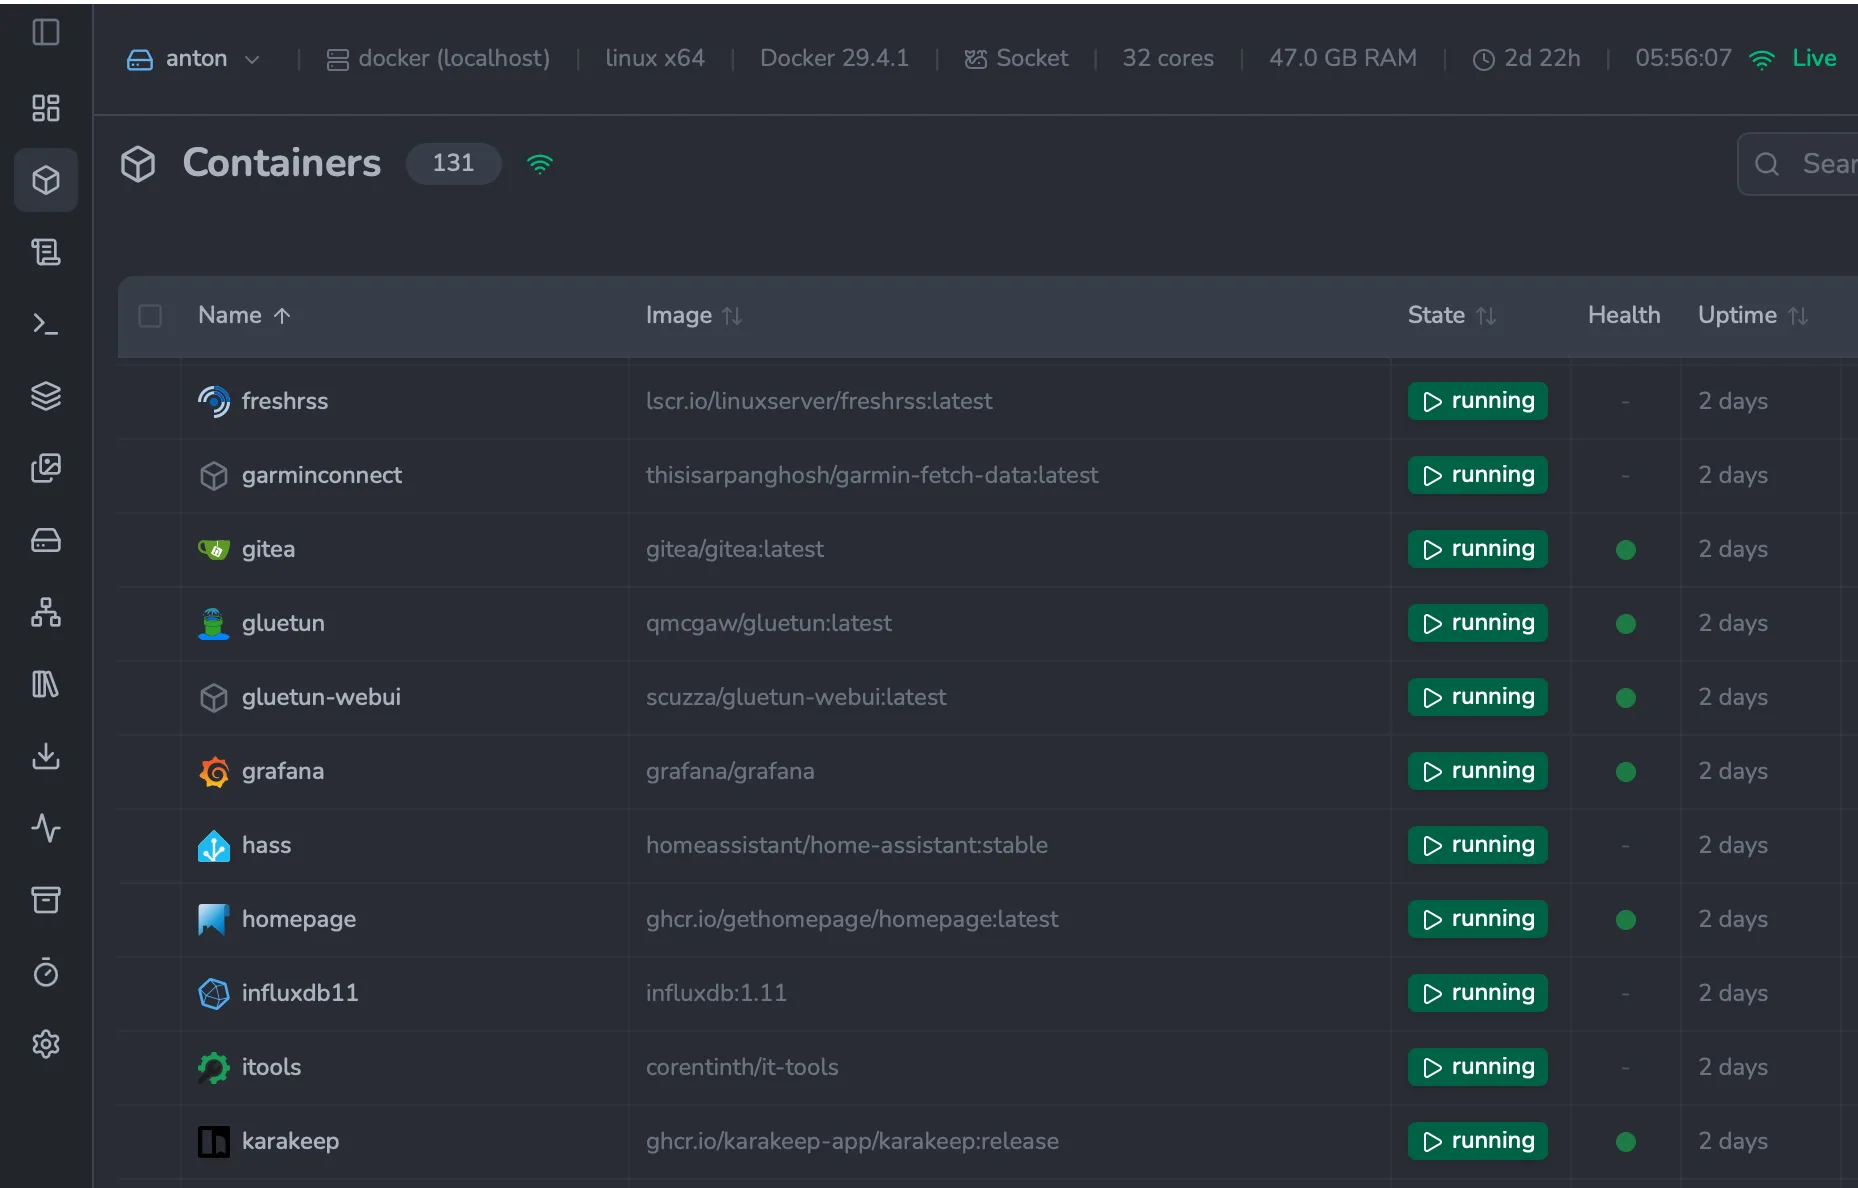
Turn it on. App logos are off by default. Enable Settings → General → Use selfh.st icons. The logos come from selfh.st; Dockhand fetches each one once and caches it locally, so your browser never contacts an external CDN. Logos are licensed CC BY 4.0.
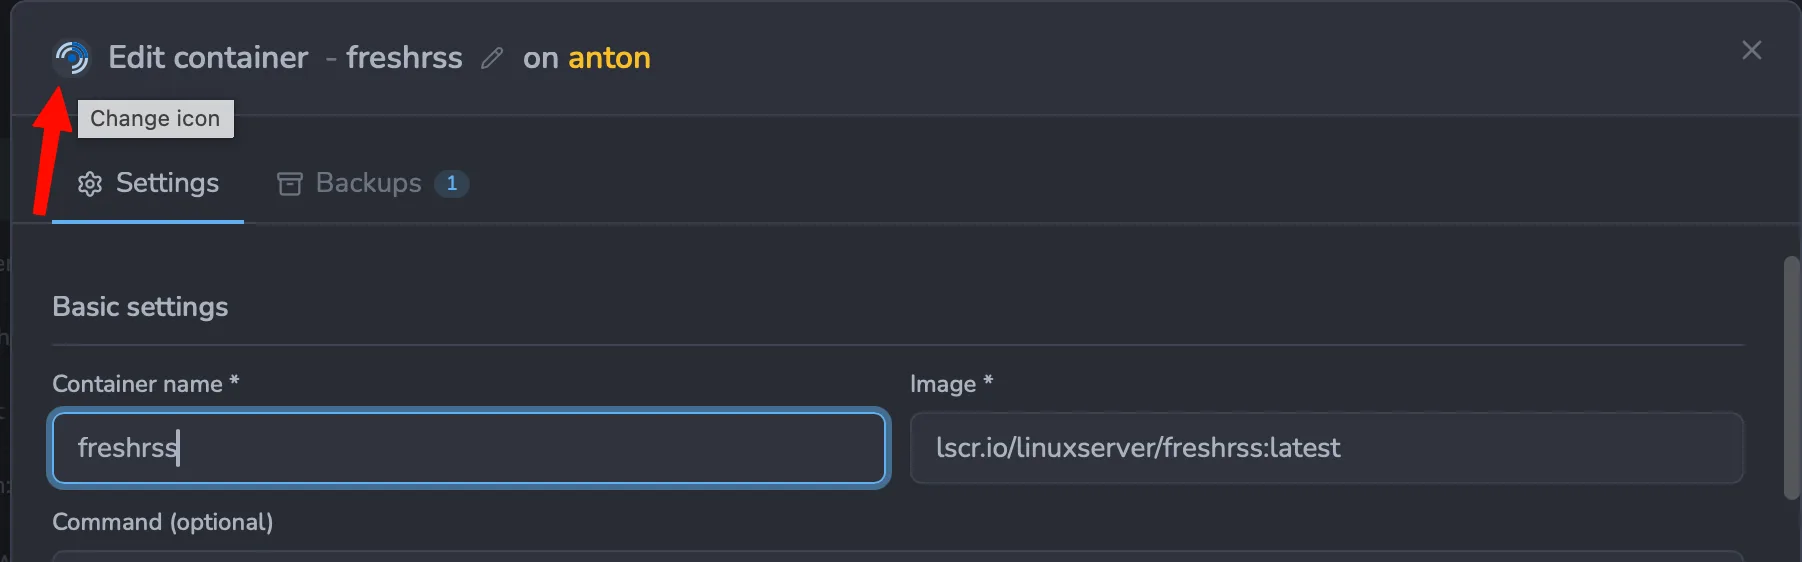
Pin a specific icon. Open Edit for a container and click the icon next to its name (Change icon). The picker offers three sources - built-in icons, a search of the selfh.st app logos, or your own uploaded image - the same picker used for stack icons. The choice is remembered per container and per environment, and survives recreation, so an updated or recreated container keeps its icon. An explicit icon always shows, even when the global selfh.st setting is off. Use Clear icon to return to automatic matching.
Container actions
Each container row has action buttons for common operations:
| Action | Description |
|---|---|
| Start | Start a stopped container |
| Stop | Stop a running container (with confirmation) |
| Pause | Pause a running container |
| Restart | Restart a container (with confirmation) |
| Inspect | View detailed container configuration |
| Browse Files | Open file browser (running containers only) |
| Edit | Edit container configuration |
| Logs | Open logs panel |
| Terminal | Open interactive shell |
| Delete | Remove container (with confirmation) |
Generate a compose file from a container Since 1.0.44
The container inspect dialog has a Compose tab (the last tab) that turns any running container - however it was created, including ones started outside Dockhand - into a ready-to-use docker-compose.yml service definition. Dockhand reads the container's configuration and writes out the image, ports, volumes, networks, restart policy, healthcheck, capabilities, labels and the rest, skipping the noise a daemon adds automatically (the auto-generated hostname, an inherited entrypoint, and so on) so the result reads like a compose file you would write by hand.
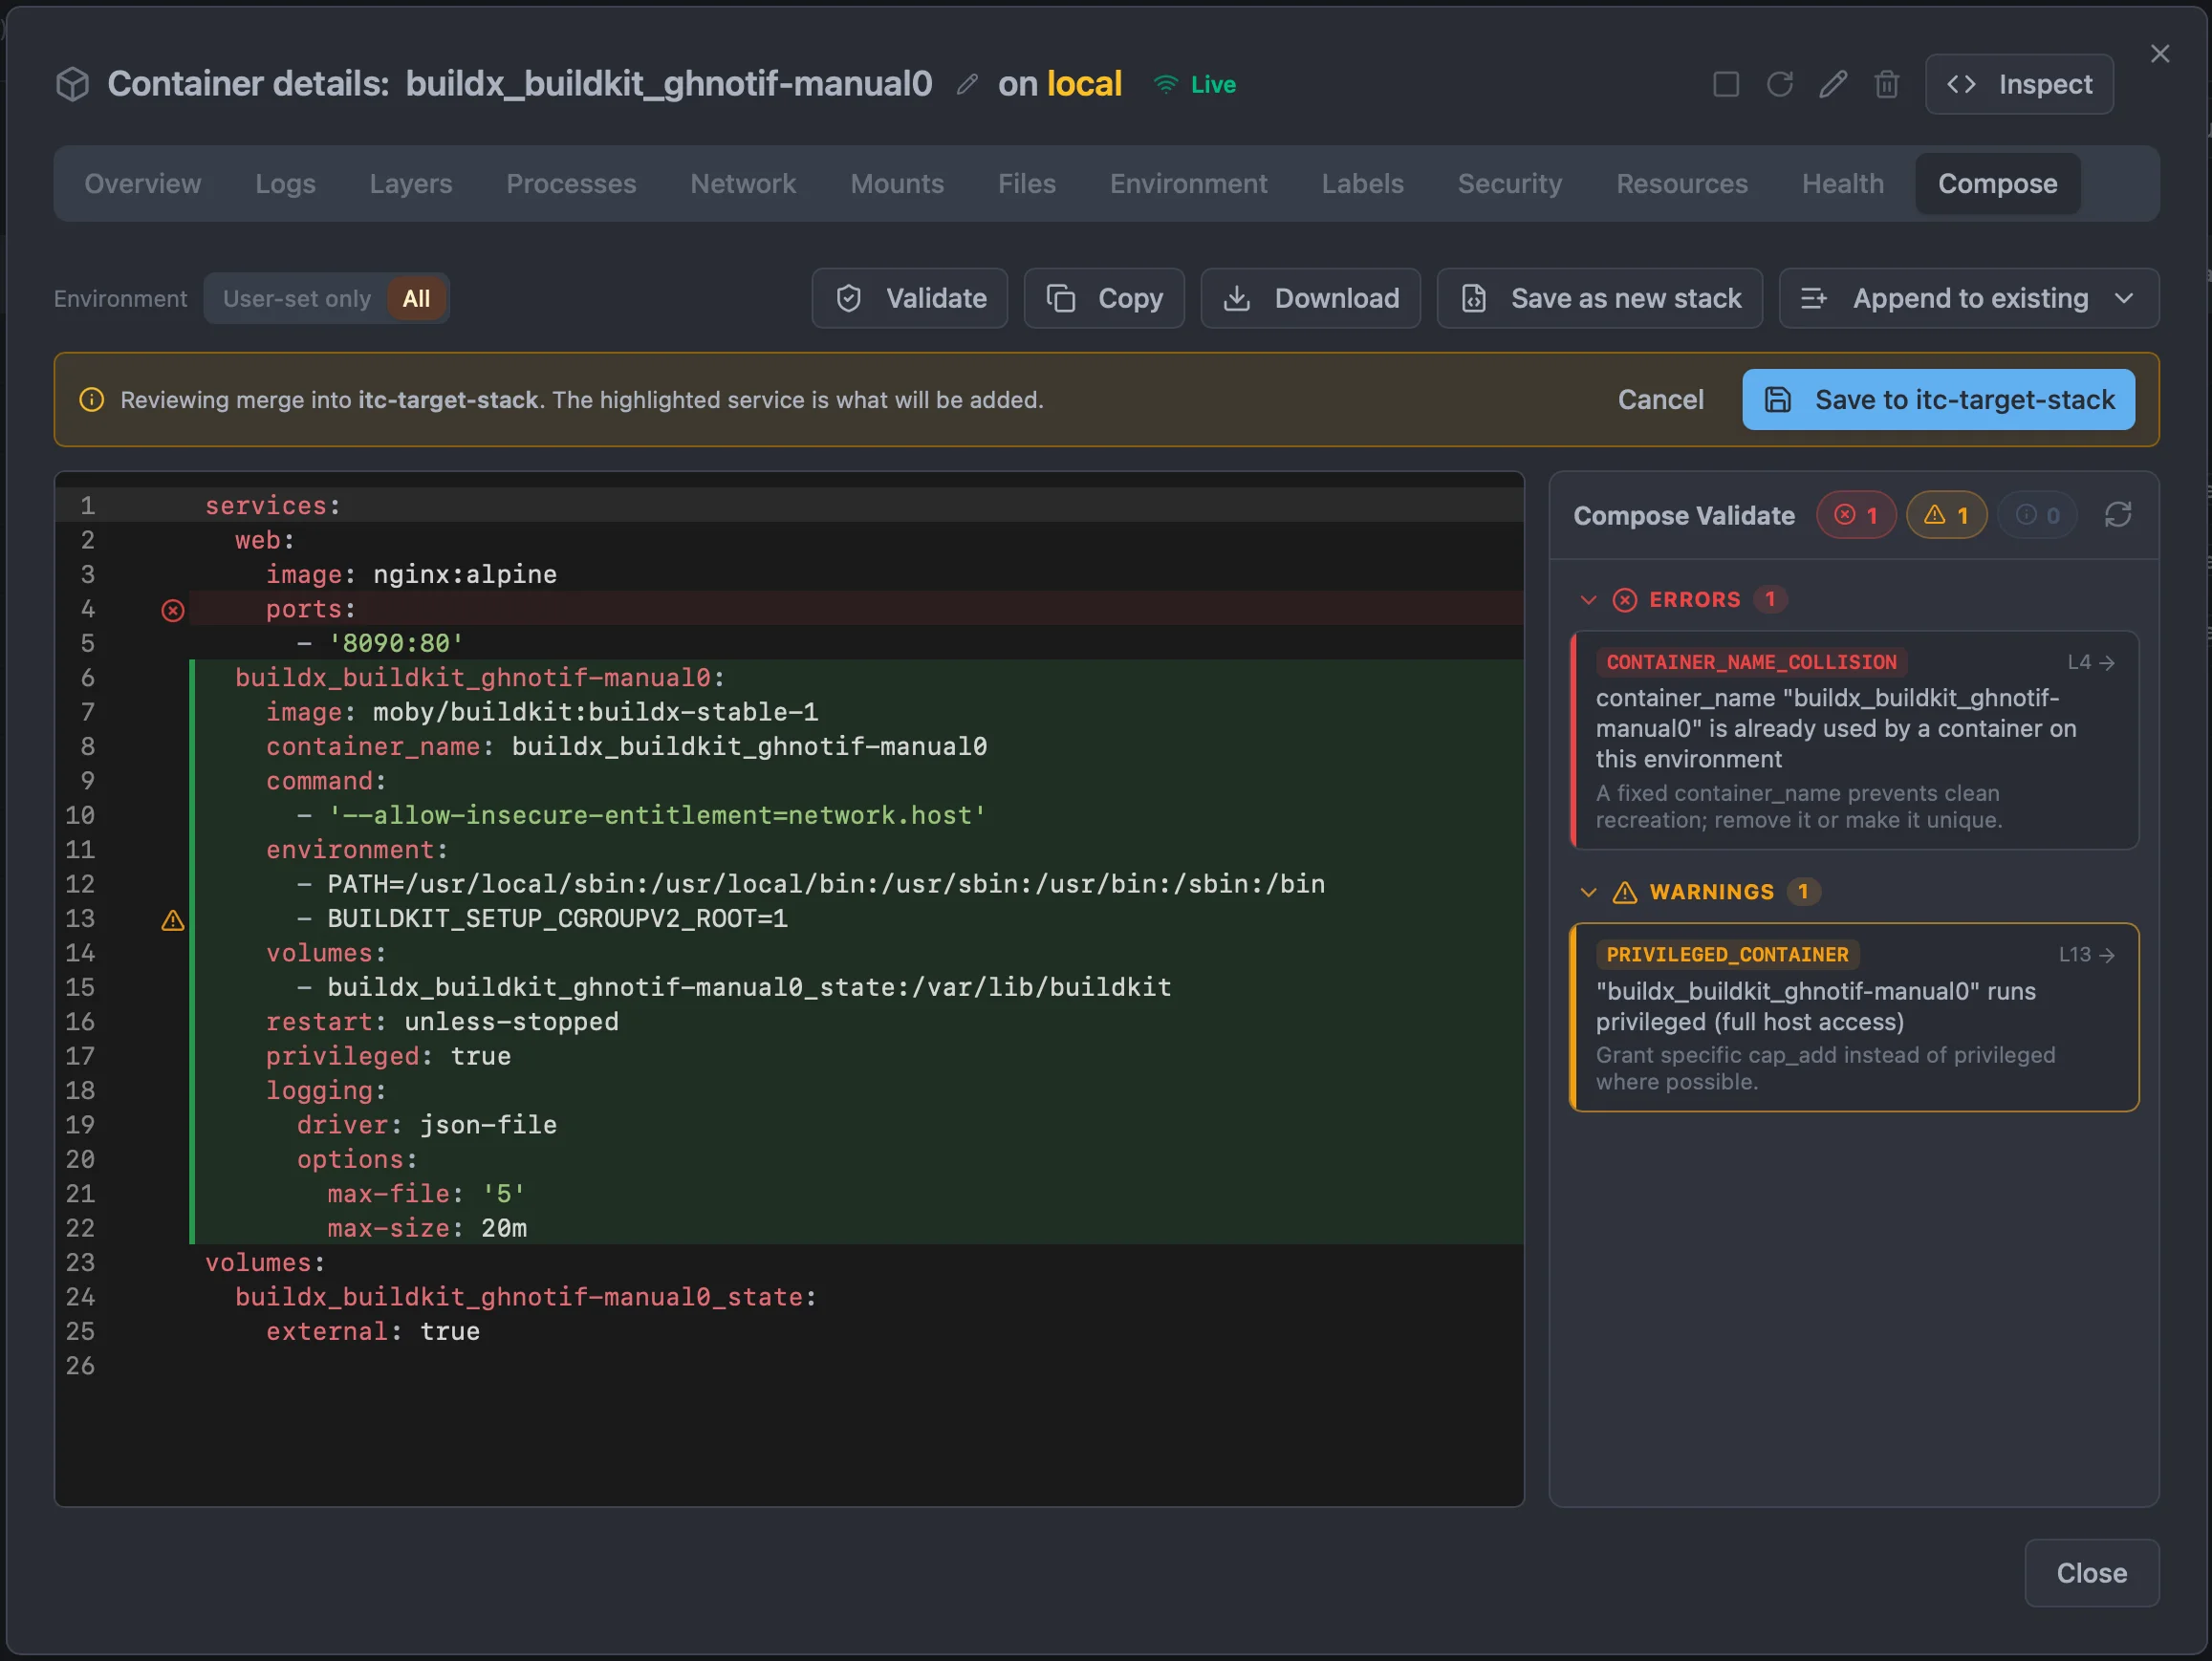
- Environment toggle - User-set only keeps just the variables you set on the container (the ones baked into the image are hidden); switch to All to include every variable.
- Validate runs the same preflight linter used on stacks against the generated file, opening a findings panel beside the editor - errors and warnings grouped by severity, each flagged inline on its line - so you can catch problems (a hard-coded secret, a read-write docker.sock, a
:latesttag, a name collision) before you save it anywhere. - Copy / Download put the compose on your clipboard or save it as a
.yamlfile.
You can edit the generated compose in place, then save it two ways:
- Save as new stack opens the new-stack dialog pre-filled with the generated compose, so you can deploy it as a fresh stack.
- Append to existing merges the service into one of your managed stacks - pick the stack from the list, review the merged file (the newly added service is highlighted), then save. If a service of the same name already exists in that stack, the added one is given a numbered suffix so nothing is overwritten.
If the container already belongs to a stack, the tab says so - the generated compose is a separate definition you can keep or merge elsewhere, it does not change the running stack.
Creating containers
Click the Create container button to launch a new container. The modal provides all configuration options:
Basic settings
- Image - Select from local images or enter image:tag to pull
- Name - Container name (auto-generated if empty)
- Command - Override the default command
- Working directory - Set the working directory
Port mappings
Map container ports to host ports. Format: host_port:container_port/protocol
When you configure a Public IP in the environment settings (Settings > Environments), port mappings become clickable links. Clicking a port badge opens the service in your browser at http://<public-ip>:<port>. This is useful for quickly accessing web UIs, APIs, or other services running in your containers.
You can override the URL for any specific port using the dockhand.port.<hostPort>.url Docker label. For example, if port 8123 is behind a reverse proxy:
# docker-compose.yml
labels:
  - "dockhand.port.8123.url=https://ha.example.com"

# docker run
docker run -l "dockhand.port.8123.url=https://ha.example.com" ...
The port badge still shows the port number, but clicking it opens your custom URL instead. Custom port links are visually highlighted to distinguish them from auto-detected links.
You can also set a single URL for the entire container using the dockhand.url label. This adds a clickable link icon next to the container name:
# docker-compose.yml
labels:
  - "dockhand.url=https://myapp.example.com"

# docker run
docker run -l "dockhand.url=https://myapp.example.com" ...
Both labels support markdown link syntax [Name](url) to display a custom name instead of the raw URL:
labels:
  - "dockhand.url=[My App](https://myapp.example.com)"
- "dockhand.port.8123.url=[Home Assistant](https://ha.example.com)"Port publishing binds container ports to host interfaces. See Docker networking documentation for details on port mapping and network modes.
Volume mounts
Mount host directories or named volumes into the container:
- Bind mount -
/host/path:/container/path - Named volume -
volume_name:/container/path - Read-only - Append
:rofor read-only access
Environment variables
Set environment variables as key-value pairs. Sensitive values are masked in the UI.
Network
Select the network mode:
- bridge (default) - Container gets its own IP on a bridge network
- host - Container shares the host's network stack
- none - No networking
- Custom network - Connect to a user-defined network
Restart policy
| Policy | Behavior |
|---|---|
no |
Never restart automatically |
always |
Always restart when stopped |
unless-stopped |
Restart unless manually stopped |
on-failure |
Restart only on non-zero exit code |
Resource limits
- CPU limit - Maximum CPU cores (e.g., 0.5 for half a core)
- Memory limit - Maximum memory (e.g., 512m, 1g)
Logs viewer
The logs viewer provides real-time streaming of container logs with ANSI color support.
Features
- Real-time streaming - Logs appear instantly via Server-Sent Events
- Stopped container support - View logs from stopped, exited, or dead containers
- ANSI color rendering - Full color support for formatted output
- Pause/Resume - Toggle streaming to freeze the view
- Auto-scroll - Automatically scroll to the latest logs
- Download - Export logs as a text file
- Font size - Adjust between 10-18px
Connection status
The status indicator shows the current connection state:
- Live (green pulse) - Streaming active
- Connecting (yellow) - Establishing connection
- Disconnected (red) - Connection lost, will retry
- Paused (amber) - Streaming manually paused
The default log buffer is 500 KB per panel. You can adjust this in Settings > General > Log buffer size. Larger buffers may impact browser performance.
Terminal
Open an interactive terminal session inside a running container.
Configuration
- Shell - Select bash, sh, zsh, or ash
- User - Run as root, nobody, or container default
- Font size - Adjust terminal font size
Keyboard shortcuts
- Cmd + L - Clear terminal
- Cmd + C - Copy selection
- Cmd + V - Paste
File browser
Browse and manage files inside running containers.
Features
- Navigation - Browse directories with breadcrumb trail
- Download - Download files or directories as tar archive
- Upload - Upload files to the container
- File info - View file sizes, types, and permissions
Auto-update
Configure automatic image updates for a container to keep it running the latest version. Enable it per container in the container editor's Settings tab; view and manage all schedules on the Schedules page. This is separate from the on-demand update check - auto-update applies image (digest) updates on its own schedule.
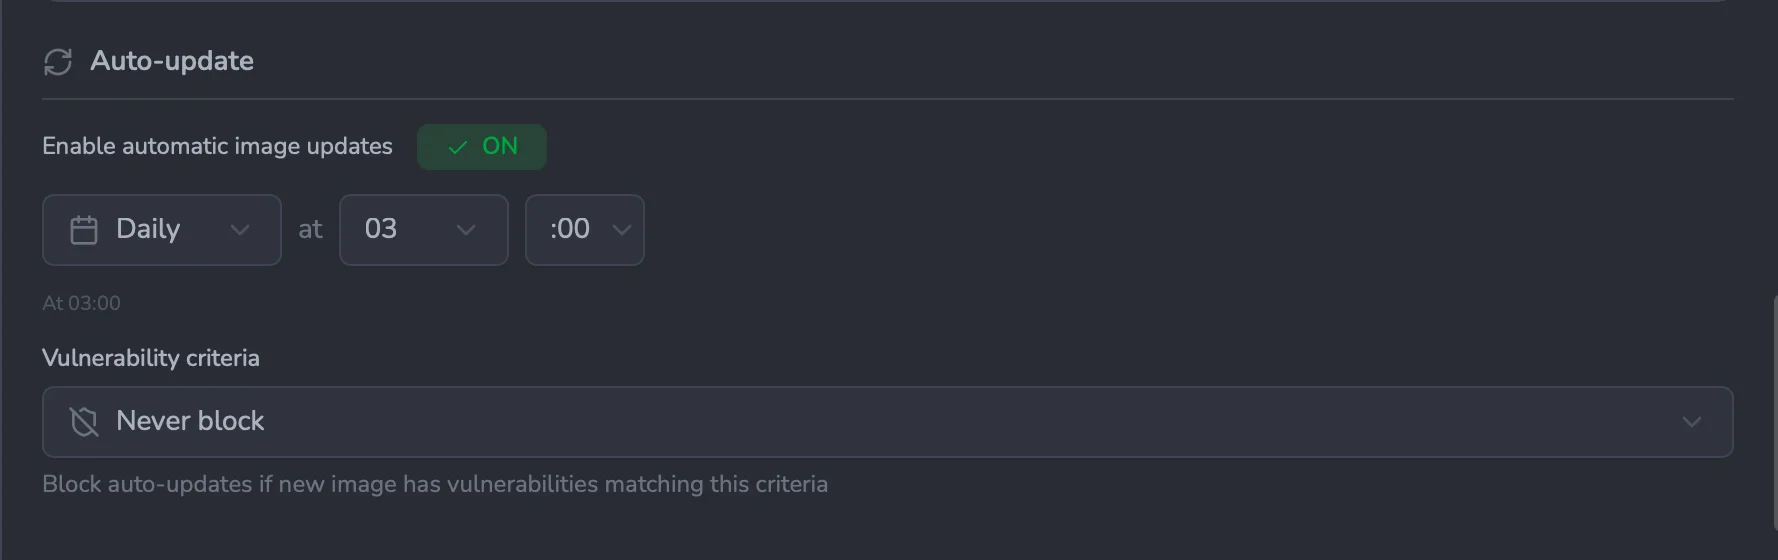
Schedule options
- Daily - Update once per day at a specific time
- Weekly - Update on a specific day and time
- Custom - Use a cron expression for precise scheduling
Vulnerability criteria
When vulnerability scanning is enabled, you can configure vulnerability criteria to control when auto-updates are blocked. This gives you fine-grained control over the balance between staying up-to-date and avoiding newly introduced security issues.
Available criteria
| Criteria | Blocks Update When | Best For |
|---|---|---|
| Never block | Never (updates always proceed) | Non-critical containers, dev environments |
| Any vulnerability | New image has any vulnerability (critical, high, medium, or low) | Security-critical, zero-tolerance environments |
| Critical or High | New image has critical or high severity vulnerabilities | Production environments (recommended) |
| Critical only | New image has critical severity vulnerabilities | Balanced approach, tolerate high/medium/low |
| More than current | New image has more total vulnerabilities than current image | Progressive improvement approach |
Criteria explained in detail
Never block - Use this when you always want the latest image regardless of vulnerabilities. The scan still runs (for visibility in the UI and notifications), but the update proceeds regardless of results. Suitable for development containers, internal tools, or situations where you trust upstream vendors to quickly patch issues.
Any vulnerability - The strictest option. Blocks the update if the new image contains any vulnerability of any severity (critical, high, medium, or low). Most container images have at least some low-severity vulnerabilities, so this option may block most updates. Use only for zero-tolerance security environments where any known vulnerability is unacceptable.
Critical or High - A balanced approach for production. Allows updates with medium and low severity vulnerabilities but blocks if critical or high severity issues are found. This is the recommended setting for most production workloads, as it prevents serious security issues while allowing routine updates.
Critical only - Blocks only for the most severe vulnerabilities (CVSS 9.0+). High, medium, and low severity issues are tolerated. Use this when you need updates to flow more freely but still want protection against the most dangerous vulnerabilities like remote code execution or privilege escalation.
More than current - A unique comparative approach. Instead of blocking based on absolute thresholds, this compares the total vulnerability count between your current image and the new image. The update is blocked only if the new image has more total vulnerabilities than what you're currently running.
This option is ideal when your current image already has known vulnerabilities that you've accepted, and you want to ensure updates don't make things worse. For example, if your current nginx:1.24 has 5 vulnerabilities and a new version has 3, the update proceeds. But if a new version has 7, it's blocked.
How "More than current" works
When using the "More than current" criteria, Dockhand performs these steps:
- Scan the new image to count its vulnerabilities
- Look up the cached scan for your current image (by SHA256 ID)
- If no cached scan exists, scan the current image on-the-fly
- Compare total vulnerability counts (summing critical + high + medium + low)
- Block update only if
new_count > current_count
This means an update from 10 vulnerabilities to 10 vulnerabilities is allowed (not worse). An update from 5 to 3 is allowed (improved). Only updates that increase the total are blocked.
Secure update flow
When vulnerability scanning is enabled, Dockhand uses a safe-pull strategy to protect your running containers. The key insight is that your container keeps running the current, known-safe image throughout the entire process. If the new image fails vulnerability checks, it's deleted and your container is never affected.
How protection works
The challenge with Docker updates is that docker pull nginx:latest overwrites your local image tag. If the new image has vulnerabilities and you've already pulled it, your running container's image tag now points to the vulnerable version.
Dockhand solves this with temporary tag protection:
- Re-tag new image to nginx:latest
- Recreate container with new image
- Container now uses updated image
- Delete temporary image entirely
- Container remains unchanged
- Still running original safe image
Step-by-step breakdown
- Registry check - Dockhand queries the registry to check if a newer image digest exists. This is a metadata-only request - no image data is downloaded yet. If no update exists, the process stops here.
- Pull new image - The new image is downloaded. This overwrites the local
nginx:latesttag to point to the new image (this is normal Docker behavior). - Restore original tag (safety step) - Immediately after pull, Dockhand re-tags the original image back to
nginx:latest. The new image is tagged asnginx:latest-dockhand-pending. Now your running container's image reference is safe again. - Scan temporary image - Trivy and/or Grype scan the temporary image for vulnerabilities. This can take 10-60 seconds depending on image size.
- Security decision:
- If approved: The new image is re-tagged to
nginx:latest, the container is recreated, and the temp tag is cleaned up. - If blocked: The temp image is deleted entirely. Your container continues running on the original, safe image as if nothing happened.
- If approved: The new image is re-tagged to
Why this approach is safe
| Failure scenario | What happens | Container status |
|---|---|---|
| Scan finds critical vulnerabilities | New image is deleted | Unchanged, keeps running |
| Scanner crashes or times out | Temp image is cleaned up | Unchanged, keeps running |
| Dockhand crashes during scan | Temp image orphaned (cleaned later) | Unchanged, keeps running |
| Network failure during pull | Pull fails, no changes made | Unchanged, keeps running |
The "more than current" criteria
When using the More than current vulnerability criteria, Dockhand performs an additional comparison:
- Scans the NEW image (as described above)
- Looks up the cached scan for the CURRENT running image (by SHA256 ID)
- If no cached scan exists, scans the current image on-the-fly
- Compares total vulnerability counts:
new_total > current_total - Blocks update only if the new image has MORE vulnerabilities
This allows updates that reduce or maintain the vulnerability count, while blocking updates that would make things worse.
Scan results are cached by image SHA256 ID (not tag). When the same image is encountered again (e.g., in "more than current" comparisons or manual scans), cached results are returned instantly. Cache persists across restarts.
Images pulled by digest (e.g., nginx@sha256:abc123...) cannot use temp tag protection because the tag IS the digest. These images are scanned directly without the safety net. Consider using tag-based references for auto-updated containers.
Environment-wide auto-update
Configure auto-updates for all containers in an environment via Settings > Environments > Updates tab:
- Update checks - Enable scheduled checks for updates across all containers
- Schedule - Set when to check (daily, weekly, or custom cron)
- Auto-update - Enable automatic deployment when updates are found
- Vulnerability criteria - Set blocking rules for the entire environment
- Timezone - Set the local timezone for scheduling (e.g., Europe/Warsaw, America/New_York)
Auto-update pulls the latest image, stops the current container, and creates a new container with the same configuration. This causes brief downtime. For zero-downtime updates, use Docker Compose with rolling update strategies.
Environment variables & labels on update Since 1.0.38
When a container is recreated during an update (manual or automatic), Dockhand keeps the container's existing configuration and only changes the image. Environment variables and labels get special handling so that a new image's updated defaults actually take effect — without discarding anything you set yourself.
For each env variable and label, Dockhand compares the container's value against the old image's value and decides:
| Situation | On update |
|---|---|
| Value matches the old image (image-provided, you never changed it) | Refreshed to the new image's value |
Value differs from the old image (you overrode it with -e / -l) |
Kept — your override wins |
| Key exists only on your container (you added it) | Kept |
| New key introduced by the new image | Added |
Example. An image bakes its version into both an env var and an OCI label, and you run it with one override plus one extra variable:
docker run -d --name myapp \
  -e APP_VERSION=1.0        # baked by the image (you did NOT set this) \
  -e LOG_LEVEL=debug        # you override the image's default (info) \
  -e FEATURE_FLAG=on \      # your own variable, not in the image
  myapp:1.0
The image is updated from 1.0 to 2.0. After the update the container has:
APP_VERSION=2.0     # refreshed  — you never touched it, so it follows the new image
LOG_LEVEL=debug     # kept       — your override wins (never silently reset)
FEATURE_FLAG=on     # kept       — your own variable
# label org.opencontainers.image.version: 1.0 → 2.0   (refreshed)
The update log shows exactly what happened, for example:
Env rebase — adopted from new image: APP_VERSION; kept your overrides: LOG_LEVEL; kept your vars: FEATURE_FLAG
Label rebase — adopted from new image: org.opencontainers.image.versionSome images (for example, those exposing their own version through APP_VERSION or the org.opencontainers.image.version label) would otherwise keep reporting the old version after an update, even though the new image was running. Values are compared by content — if the old image can't be inspected, Dockhand falls back to preserving the container's values unchanged, so an update can never wipe your configuration. Env values are never written to logs; only key names are shown.
Container labels Since 1.0.27
Dockhand supports Docker container labels to control its behavior on a per-container basis. Labels follow an opt-out model — by default, all containers are visible, updatable, and generate notifications. Add labels to change this behavior for specific containers.
Labels override Dockhand's UI settings (label wins). If a container has dockhand.update=false, it will be skipped during auto-updates regardless of any schedules configured in the UI.
Available labels
| Label | Values | Default | Description |
|---|---|---|---|
dockhand.update |
true / false |
true (updates allowed) |
Set to false to exclude this container from auto-updates, batch updates, and the "update available" indicator |
dockhand.hidden |
true / false |
false (visible) |
Set to true to hide this container from the Dockhand UI entirely |
dockhand.notify |
true / false |
true (notifications sent) |
Set to false to suppress notifications for this container's events (start, stop, die, etc.) |
dockhand.url Since 1.0.29 |
URL or [Name](URL) |
none | Custom clickable URL displayed alongside container ports. Supports plain URLs (e.g., https://myapp.example.com) or markdown-style named links (e.g., [My App](https://myapp.example.com)) to show a friendly name instead of the URL |
dockhand.port.<hostPort>.url Since 1.0.29 |
URL string | none | Override the click URL for a specific published port. The port badge still shows the port number but links to the custom URL instead |
dockhand.order Since 1.0.30 |
Integer | 0 |
Controls display order of containers within a stack. Lower numbers appear first. Containers with the same order value are sorted alphabetically by service name |
dockhand.changelog.url Since 1.0.34 |
URL string | none | Override the release-notes URL surfaced next to the image name when an update is available. Wins over the automatic resolution. Useful when org.opencontainers.image.source is missing or points somewhere unhelpful, or to point at a non-GitHub changelog (e.g. https://example.com/changelog). May contain a {{version}}/{{tag}} placeholder for a per-version link Since 1.0.43. See Settings → General → Show changelog links for the full resolution rules |
dockhand.adopt Since 1.0.37 |
true / false |
true (adoptable) |
Set to false on any container in a stack to prevent that stack from being adopted — it shows in the scan results as "Not adoptable" and can't be selected. Useful for stacks you want oversight of but manage outside Dockhand. Because the label lives on the container, it is only enforced while the stack is running |
dockhand.version.pattern Since 1.0.43 |
regex:<pattern> |
none | Teach the newer version tag check how to read this image's tags when they don't follow the usual dotted-number shape (e.g. a CalVer-plus-hash like 2024.12.5-a1b2c3d). The value is regex: followed by a regular expression with numeric named groups major, minor (optional), patch (optional): regex:^(?<major>\d{4})\.(?<minor>\d+)\.(?<patch>\d+)-[0-9a-f]+$. Only affects newer-version detection, never the digest update check. An invalid or unmatched pattern falls back to the default parser |
All label values are case-insensitive. You can use: true, TRUE, True, yes, YES, 1 for truthy values, and false, FALSE, False, no, NO, 0 for falsy values.
Usage examples
Docker Compose
services:
  socket-proxy:
    image: tecnativa/docker-socket-proxy
    labels:
      - "dockhand.update=false"    # Never auto-update
      - "dockhand.notify=false"    # Don't send notifications

  reverse-proxy:
    image: traefik:latest
    labels:
      - "dockhand.update=false"    # Manage updates manually

  monitoring:
    image: grafana/grafana
    labels:
      - "dockhand.hidden=true"     # Hide from Dockhand UI

  # Custom URL labels (since 1.0.29)
  nextcloud:
    image: nextcloud:latest
    ports:
      - "8080:80"
    labels:
      - "dockhand.url=https://cloud.example.com"          # Plain URL — shows "cloud.example.com"
      # Or use markdown syntax for a friendly name:
      # - "dockhand.url=[Cloud](https://cloud.example.com)"  # Shows "Cloud"

  homeassistant:
    image: homeassistant/home-assistant
    ports:
      - "8123:8123"
      - "1883:1883"
    labels:
      - "dockhand.port.8123.url=https://ha.example.com"   # Override URL for port 8123

  # Container display order (since 1.0.30)
  nginx:
    image: nginx:alpine
    labels:
      - "dockhand.order=1"    # Show first in the stack
  app:
    image: myapp:latest
    labels:
      - "dockhand.order=2"    # Show second
  redis:
    image: redis:alpine
    # No label — defaults to order 0, sorted alphabetically among other 0s

  # Custom changelog URL (since 1.0.34) — overrides the automatic GHCR/OCI resolution
  postgres:
    image: postgres:16
    labels:
      - "dockhand.changelog.url=https://www.postgresql.org/docs/release/"
Docker CLI
# Create container with update protection
docker run -d --name socket-proxy \
  --label "dockhand.update=false" \
  --label "dockhand.notify=false" \
  tecnativa/docker-socket-proxy

# Hide a container from Dockhand
docker run -d --name internal-svc \
  --label "dockhand.hidden=true" \
  myapp:latest
Behavior details
- dockhand.update=false — The container is skipped during per-container auto-updates, environment-wide auto-updates, manual batch updates, and update availability checks. The "update available" badge is not shown for these containers.
- dockhand.hidden=true — The container is filtered from the container list API response. It won't appear in the containers page, batch update modal, or any container-related UI. The container still runs normally and can be managed via Docker CLI.
- dockhand.notify=false — Notifications (email, Discord, Slack, Telegram, etc.) are suppressed for this container's Docker events. The events are still logged to the activity database for audit purposes.
- dockhand.url — A clickable link with a globe icon is displayed alongside the container's port badges. Accepts two formats:
- Plain URL:
dockhand.url=https://cloud.example.com— displays the URL with the protocol stripped (e.g., "cloud.example.com") - Named link:
dockhand.url=[Cloud](https://cloud.example.com)— displays the friendly name "Cloud" instead of the URL
dockhand.urlstill wins when both are present. - Plain URL:

- dockhand.port.<hostPort>.url — Overrides the link for a specific port. Clicking it opens the custom URL instead of the auto-generated
http://host:portlink, and custom port links are visually highlighted to distinguish them from auto-detected links. Accepts the same two formats asdockhand.url:- Plain URL:
dockhand.port.8123.url=https://ha.example.com— the port badge still shows the port number - Named link:
dockhand.port.8123.url=[Home Assistant](https://ha.example.com)— the port badge shows the friendly name "Home Assistant" instead of the port number
- Plain URL:
- dockhand.order — Controls the display position of containers within a stack on the stacks page. Primary sort is by order value (ascending), secondary sort is alphabetical by service name. Containers without the label default to
0. Negative values are allowed to appear before unlabeled containers. Only label the containers you want to reorder — no need to label everything.
If Dockhand connects to Docker through a socket proxy (e.g., linuxserver/socket-proxy or tecnativa/docker-socket-proxy), you must add dockhand.update=false to that proxy container. When Dockhand auto-updates its own socket proxy, it stops the proxy first — which immediately disconnects Dockhand from Docker, leaving the proxy stopped and the environment unreachable.
services:
  dockhand-socket-proxy:
    image: linuxserver/socket-proxy:latest
    labels:
      - "dockhand.update=false"   # Dockhand connects through this — never auto-update
      - "dockhand.notify=false"   # Reduce noise from proxy events
    volumes:
      - /var/run/docker.sock:/var/run/docker.sock:ro

  dockhand:
    image: fnsys/dockhand:latest
    environment:
- DOCKER_HOST=tcp://dockhand-socket-proxy:2375Reverse proxies (Traefik, Nginx Proxy Manager), VPN containers, and other infrastructure that other services depend on are also good candidates for dockhand.update=false. Update these manually after testing.
Checking for updates
Dockhand can tell you when the containers and stacks in an environment have an update available. There are two independent kinds of update, and it is worth understanding the difference:
- Image updates — the tag you run has not changed, but its image has moved. For a floating tag like
nginx:latest, or any tag the publisher re-pushes, the digest behind the tag changes. Dockhand compares the digest you run against the registry and flags a pending update. This is the classic behaviour and can be applied automatically. - Newer version tags Since 1.0.43 — you are pinned to a specific version (
postgres:16.2-alpine) and a newer version tag exists upstream (16.15-alpine). Dockhand surfaces it as an advisory badge but never applies it — the version lives in your compose file. See Newer version tags below.
Manual and scheduled checks
Run a check on demand with the Check for updates button on the Containers or Compose stacks page. It queries every container in the current environment and flags the ones with an update.
To check automatically, enable a schedule per environment in Settings → Environments → (edit) → Updates. The scheduled check runs on a cron you choose and can either just notify you, or update containers automatically.
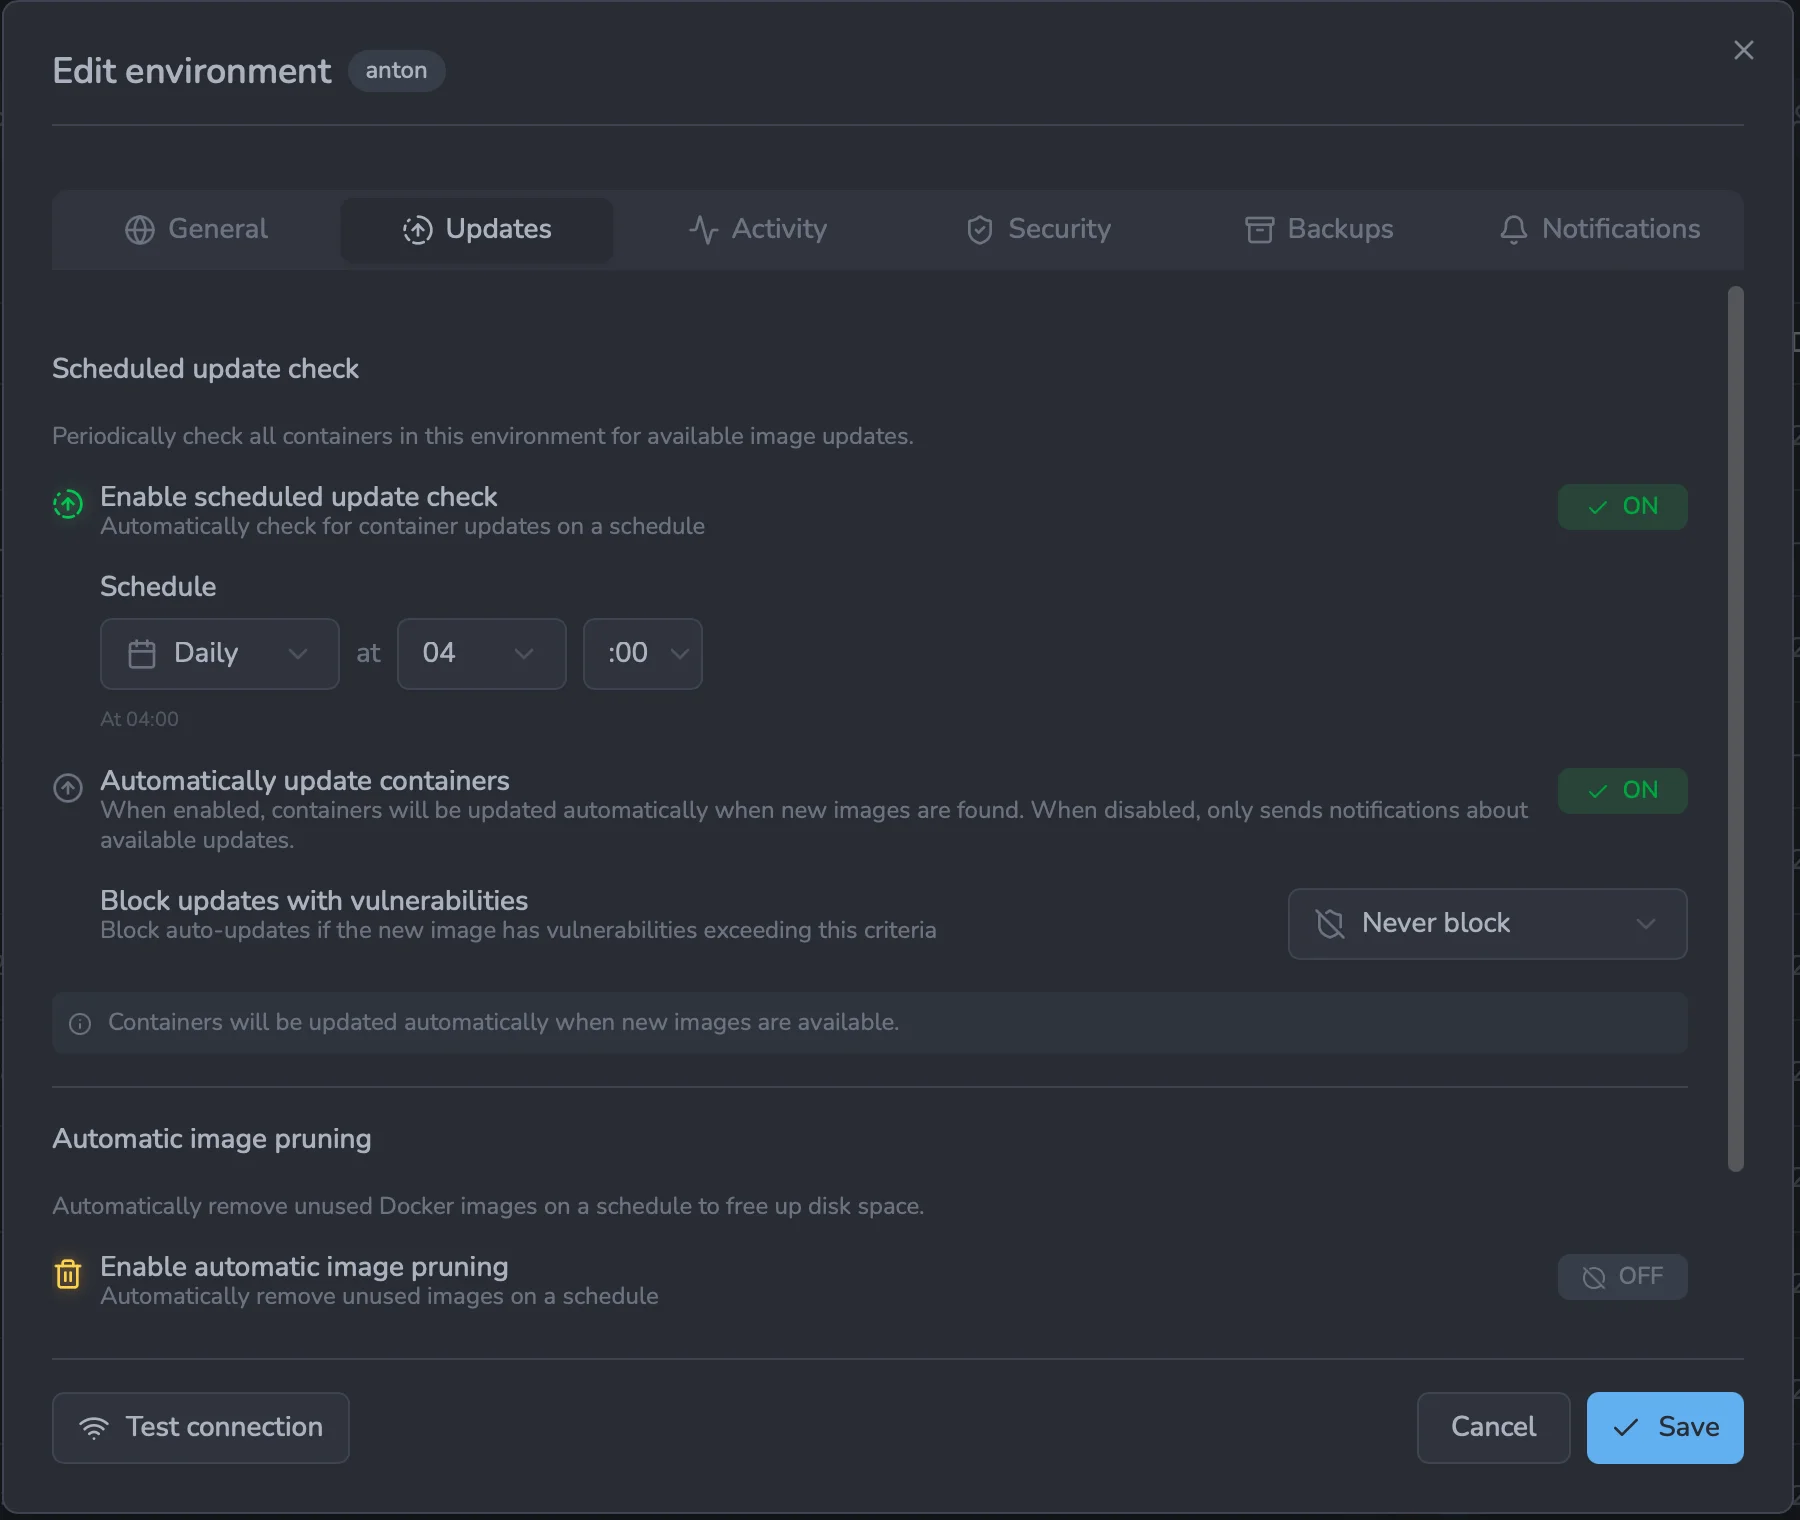
- Automatically update containers — when on, containers are recreated with the new image as soon as an image update is found. When off, Dockhand only records the pending update and sends a notification. This applies to image (digest) updates only; newer version tags are always advisory and never applied automatically.
- Block updates with vulnerabilities — when auto-update and a scanner are both enabled, the new image is pulled to a temporary tag, scanned, and only deployed if it passes the chosen vulnerability criteria. Blocked images are discarded and the container is left untouched. See Vulnerability scanning.
Update indicators
When an image update is available, an amber up-arrow appears before the image name on the Containers list, and a toolbar button lets you update all flagged containers at once.
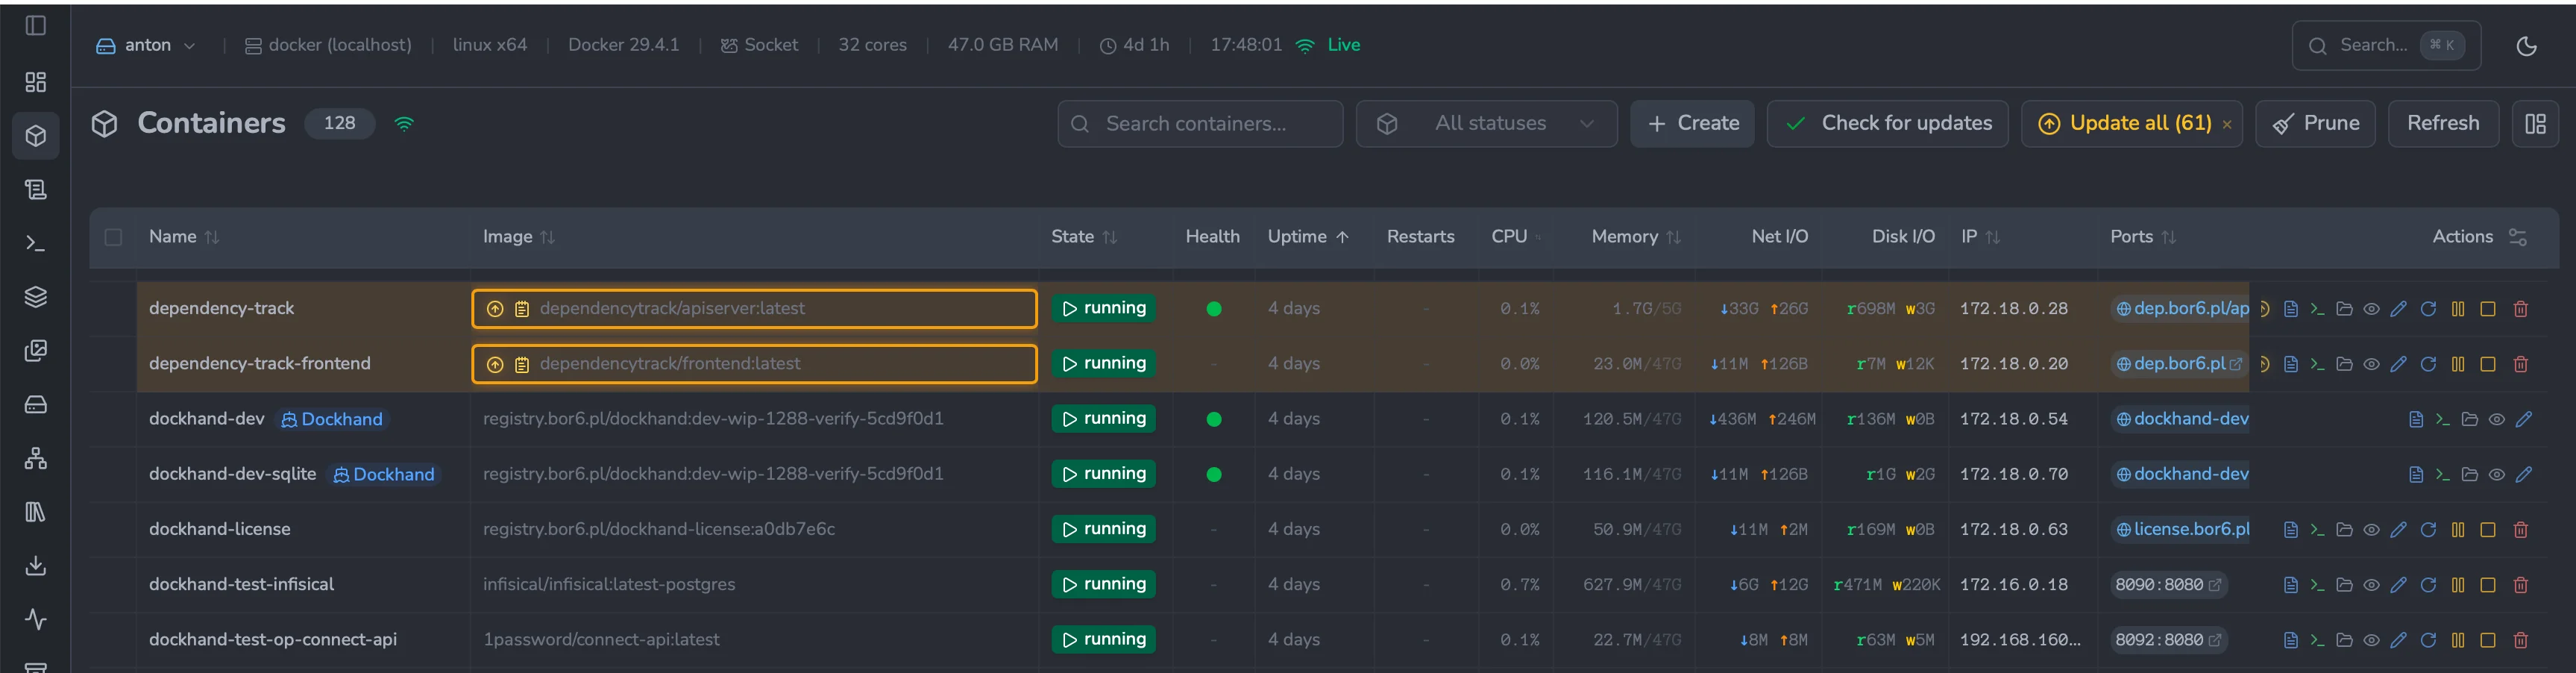
On the Compose stacks page the same arrow aggregates on the stack row (with a count) and repeats on each container tile. Internal and Git stacks can be redeployed to apply the updates; external stacks show the indicator for information only.
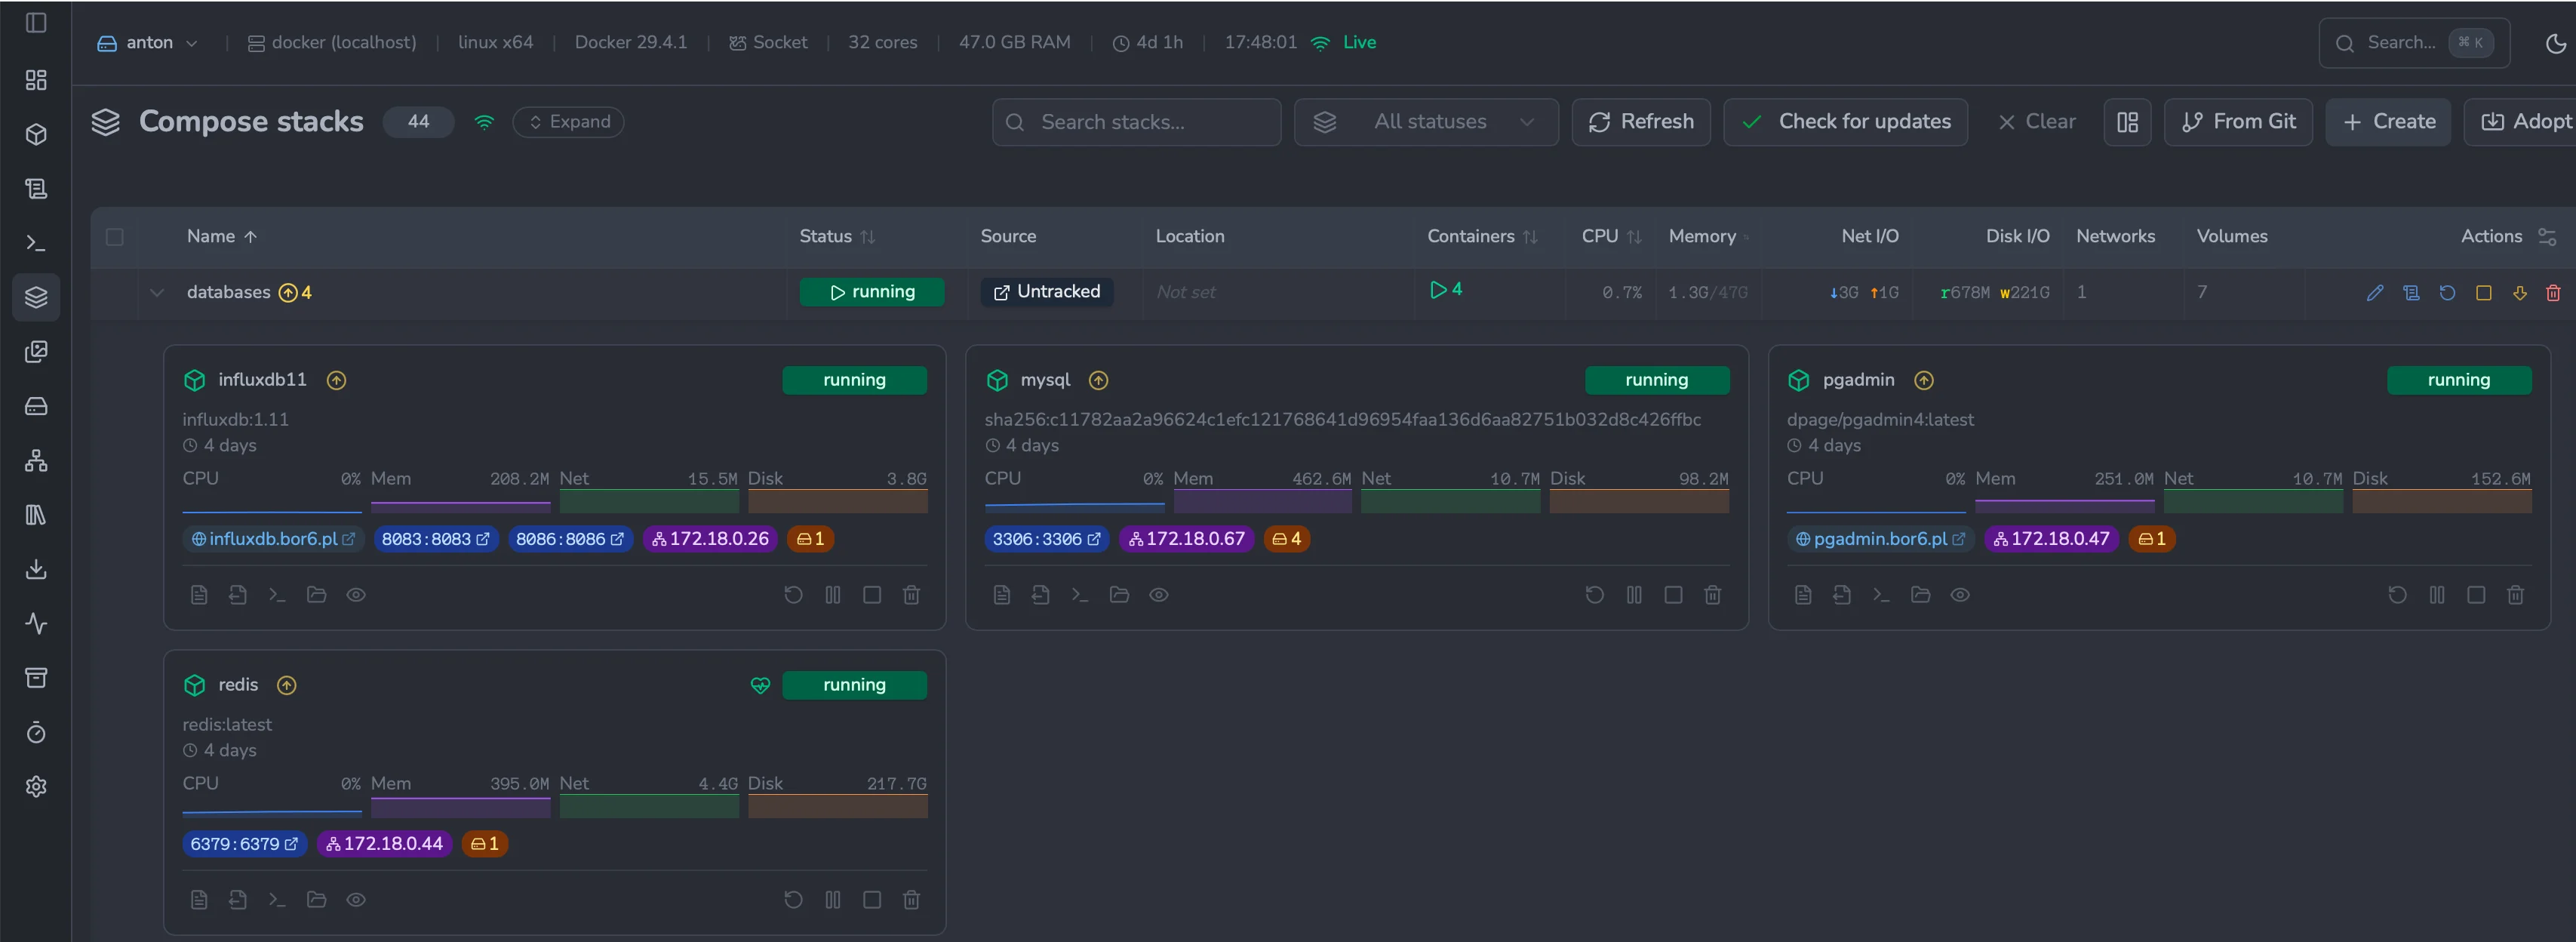
Indicators persist across a page reload and are refreshed by the scheduled check. Clear them with the dismiss control in the toolbar.
Newer version tags Since 1.0.43
Besides the digest-based image update above, Dockhand can detect when a newer version tag is published for an image you have pinned to a specific version. If you run forgejo:9.0.0 and 16.0.2 exists upstream, or postgres:16.2-alpine when 16.15-alpine is out, Dockhand surfaces it as a badge.
This is advisory only. The version tag lives in your compose file, which Dockhand does not own, so a newer version is never applied automatically — you bump the tag yourself. It is purely a heads-up that a newer release is available.
Enabling detection
Newer-version detection is a global setting. Enable it in Settings → General → Newer version tags, under Check for newer version tags. Both update-check paths - the scheduled check and the manual Check for updates button - read this one setting. The split is deliberate: a per-environment schedule decides whether to check automatically; the global setting decides how versions are read (on/off, maximum bump, flavor matching, prereleases).
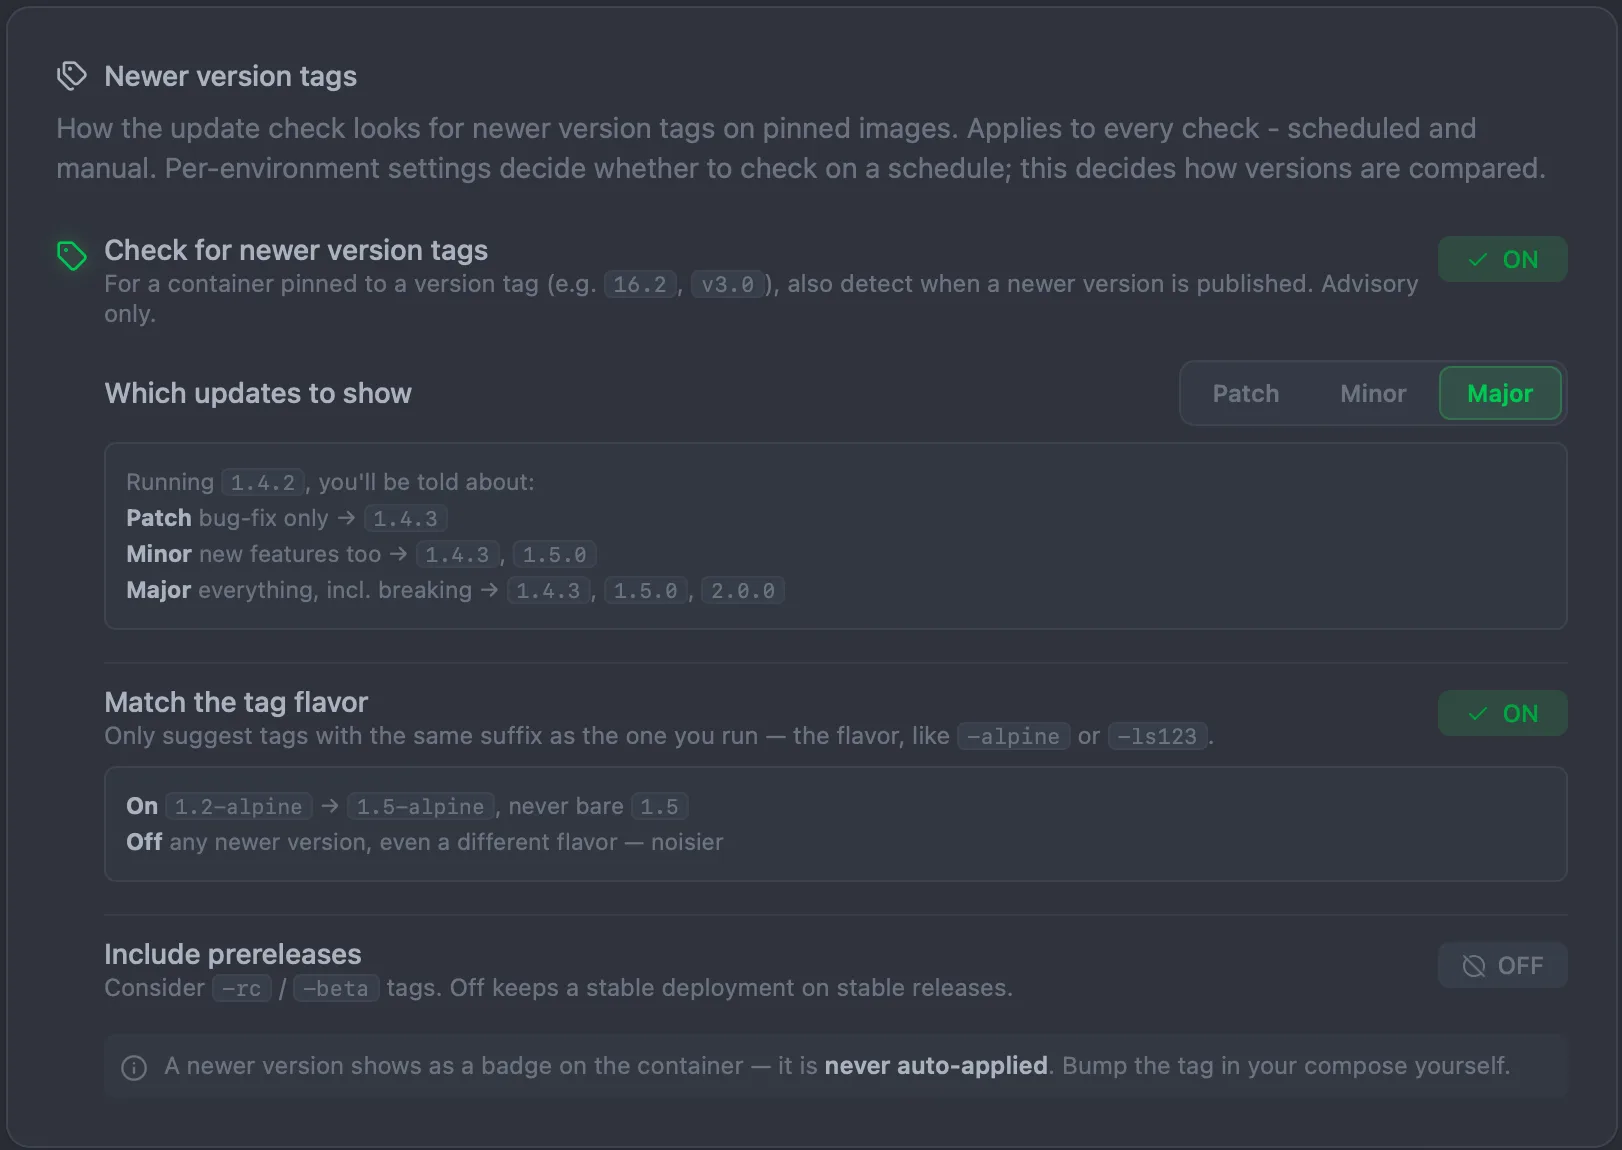
Three options control how many suggestions you see:
- Which updates to show — cap the surfaced jump. Patch shows only bug-fix releases (
1.4.2 → 1.4.3); Minor adds new-feature releases (→ 1.5.0); Major shows everything, including breaking changes (→ 2.0.0). - Match the tag flavor — only suggest tags with the same suffix as the one you run. With it on,
1.2-alpineonly ever suggests another-alpinetag, never a bare1.5. This is the most effective filter for images that publish many variants. - Include prereleases — consider
-rc/-betatags. Off keeps a stable deployment on stable releases.
Version comparison is library-free and handles both SemVer (1.2.3) and CalVer (2024.1.3) tags, tolerating a leading v and build suffixes. Floating tags like latest or stable are not versions, so they are skipped entirely — enabling the option on a latest container simply does nothing.
Custom tag patterns
Some images use a version scheme the generic parser can't read on its own — most often a date-based tag with a trailing commit hash, like 2024.12.5-a1b2c3d. For those, set a dockhand.version.pattern label on the container to override how Dockhand reads that image's tags. The value is regex: followed by a regular expression with numeric named groups major, an optional minor, and an optional patch:
services:
  app:
    image: example/app:2024.12.5-a1b2c3d
    labels:
      - "dockhand.version.pattern=regex:^(?<major>\d{4})\.(?<minor>\d+)\.(?<patch>\d+)-[0-9a-f]+$"
The captured groups become the version to compare, so 2024.12.6-… is correctly seen as newer than 2024.12.5-…. The override only changes newer-version detection — it never touches the digest-based update check. It is scoped to the one container it is set on; other containers keep using the default parser. An invalid pattern, or one that doesn't match the running tag, safely falls back to the default. See Container labels for the full label reference.
Badges and release notes
When a newer version is found, an amber tag badge showing the target version appears before the image name — on the Containers list, on each container tile inside a stack, and as an aggregate count on the stack row. A tooltip summarises the jump.
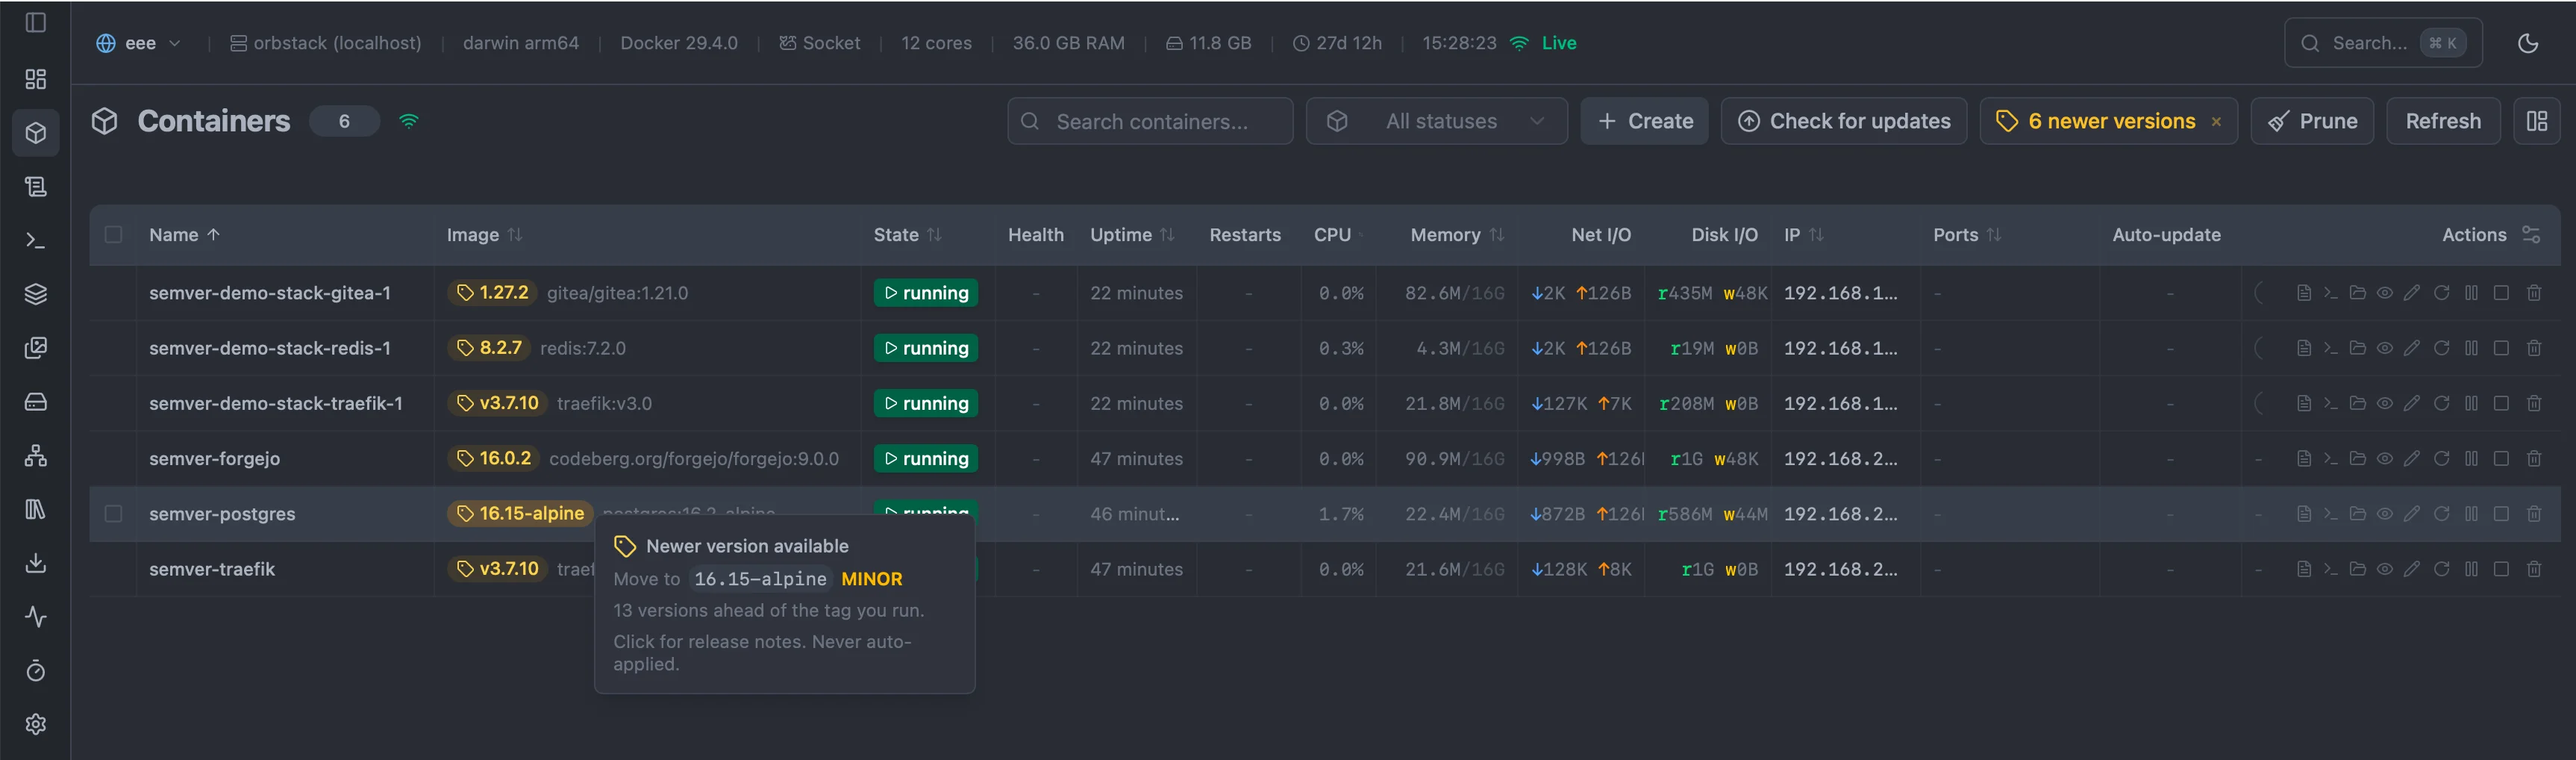
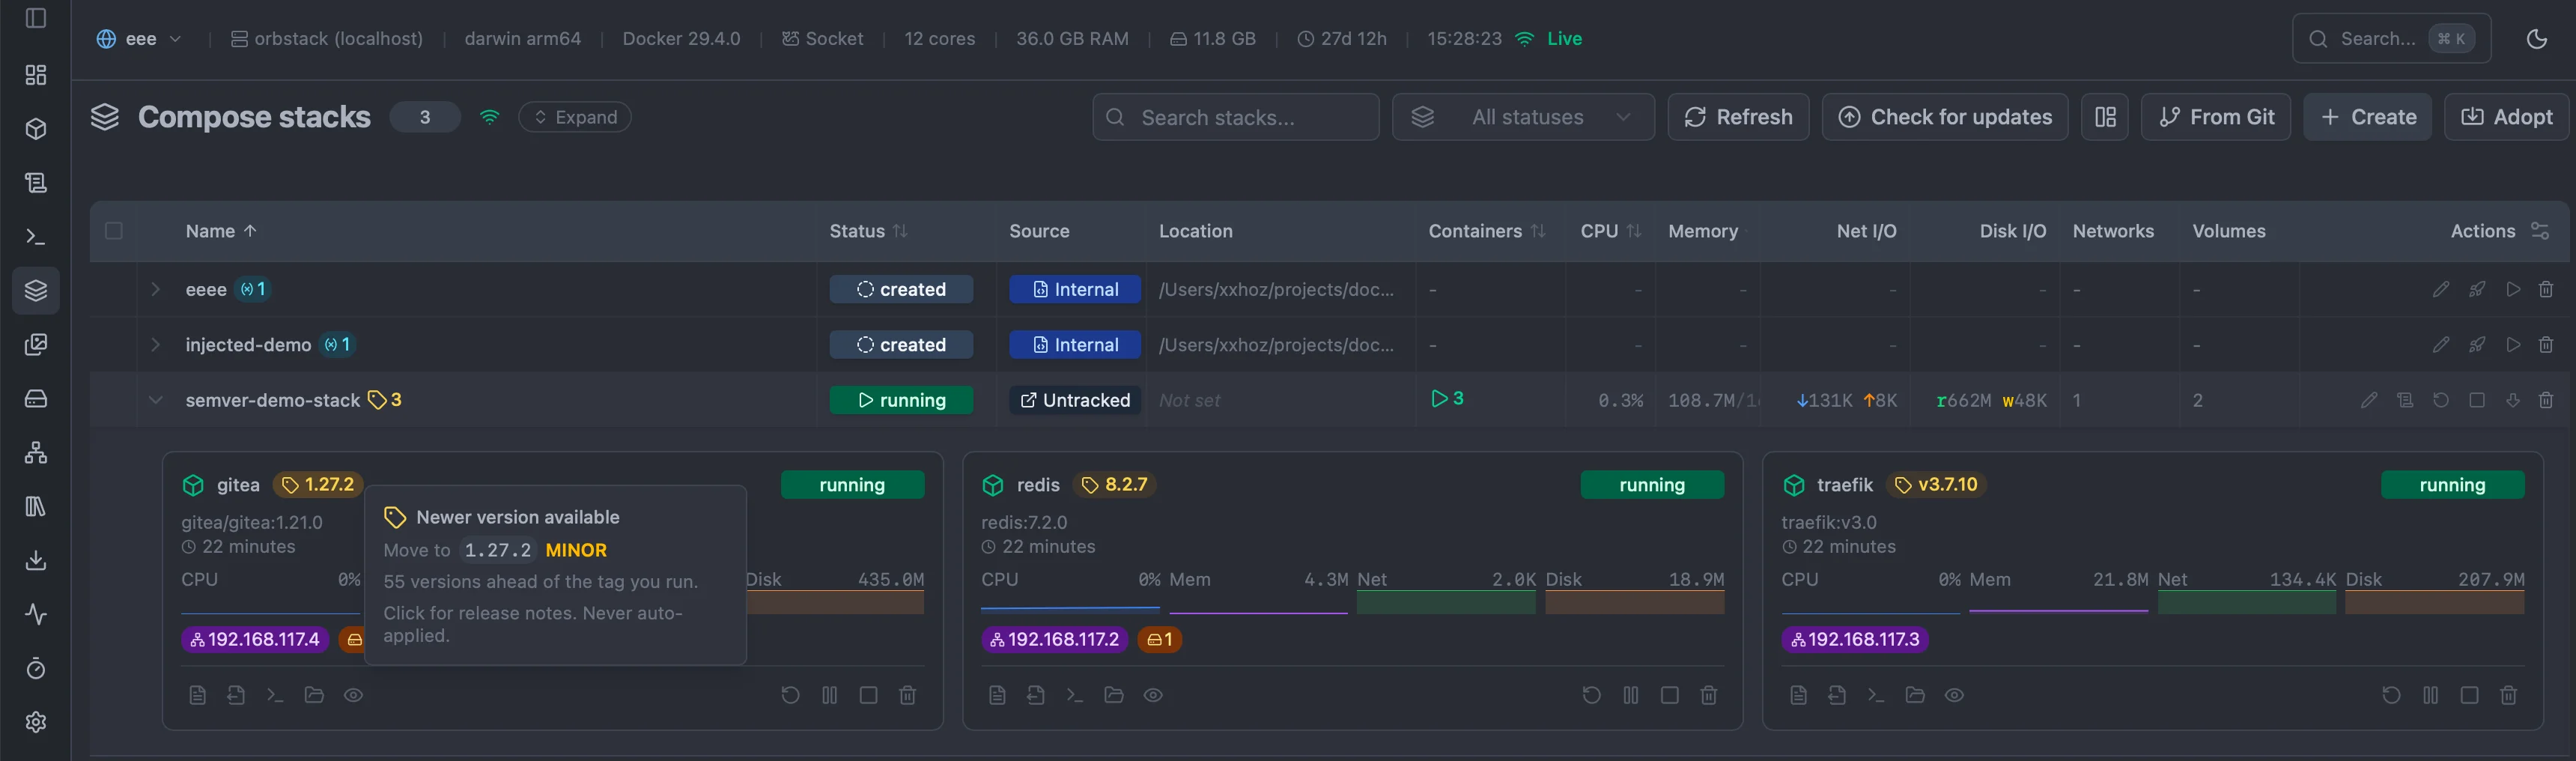
Clicking a badge opens a dialog with the full version path (every release between what you run and the newest) and the release notes for each step, rendered from Markdown.
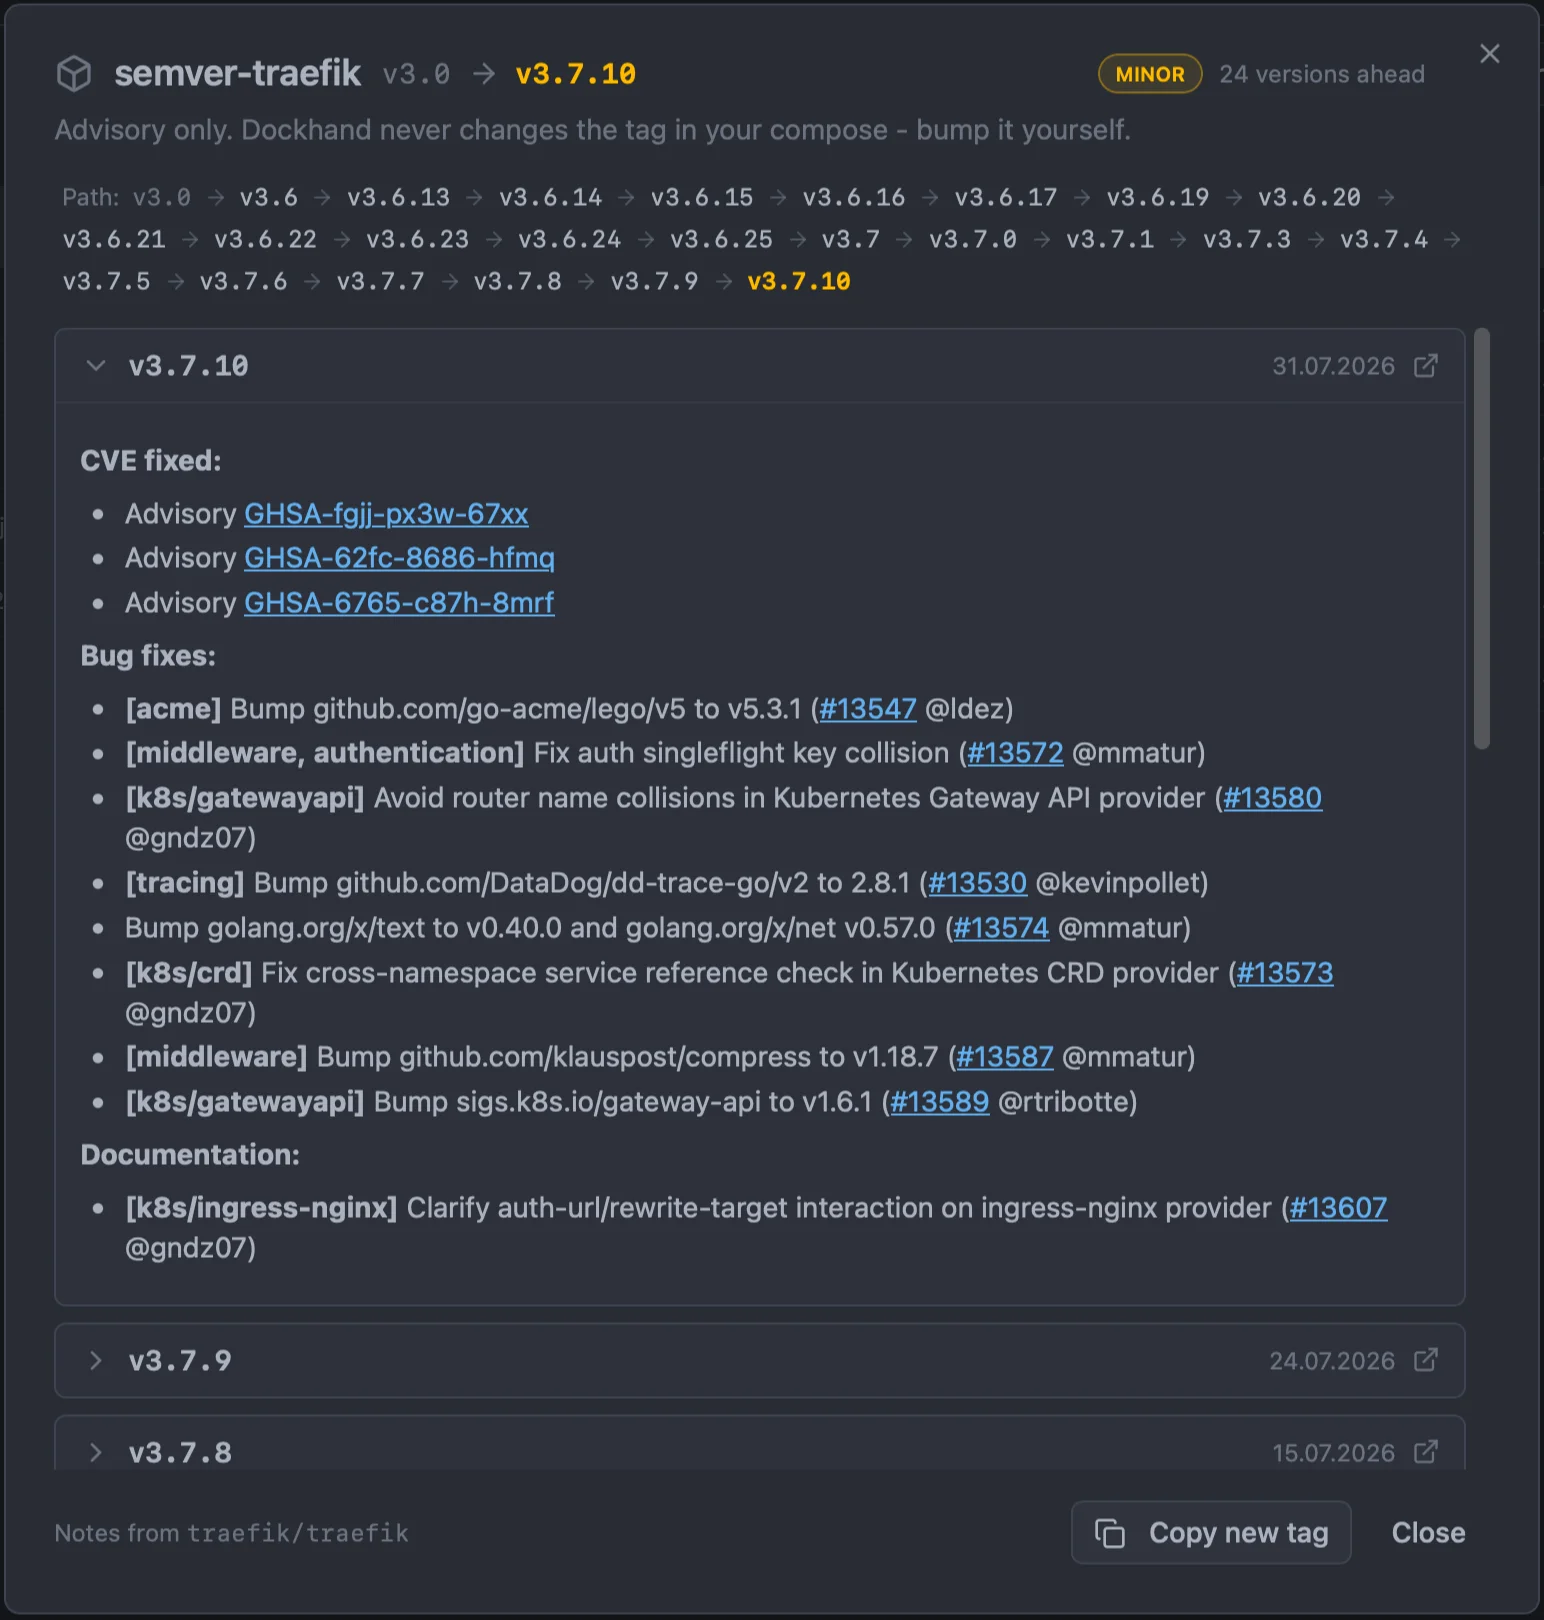
Notes are fetched from the image's source forge when the image carries an org.opencontainers.image.source label pointing at GitHub, or a Gitea / Forgejo instance such as Codeberg (ghcr.io/<owner>/<repo> images resolve to GitHub automatically). Images without a readable source — most Docker Hub base images like nginx — show the version path with a link to the changelog when one can be inferred, but no inline notes.
Badges are cleared with the dismiss control in the toolbar, the same way image-update indicators are, and persist across a page reload. When newer-version detection runs on a schedule, Dockhand sends a Newer version tag notification listing the affected containers — only for versions not surfaced on the previous run, so a daily check does not re-notify the same suggestion. Enable it per environment under the environment's notification event types, in the auto-update group.
Compose stacks
Manage Docker Compose stacks for multi-container applications. Dockhand supports both manually created stacks and stacks deployed from Git repositories.
Remote deployment architecture
Dockhand acts as a centralized control plane. When you deploy a stack to a remote node, Dockhand reads the docker-compose.yml file from its own local filesystem (where Dockhand is running) and sends the instructions directly to the remote Docker daemon via the Docker API.
This means:
- Source of truth: Compose files live on the Dockhand node. You don't need to manually sync or copy files to remote servers.
- Deployment: Dockhand handles context switching and payload delivery to the target environment.
- Volumes: If your stack mounts local paths (e.g.,
./data:/app/data), those paths refer to the target remote node's filesystem, not Dockhand's. The Docker daemon on the remote node will look for./dataon its own disk.
Why centralized management?
Some tools expect compose files to exist physically on each remote server. Dockhand's centralized approach offers several advantages:
- Single source of truth: All stack definitions live in one place, making auditing and version control straightforward.
- Reduced attack surface: Remote nodes don't need writable access to configuration files or SSH/SFTP services for file transfers.
- Simplified secrets management: Sensitive environment variables stay on the Dockhand node and are injected at deploy time, never stored on target servers.
- Cluster-like management: Manage multiple nodes from one UI without copying YAML files to each server.
Summary:
- Stack definitions (YAML): Stored centrally on the Dockhand node
- Data/Volumes: Must exist on the remote node (the target)
You don't need stack definitions on the remote node, but you do need the data directories on the remote node if you are binding host paths.
Stack types
Dockhand categorizes stacks based on how they are managed:
| Type | Badge | Description |
|---|---|---|
| Internal | Internal | Dockhand knows the compose file location and can fully manage the stack (edit, save, deploy). This includes stacks created in Dockhand and adopted stacks. |
| Git | Git | Deployed from a Git repository with automatic sync and updates. |
| Untracked | Untracked | Stack discovered running via Docker, but Dockhand doesn't know where its compose file is located. Limited management (can stop/start, but cannot edit). To gain full control: adopt the stack, or edit it and provide the compose file path (and optional .env path). |
Creating stacks
Click Create stack to open the YAML editor:
- Enter a stack name (becomes the Compose project name)
- Write or paste your
docker-compose.ymlcontent - Add environment variables in the right panel (optional)
- Optionally check "Deploy immediately" to start the stack
- Click Create
Environment variables Since 1.0.5
Stack environment variables are managed with a clear separation between regular variables and secrets. The env file (configured per stack — can be .env, .env.production, or any custom path) is the single source of truth for non-secret variables.
Regular variables
- Written directly to the configured env file on disk
- Docker Compose reads them via
--env-fileat deploy time - You can edit the file manually (via SSH, git, or the text editor in Dockhand)
- Comments and formatting are preserved
- Not stored in the database — the file is the only copy
Secret variables
Variables marked as secret are stored encrypted in the database and injected at runtime — never written to disk. Values are masked (***) after saving. See Secrets for full details on storage, injection, and important caveats.
Built-in Docker and Compose variables
Docker and Docker Compose define a set of well-known environment variables that are read implicitly from the shell at deploy time. You can reference them in your compose file with ${VAR} syntax (for example ${COMPOSE_PROJECT_NAME}) without defining them in the env panel — the editor recognises them and will not flag them as missing.
The following variables are treated as built-ins:
| Source | Variables |
|---|---|
| Docker Compose | COMPOSE_PROJECT_NAME, COMPOSE_FILE, COMPOSE_PROFILES, COMPOSE_CONVERT_WINDOWS_PATHS, COMPOSE_PATH_SEPARATOR, COMPOSE_IGNORE_ORPHANS, COMPOSE_REMOVE_ORPHANS, COMPOSE_PARALLEL_LIMIT, COMPOSE_ANSI, COMPOSE_STATUS_STDOUT, COMPOSE_ENV_FILES, COMPOSE_DISABLE_ENV_FILE, COMPOSE_MENU, COMPOSE_EXPERIMENTAL, COMPOSE_PROGRESS |
| Docker CLI | DOCKER_API_VERSION, DOCKER_CERT_PATH, DOCKER_CONFIG, DOCKER_CONTEXT, DOCKER_CUSTOM_HEADERS, DOCKER_DEFAULT_PLATFORM, DOCKER_HIDE_LEGACY_COMMANDS, DOCKER_HOST, DOCKER_TLS, DOCKER_TLS_VERIFY |
| Build / misc | BUILDKIT_PROGRESS, NO_COLOR |
Reference: Compose envvars, Docker CLI environment variables.
When deploying to a remote Docker host (direct TCP or Hawser), variables from the env file are used for substitution only — they replace ${VAR} placeholders in your compose file.
To make variables visible inside containers (via the env command), you must explicitly list them in the environment: section:
services:
  app:
    image: myapp:latest
    environment:
      - MY_VAR=${MY_VAR}
      - DATABASE_URL=${DATABASE_URL}
      - API_KEY=${API_KEY}
This way, Dockhand interpolates the variables locally and sends the final resolved values to the remote host.
For Hawser environments specifically, note that variables set in the agent container's own environment: are not used for interpolation — define them on the stack instead. See Global variables for stacks.
Live deploy console Since 1.0.47
When you deploy a stack — Save & redeploy in the editor, Deploy on a Git stack, or a stack start/stop/down — the compose output streams into a console at the bottom of the editor as it happens, instead of appearing all at once when the operation finishes. You watch each Container ... Recreate / Started line arrive in real time, so a slow pull or a stuck depends_on health check is visible while it is happening rather than after.
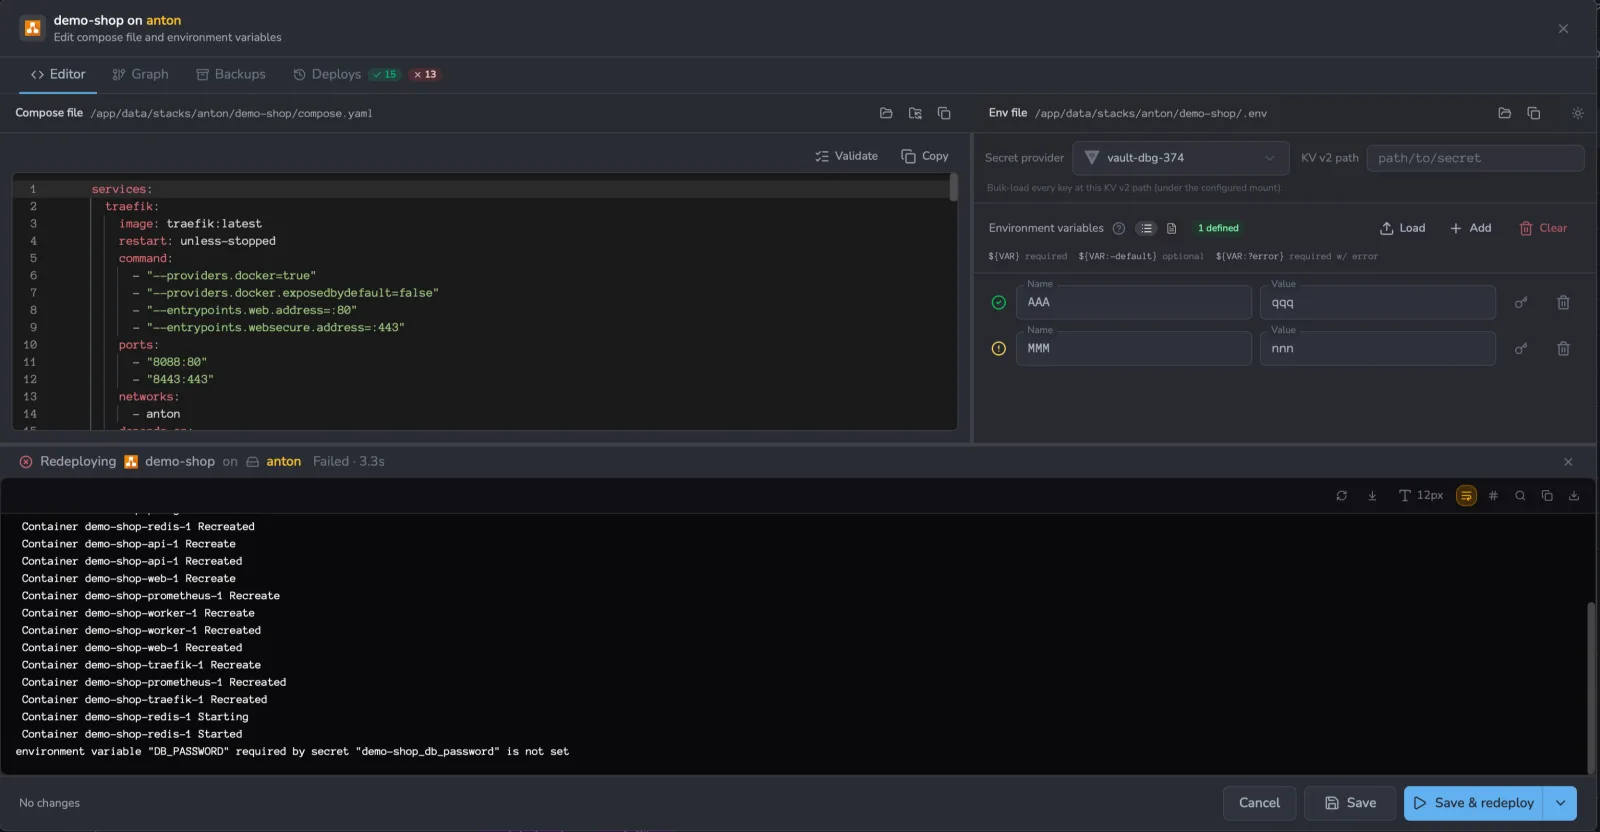
The console header shows what is running and a live status — a spinner while in progress, then a green success or red failure line when it ends. The toolbar lets you adjust font size, toggle line wrapping, search, and copy or download the full log. When a deploy fails, the reason is written on the last line of the same log — there is no separate error dialog to chase.
On Hawser and remote environments the output is streamed from the agent line by line as the compose command runs on the remote host, the same as a local deploy. Older agents that predate this simply return the buffered result at the end — the deploy still works, you just do not see the intermediate lines. Live streaming requires a Hawser agent version v0.2.47 or newer.
Deploy history Since 1.0.47
Every deploy is recorded. Open a stack and switch to the Deploys tab to see its full run history — the tab label carries a success / failure tally (a green success count and a red failure count) so you can tell at a glance how a stack has been behaving.
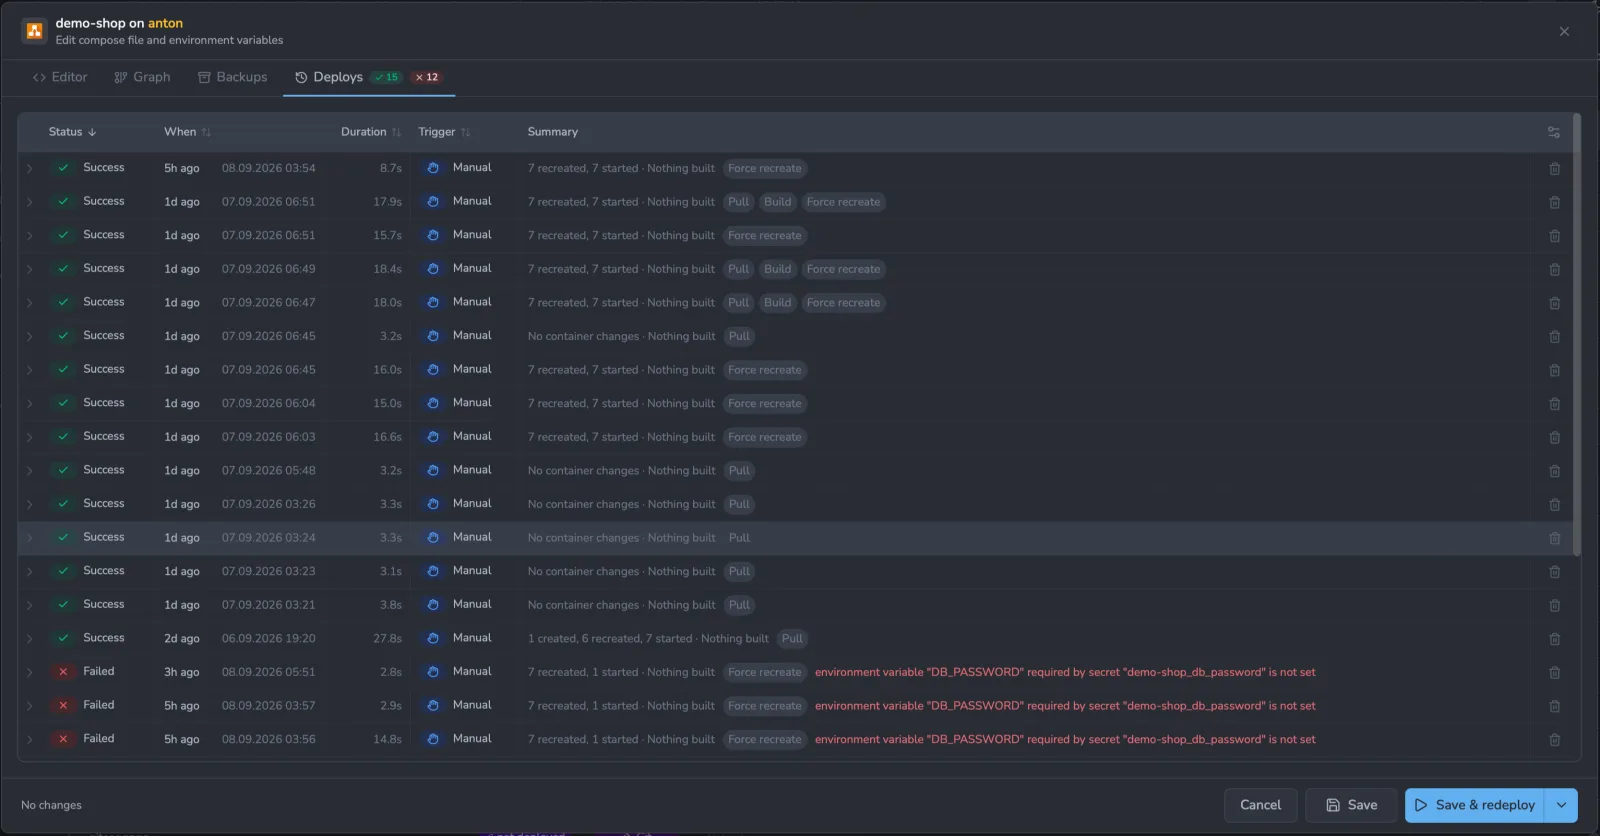
Each row summarises one deploy:
- Status — success or failure.
- When and Duration — when the deploy ran and how long it took.
- Trigger — what started it: a manual deploy, a scheduled sync, or a webhook.
- Summary — what changed (
created/recreated/startedcounts and whether anything was built), the deploy options used (Pull, Build, Force recreate), and, for a failed deploy, the reason.
Expand a row to see the containers it touched, the build result, who or what triggered it, and the complete log for that run — the same searchable, copyable console as a live deploy, kept so you can review a deploy long after it finished.
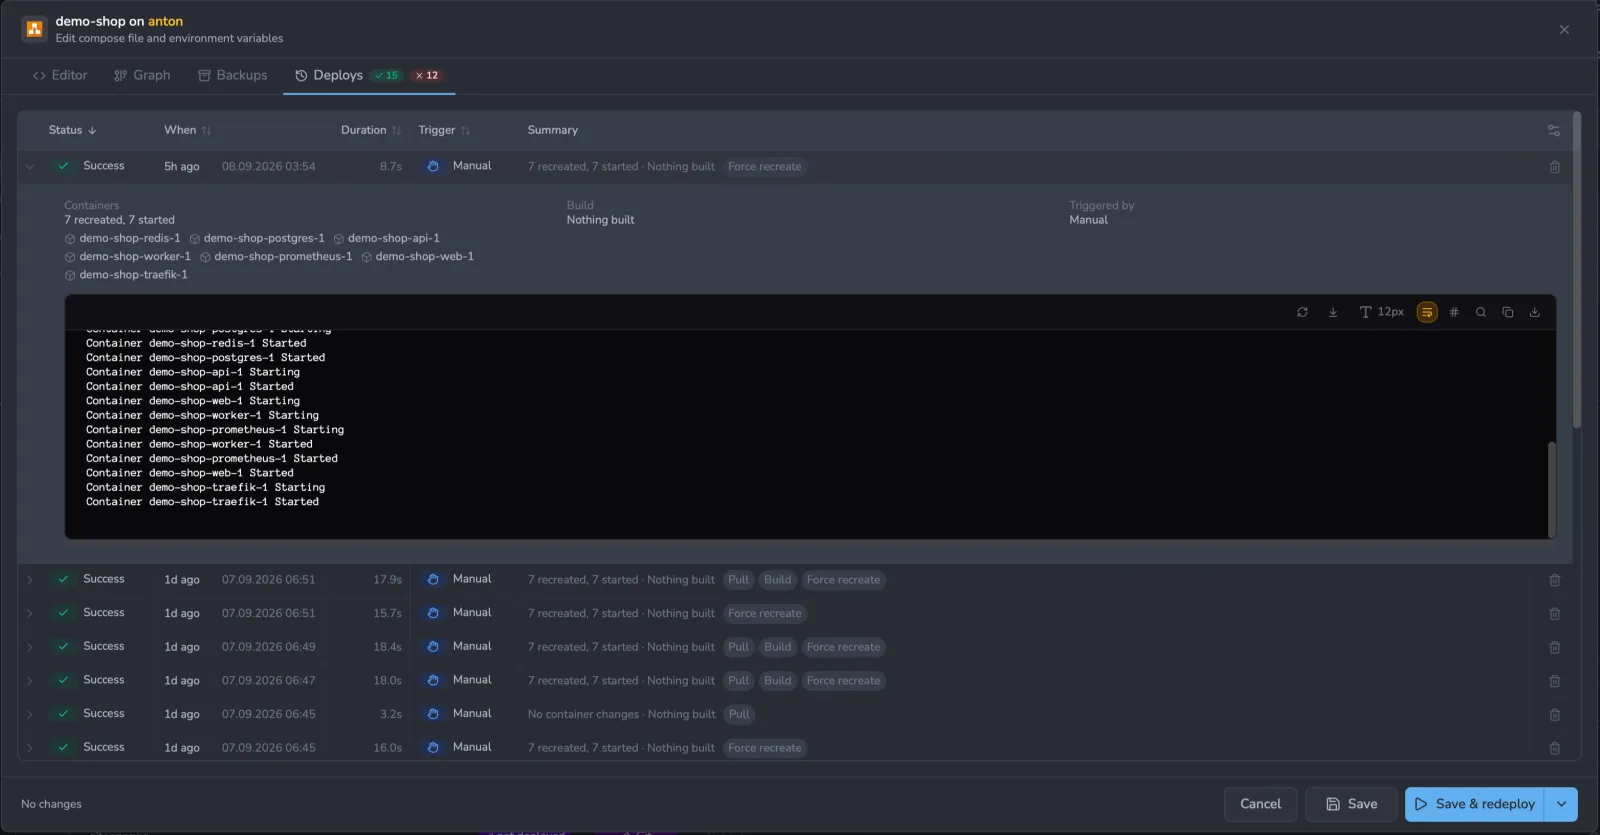
Because the history covers every trigger, it also captures deploys that failed before compose even ran — for example a Git clone or fetch error on a scheduled sync — each with its reason in the log, so a stack that quietly stopped updating leaves a visible trail.
Stack icons Since 1.0.44
Give a stack its own icon so it stands out in the list. Open the stack and click the icon next to its name (Change stack icon) to open the picker. The choice is saved per stack and per environment, and a set stack icon always shows regardless of the global Use selfh.st icons setting. Use Clear icon to go back to the default.
The picker has three tabs:
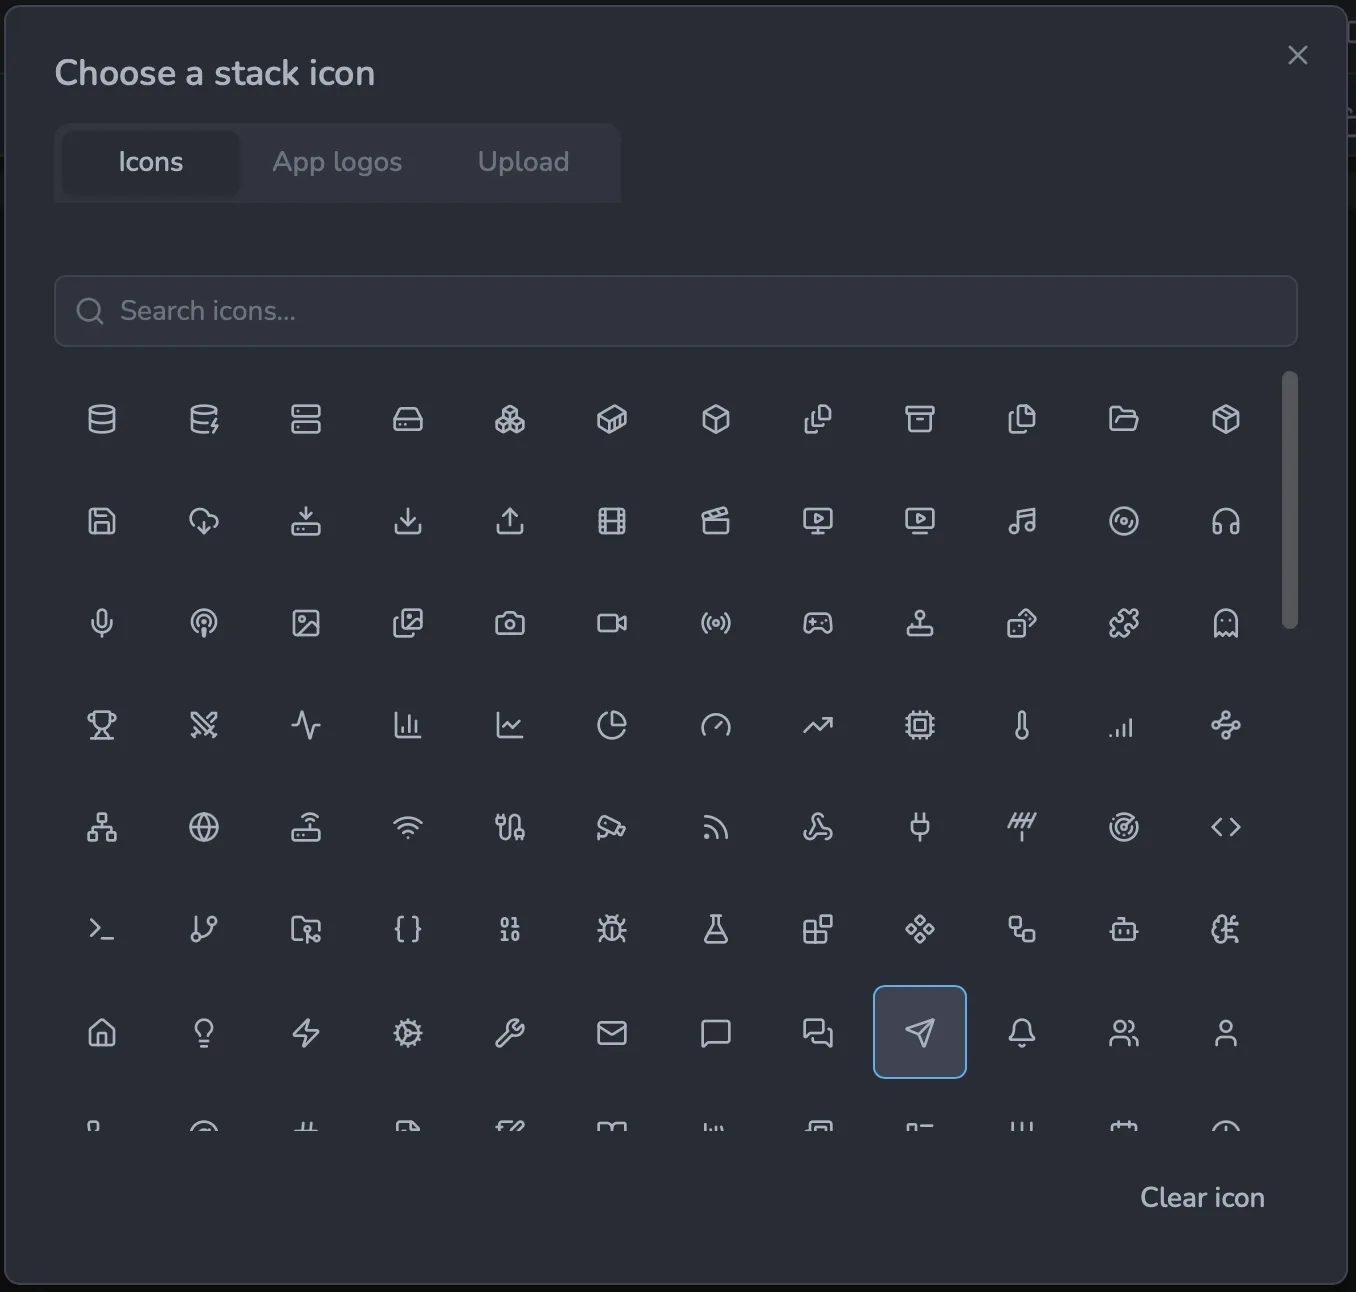
Compose validate Since 1.0.43
Compose validate is a preflight linter for your compose file. Click Validate above the editor and Dockhand checks the file for problems before you deploy, showing each issue inline in the editor and in a panel beside it.
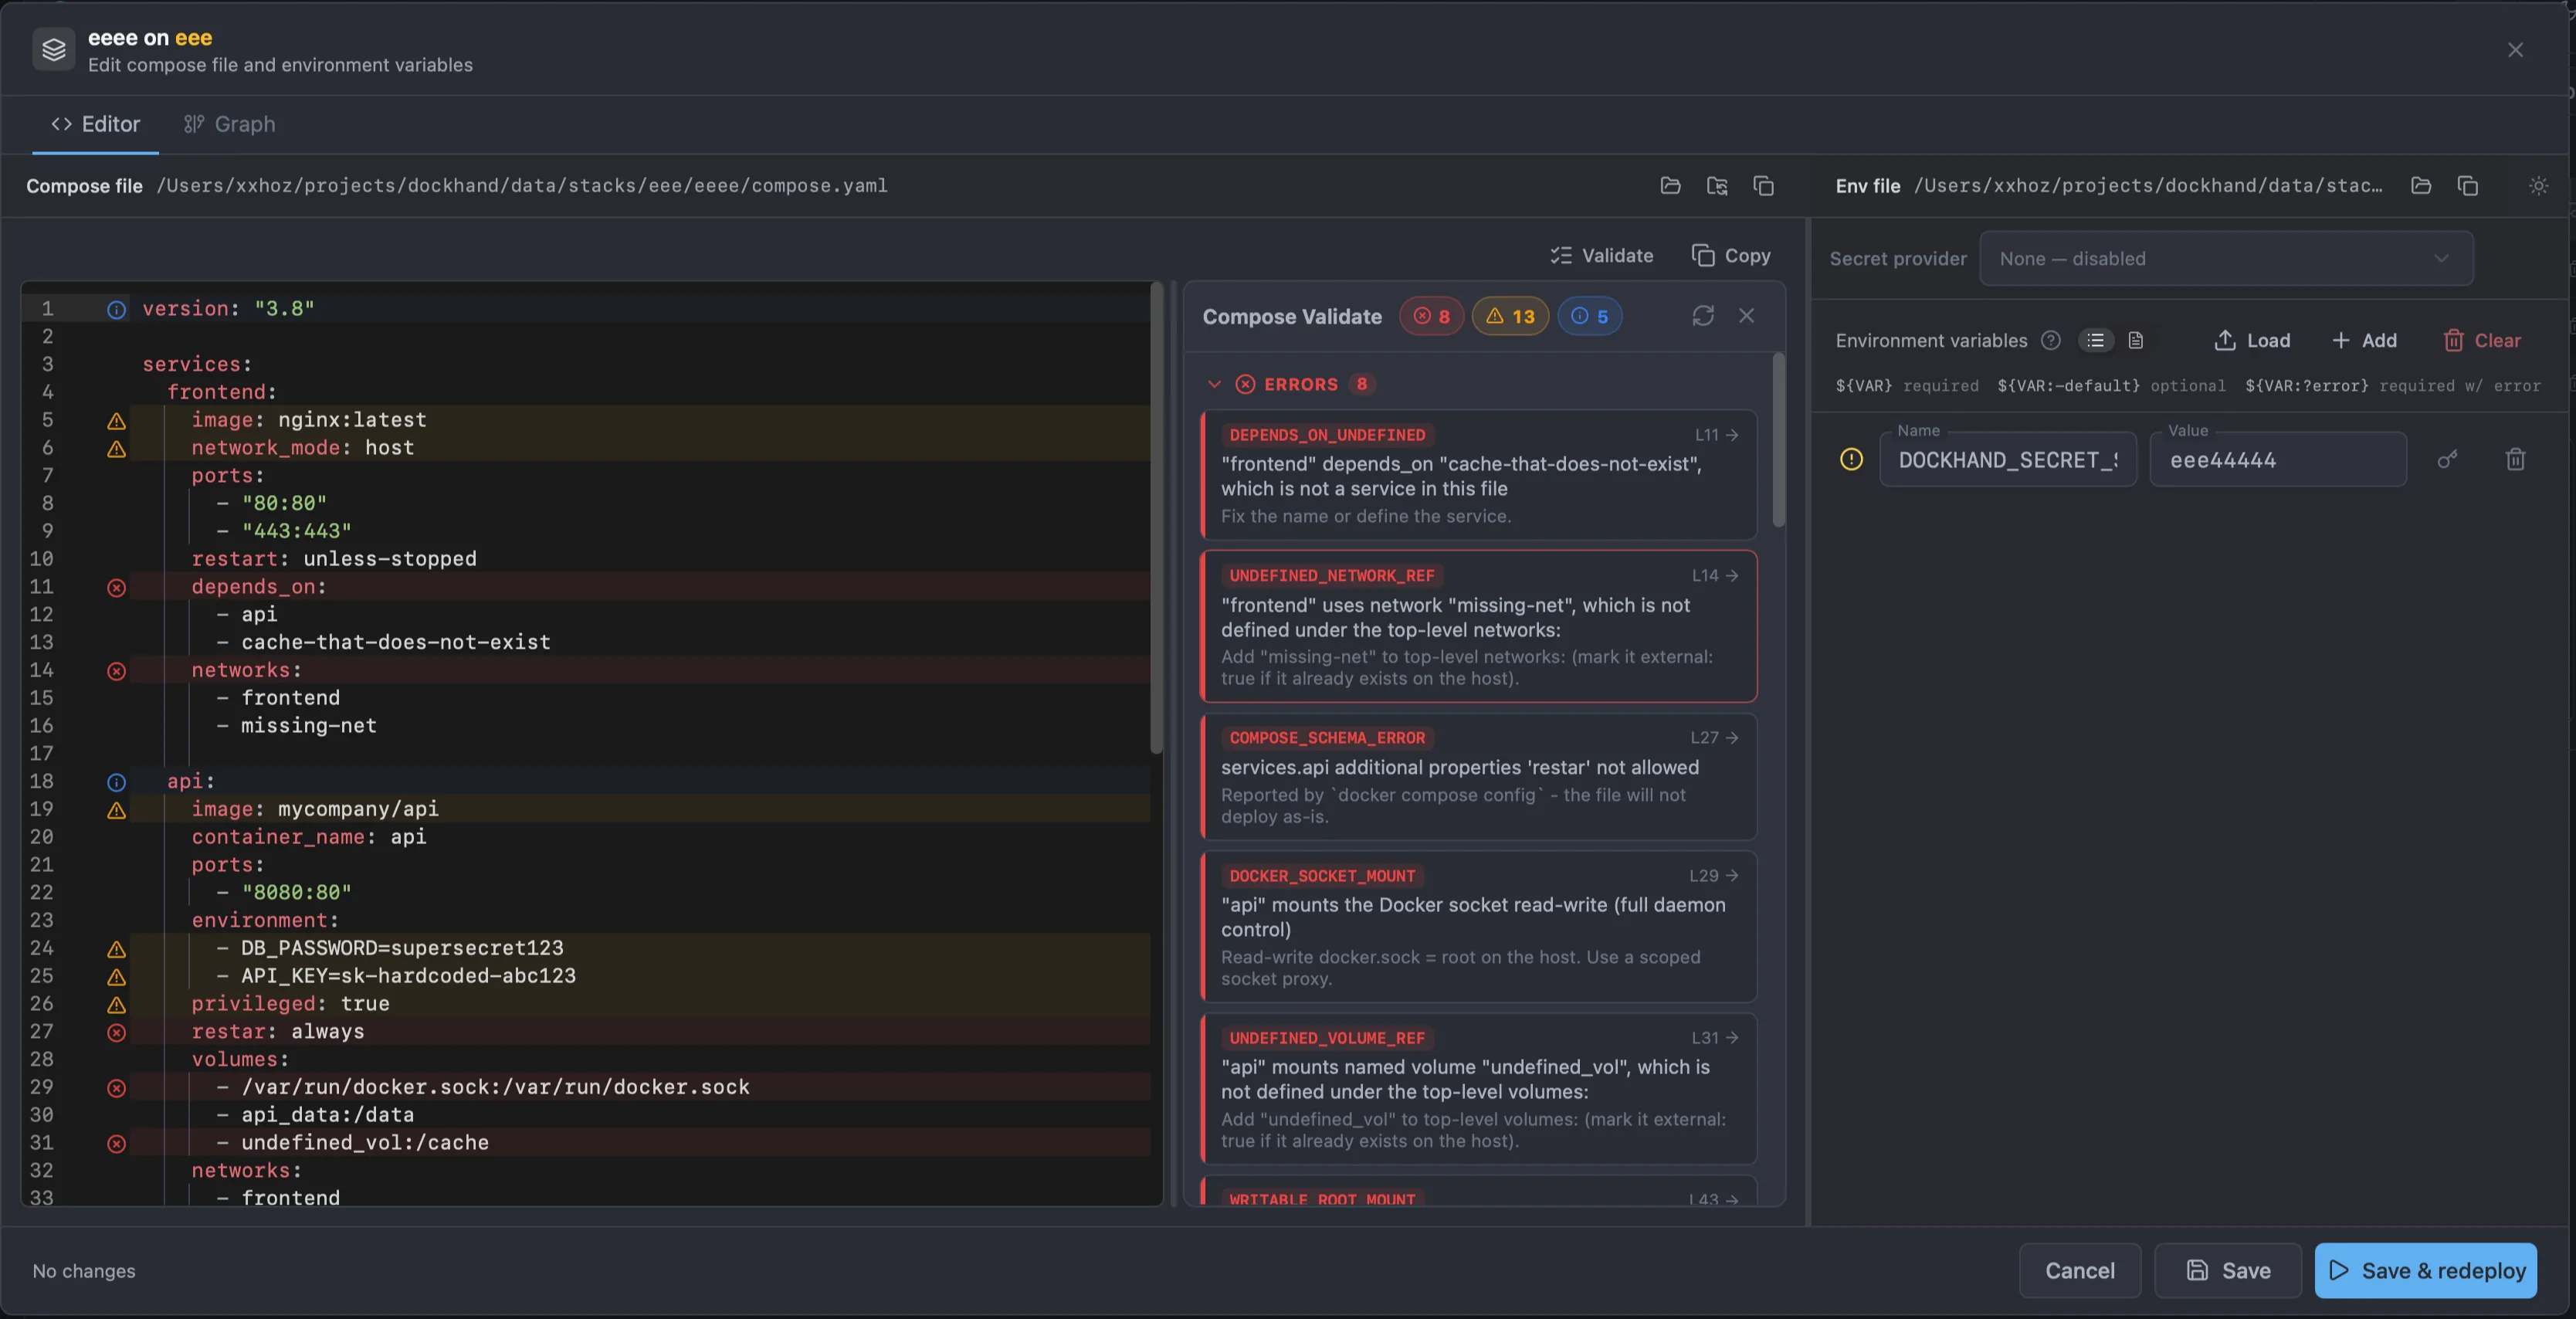
It draws on two independent sources:
- Docker's own validator. Dockhand runs
docker compose configon the file, so any schema or syntax error Docker itself would reject (a wrong field type, an unknown key it drops, a bad interpolation, aninclude:/extends:problem) is surfaced with its line. This is the authoritative "will it even deploy" check.configonly renders the file - it does not talk to any Docker daemon - so it runs the same way for local, Direct TCP and Hawser environments. - Dockhand's own rule set. A catalog of checks that go beyond what
docker compose configcan know - a host port already taken by another stack on the same environment, a database exposed on all interfaces, a hard-coded secret inenvironment:, a typo in a key that Docker would silently ignore, a writable mount of a host system path, and more.
Findings and severities
Each finding has a severity and, where the problem points at a specific line, an editor marker (a gutter icon plus a faint line tint). Click a marker to jump to that finding in the panel, or click a finding to jump to its line in the editor.
- Errors - the file will not deploy as-is, or a definite mistake (duplicate host port, a service that depends on a service that does not exist, an undefined network or volume reference, a read-write mount of the Docker socket or a host system path).
- Warnings - risky or fragile, but valid (a
:latest/ untagged image, a privileged container,network_mode: host, a near-privilegedcap_add, a database port published on all interfaces, a hard-coded secret value, a typo`d key). - Suggestions - advisory nudges (the obsolete top-level
version:key, a service with norestart:policy).
One-click fixes
Where a fix is completely unambiguous, the finding shows a small Fix button that rewrites the compose in place and re-validates, so the finding drops off the list. Fixes are only offered when there is exactly one correct edit - a typo whose intended key is known, the obsolete version: line, a database port to bind to 127.0.0.1, or a missing restart policy. Problems that need a real decision (which port to change, whether a network should be external, which image tag to pin) are never auto-fixed - they show the problem and a hint instead.
The rule catalog
Dockhand's rules are a plugin catalog. Each rule has a stable id (shown on every finding, e.g. DUPLICATE_HOST_PORT) and a default severity. The check is advisory - Compose validate never blocks a deploy, it only reports. The built-in rules:
| Rule | Group | Severity | Fix | Checks for |
|---|---|---|---|---|
NO_SERVICES | Correctness | Error | - | the compose file defines no services |
DUPLICATE_HOST_PORT | Correctness | Error | - | two services in the stack publish the same host port |
CROSS_STACK_PORT_COLLISION | Correctness | Error | - | a host port already in use by another container on the environment |
DEPENDS_ON_UNDEFINED | Correctness | Error | - | depends_on a service not defined in the file |
UNDEFINED_NETWORK_REF | Correctness | Error | - | a service uses a network not defined at the top level |
UNDEFINED_VOLUME_REF | Correctness | Error | - | a service mounts a named volume not defined at the top level |
CONTAINER_NAME_COLLISION | Correctness | Error | - | container_name already used by a container on the environment |
MISSING_EXTERNAL_RESOURCE | Correctness | Error | - | an external network or volume does not exist on the environment |
SECRET_IN_ENVIRONMENT | Security | Warning | - | a secret-looking value hard-coded in environment: instead of a secret / ${VAR} |
DOCKER_SOCKET_MOUNT | Security | Error / Warning | - | a mount of the Docker socket (read-write = error, read-only = warning) |
WRITABLE_ROOT_MOUNT | Security | Error / Warning | - | a bind mount of a host system path such as /, /etc, /var (writable = error, read-only = warning) |
PRIVILEGED_CONTAINER | Security | Warning | - | a service runs privileged (full host access) |
CAP_ADD_DANGEROUS | Security | Warning | - | a near-privileged capability in cap_add (e.g. SYS_ADMIN) |
HOST_NETWORK_MODE | Security | Warning | - | network_mode: host - no network isolation |
DB_PORT_ON_ALL_INTERFACES | Security | Warning | Yes | a database / cache port published on all interfaces (fix binds it to 127.0.0.1) |
LATEST_TAG | Reliability | Warning | - | an image uses :latest or is untagged |
MISSING_RESTART_POLICY | Reliability | Suggestion | Yes | a service has no restart policy (fix adds restart: unless-stopped) |
MISSING_HEALTHCHECK | Reliability | Suggestion | - | a service defines no healthcheck, so Docker cannot tell whether it is actually ready |
UNUSED_VOLUME | Correctness | Suggestion | - | a top-level named volume is declared but never mounted by any service |
OBSOLETE_VERSION_KEY | Schema | Suggestion | Yes | the obsolete top-level version: key (fix removes the line) |
UNKNOWN_SERVICE_KEY | Schema | Warning | Yes | a service key that looks like a typo of a real Compose key (fix renames it) |
UNKNOWN_TOP_LEVEL_KEY | Schema | Warning | Yes | a top-level key that looks like a typo (fix renames it) |
On top of these, any schema or syntax error from docker compose config appears as a COMPOSE_SCHEMA_ERROR finding. Validation is read-only - it inspects the compose text and, for the context-aware rules, the target environment's live containers, networks and volumes, and never changes anything until you click a Fix or deploy.
Secrets
Dockhand separates regular environment variables from secrets. Regular variables live in .env files on disk, while secrets are stored encrypted in the database and injected at runtime. This ensures sensitive values like database passwords, API keys, and private tokens are never exposed in plain-text files.
Secrets can also come from an external secret store (HashiCorp Vault, 1Password, Bitwarden, Infisical, Doppler, and more) instead of being typed into Dockhand - see External secrets.
Secrets vs regular variables
| Regular variables | Secrets | |
|---|---|---|
| Storage | .env file on disk (plain text) |
Database only (AES-256-GCM encrypted) |
| Visible after saving | Yes — editable in the text editor | No — masked as ***, cannot be viewed again |
| Survives Docker restart | Yes — Docker reads .env directly |
No — requires Dockhand to redeploy (see below) |
| External editing | Yes — edit via SSH, git, or any text editor | No — only manageable through Dockhand UI or API |
| Backed up with files | Yes — included in filesystem backups | No — requires database backup |
Marking a variable as secret
In the environment variables editor, click the key icon next to any variable to toggle it as a secret. The key icon turns amber to indicate the variable is marked as secret.
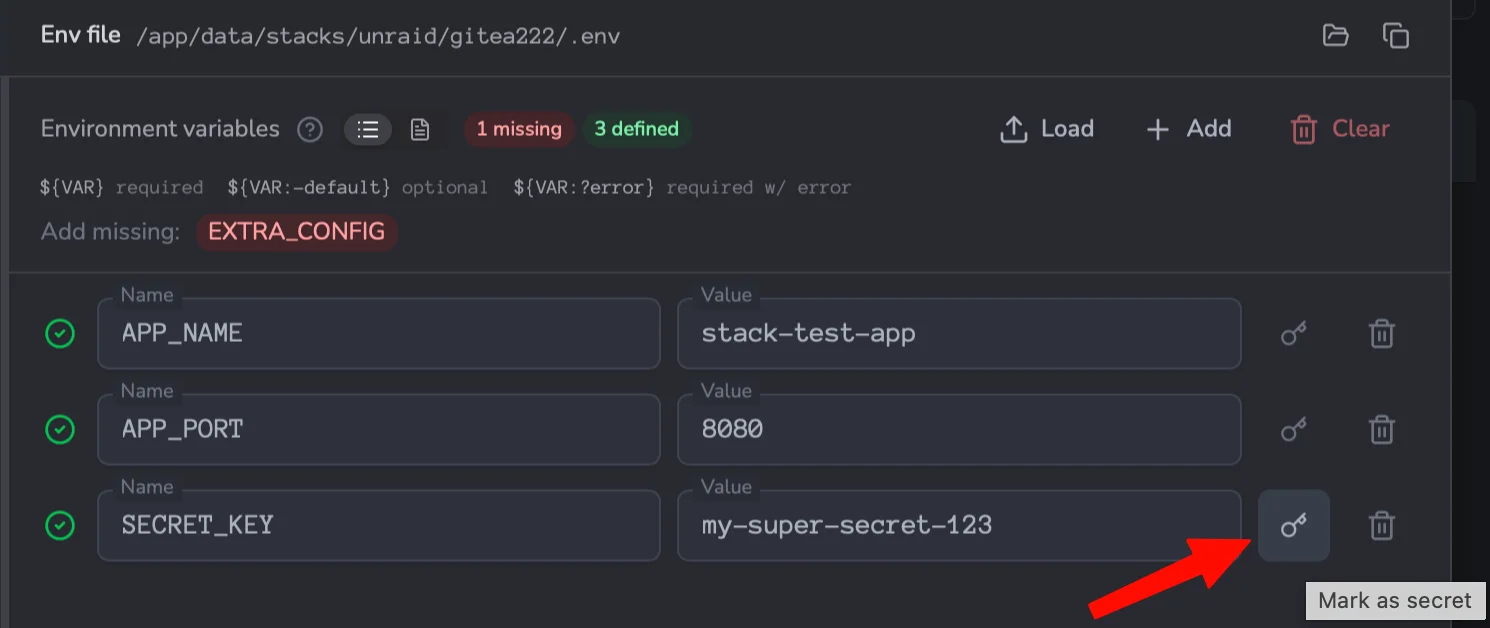
You can also mark variables as secret in the raw text editor mode. When switching between form and text views, secret flags are preserved.
How secrets are stored
- Encrypted with AES-256-GCM in the Dockhand database
- Never written to any file on disk — not to
.env, not to.env.dockhand, not to temporary files - Values are masked (
***) in the UI after saving — they cannot be retrieved or viewed again. To change a secret, you must enter a new value - The encryption key is automatically derived from your Dockhand instance
Since secrets are stored only in the database, a filesystem backup of your .env files will not include secrets. Make sure your backup strategy includes the Dockhand database (SQLite file or PostgreSQL dump).
How secrets are injected
When you deploy a stack, Dockhand injects secrets as shell environment variables passed to the docker compose process. The .env file on disk contains only regular variables — secrets exist only in the process environment for the duration of the deployment.
# Conceptual example — this is what Dockhand does internally:
DB_PASSWORD=secret123 API_KEY=abc docker compose --env-file .env up -d
The injection mechanism differs slightly depending on the stack type and deployment target:
| Stack type | Regular variables | Secrets |
|---|---|---|
| Internal / adopted (local) | Read from .env file on disk via --env-file |
Injected as shell environment variables |
| Git stacks (local) | Repo .env + .env.dockhand override file via --env-file |
Injected as shell environment variables |
| Internal / adopted (remote via Hawser) | File contents sent to agent in stack file payload | Sent separately via secure channel, injected as shell env on remote host |
| Git stacks (remote via Hawser) | Repo .env + .env.dockhand sent in stack files |
Sent separately via secure channel, injected as shell env on remote host |
Making secrets available inside containers
Secrets (and all environment variables) are injected into the docker compose process, not directly into containers. This means they are available for variable interpolation (${VAR} syntax) in your compose file, but they are not automatically visible inside containers.
To pass secrets into your containers, you must explicitly reference them in the environment: section of your compose file:
services:
  app:
    image: myapp:latest
    environment:
      - DB_PASSWORD=${DB_PASSWORD}    # Secret from Dockhand
      - API_KEY=${API_KEY}            # Secret from Dockhand
- LOG_LEVEL=${LOG_LEVEL:-info} # Regular var with defaultUsing only env_file: .env in your compose file will read the raw .env file from disk, which does not contain secrets. Secrets are only available via ${VAR} interpolation from the shell environment. Always use the environment: section for secrets.
Important: Docker restart behavior
When Docker restarts (host reboot, daemon restart, or docker restart), containers with restart: always or restart: unless-stopped are restarted by Docker directly — not by Dockhand.
Since secrets are only injected via shell environment during docker compose up, Docker-restarted containers will not have their secret values. Any ${VAR} references to secrets will resolve to empty strings, which can cause applications to fail with authentication errors, missing database connections, or other configuration issues.
This affects only secrets — regular variables stored in .env files are read by Docker Compose and baked into the container configuration at deploy time, so they survive restarts.
Workarounds
- Redeploy from Dockhand after a restart. Open the stack in Dockhand and click Deploy. Secrets are re-injected automatically during the deployment process.
- Use scheduled deployments. Configure a Git stack auto-sync or a container auto-update schedule. This ensures stacks are periodically redeployed with fresh secrets, even after unattended restarts.
-
Minimize secret usage. Only mark truly sensitive values (passwords, tokens, private keys) as secrets. Configuration values that are not sensitive (ports, log levels, feature flags) should remain as regular variables in the
.envfile, where they survive Docker restarts.
Why this happens
Docker Compose stores container configuration (image, ports, volumes, networks) in Docker's internal state — but not the shell environment used during docker compose up. When Docker restarts a container, it uses the stored configuration, which includes variables from .env files (these were resolved at deploy time) but not the transient shell environment where secrets were injected.
Troubleshooting
| Symptom | Cause | Fix |
|---|---|---|
| App shows empty passwords or "authentication failed" after host reboot | Docker restarted the container without Dockhand, so secrets were not injected | Redeploy the stack from Dockhand to re-inject secrets |
Secret value shows *** and I need to see it |
Secrets are write-only — once saved, the original value cannot be retrieved | Enter a new value for the secret. If you need the current value, check the running container: docker exec <container> env | grep VAR |
| Secret is set in Dockhand but container sees an empty value | The variable is not referenced in the compose file's environment: section |
Add - MY_SECRET=${MY_SECRET} to the service's environment: list and redeploy |
| Secret works locally but not on remote Hawser host | Same as above — secrets require explicit environment: references in the compose file for both local and remote deployments |
Verify the compose file references the variable, then redeploy |
| I marked a variable as secret by mistake | The original plain-text value has been replaced with an encrypted entry in the database | Click the key icon again to unmark it as secret, then re-enter the value as a regular variable |
| Secrets missing after restoring a database backup | The encryption key may differ between Dockhand instances | If restoring to the same instance, secrets should decrypt normally. If migrating to a new instance, you will need to re-enter secret values |
Adopting untracked stacks Since 1.0.7
Import Docker Compose stacks from your filesystem. This converts Untracked stacks (where Dockhand doesn't know the compose file location) into Internal stacks that can be fully managed. This is useful for adopting stacks created via CLI or stored in custom locations.
How to import
- Click the Import button on the Stacks page
- Browse to a directory containing compose files
- Either click a compose file directly to import it, or click Scan this folder to find all stacks
- Select which stacks to import and click Import
Recent locations
The import dialog remembers recently browsed locations in the left sidebar. The first location becomes the default starting point when opening the dialog.
Scan results
When scanning a folder, Dockhand recursively searches for Docker Compose files (docker-compose.yml, compose.yml, etc.) and presents them for import:
- Compose name - If the compose file defines a top-level
nameproperty, it is used as the stack name instead of the directory name Since 1.0.28 - Service count - Number of services defined in the compose file
- Running indicator - Shows if a stack is already running on the current environment
- .env detection - Automatically detects associated .env files
Running stack detection
When scanning, Dockhand uses the compose file's name property (if defined) or the directory name as the stack name. Running stacks are identified by matching this project name against the com.docker.compose.project container label. This ensures stacks started outside Dockhand with a name property are correctly detected as running.
- Running stacks display a green indicator with the container count
- Running stacks are not pre-selected for import (they're likely already managed)
Imported stacks become Internal (fully managed), but their compose and .env files remain in their original location - they are not copied to Dockhand's data directory. This allows you to continue using your existing workflows (git, SSH, etc.) alongside Dockhand.
Relative volume paths Since 1.0.8
Imported stacks with relative volume paths (like ./data:/app/data) work correctly because Dockhand uses the original compose file location as the working directory when deploying.
For example, if you import a stack from /opt/myapp/docker-compose.yml with:
services:
  app:
    image: myapp:latest
    volumes:
      - ./data:/app/data    # Resolves to /opt/myapp/data
      - ./config:/app/config
The relative paths ./data and ./config will resolve relative to /opt/myapp/, not Dockhand's data directory.
Relative volume paths (./data) resolve against the stack directory, so the files must be on the same host as the daemon. On a local socket they just work. Hawser environments handle it automatically — the agent writes the files to the remote host. For Direct TCP environments, set a Remote stacks directory so Dockhand stages the files onto the remote host; without it, use absolute paths or named volumes. See Where stack files live for the full breakdown.
Mounting external stack directories
To import stacks from directories outside the container, you need to mount those directories as volumes.
For example, if your stacks are in /opt/stacks on the host:
docker run -d \
  --name dockhand \
  -v /var/run/docker.sock:/var/run/docker.sock \
  -v dockhand_data:/app/data \
  -v /opt/stacks:/opt/stacks \
  -p 3000:3000 \
  fnsys/dockhand
You can mount multiple directories if your stacks are spread across different locations:
docker run -d \
  --name dockhand \
  -v /var/run/docker.sock:/var/run/docker.sock \
  -v dockhand_data:/app/data \
  -v /opt/stacks:/opt/stacks \
  -v /home/user/projects:/home/user/projects \
  -v /srv/docker:/srv/docker \
  -p 3000:3000 \
fnsys/dockhandThe path inside the container should match the host path (e.g., -v /opt/stacks:/opt/stacks) so that Docker Compose can resolve relative volume paths correctly when Dockhand executes compose commands.
When you set a stack's compose file to a custom path, that path must be inside a volume mounted into the Dockhand container. If it isn't, Dockhand writes the compose file to the container's own throwaway filesystem: it looks saved, but it is lost the next time the container is recreated (an update or restart), and the stack's compose then appears blank. Either keep the default location (which lives in the dockhand_data volume) or add a bind mount for your chosen path (as shown above) before pointing a stack at it. Dockhand warns you if you pick a location it can't persist to.
Git integration
Deploy stacks directly from Git repositories with automatic synchronization. Configure Git credentials in Settings → Git.
Triggers: Scheduled auto-sync • Webhook from CI/CD • Manual deploy button
Configuration
- Repository - Select from configured Git repositories or add a new one
- Branch - Target branch to track. Pick one from a live list of the repository's branches (fetched from the remote), or type a name. This is a per-stack override Since 1.0.44: two stacks can track different branches of the same repository, and changing it re-deploys the stack from the new branch.
- Compose file path - Path to the compose file (default:
docker-compose.yml) - Context directory - Working directory for Docker Compose, relative to the repo root (see Context directory)
- Auto-sync - Enable automatic sync on a schedule (see Schedules)
- Schedule - Cron expression for auto-sync timing
Deploy options Since 1.0.23
Each git stack has three per-stack deploy options that control how Docker Compose runs during deployment:
| Option | Default | Description |
|---|---|---|
| Build images on deploy | Off | Adds --build to docker compose up. Builds images from Dockerfiles before starting containers. Enable if your compose file has build: directives. |
| Disable build cache Since 1.0.28 | Off | Adds --no-cache to docker compose up. Forces a clean build without using cached layers. Only available when Build images on deploy is enabled. Useful when external dependencies (base images, package repos) have updated but your Dockerfile hasn't changed. |
| Re-pull images | Off | Adds --pull always to docker compose up. Forces Docker to pull the latest version of every image before deploying, even if it already exists locally. Useful for CI/CD workflows that push to static tags like :latest or :prod. |
| Force redeployment | Off | Always redeploy the stack on webhook or scheduled sync, even if no git changes are detected. Without this, webhooks and scheduled syncs skip the deploy when the git commit hasn't changed. |
If your CI pipeline builds and pushes images to a registry with a fixed tag (e.g. :latest), then triggers Dockhand via webhook, enable both Re-pull images and Force redeployment. This ensures Dockhand always pulls the freshly-pushed image and redeploys, even though the compose file hasn't changed in git.
Deployment behavior
Git stacks use intelligent deployment that only redeploys when necessary:
| Trigger | When does it redeploy? |
|---|---|
| Scheduled auto-sync | Only if git commit changed (or Force redeployment is on) |
| Webhook (from GitHub/GitLab/Gitea/Forgejo) | Only if git commit changed (or Force redeployment is on) |
| Manual "Deploy" button | Always (forces redeploy) |
| "Save and deploy" button | Always (forces redeploy) |
What counts as a change? Dockhand checks if any files in the stack's compose directory changed (using git diff). Only changes to files in that directory trigger a redeploy:
- Changed compose file - redeploys
- Changed .env file in compose directory - redeploys
- Changed config files, scripts in compose directory - redeploys
- Changed files elsewhere in repo - skipped (not in compose directory)
- No new commits - skipped
Multiple stacks can use the same Git repository with different compose paths. Each stack only redeploys when its own directory changes - commits to other directories are ignored.
Even when a redeploy is triggered, Docker Compose only recreates containers whose configuration actually changed. Other containers keep running without interruption.
Directory deployment
When deploying a Git stack, Dockhand clones the entire directory containing your compose file, not just the compose file itself. This means:
- Any
.envfiles referenced byenv_file:directives are automatically available - Config files, secret files, and other supporting files are included
- Multi-file compose setups (
compose.yaml+compose.override.yaml) work out of the box
All files in your compose directory are automatically cloned. Whether your compose uses env_file: .env, env_file: prod.env, or references config files - they'll all be available.
If your git repository contains compose files with relative volume or file paths (e.g., ./config:/app/config), these files are cloned into Dockhand's data directory. For the Docker daemon on the host to find them, you need to configure Dockhand with matching volume paths. See Data storage & volume paths for setup instructions.
Clone directory location
Git repositories are cloned into the git-repos/ subdirectory inside Dockhand's data directory. Each stack gets its own directory organized by environment name:
$DATA_DIR/git-repos/{environmentName}/{stackName}/For example, with DATA_DIR=/opt/dockhand, an environment called production, and two git stacks:
/opt/dockhand/
└── git-repos/
    └── production/
        ├── webapp/               # stack "webapp" on "production"
        │   ├── docker-compose.yml
        │   ├── .env
        │   └── config/
        └── monitoring/           # stack "monitoring" on "production"
└── docker-compose.ymlIf your compose file is in a subdirectory of the repository (e.g., deploy/docker-compose.yml), Dockhand sets the working directory to that subdirectory when running docker compose. Relative paths in your compose file resolve from there. If your compose file references files outside its directory, use the Context directory setting to widen the scope.
Context directory Since 1.0.28
By default, Dockhand uses the compose file's parent directory as the working directory for Docker Compose. The Context directory field lets you override this to a wider directory (relative to the repo root), so files outside the compose file's folder become available for volume mounts, build contexts, and env_file: references.
Example: your repo has shared config files referenced by multiple stacks:
my-repo/
├── shared/
│   ├── certs/
│   │   └── ca.pem
│   └── config.toml
├── apps/
│   ├── webapp/
│   │   └── compose.yaml      ← volumes: - ../../shared/config.toml:/config.toml
│   └── api/
│       └── compose.yaml
└── monitoring/
    └── gotify/
        └── compose.yaml
Without a context directory, Dockhand only copies apps/webapp/ — the ../../shared/ reference breaks because those files aren't included. Setting Context directory to . (repo root) makes the entire repository available:
| Setting | Value |
|---|---|
| Compose file path | apps/webapp/compose.yaml |
| Context directory | . |
You can also set it to a subdirectory. For example, if your stacks share a deploy/ folder:
my-repo/
├── deploy/
│   ├── shared-config.env
│   ├── webapp/
│   │   └── compose.yaml      ← env_file: ../shared-config.env
│   └── api/
│       └── compose.yaml
└── src/
└── ...| Setting | Value |
|---|---|
| Compose file path | deploy/webapp/compose.yaml |
| Context directory | deploy |
This copies the entire deploy/ directory, making shared-config.env available via the relative path ../shared-config.env from the compose file's location.
When a context directory is set, Dockhand monitors the entire context directory for changes — not just the compose file's folder. A change to shared/config.toml will trigger a redeploy for any stack whose context directory includes it.
The compose file path must point to a file within the context directory. For example, if context directory is deploy, then the compose file path must start with deploy/.
How .env files work
Dockhand automatically detects a .env file in the compose directory and passes it to Docker Compose via --env-file. No configuration is needed for the standard .env file.
Docker Compose uses environment files in two ways:
- Variable substitution - Replaces
${VAR}placeholders in the compose file (e.g.,image: ${REGISTRY}/app) - Container environment - The
env_file:directive can reference any file (e.g.,env_file: prod.env) to pass variables to containers at runtime
The Additional env file field is for non-standard env file names (e.g. .env.production, .env.staging). If configured, it is added as a second --env-file and its values override the default .env.

Environment variable overrides
The right panel in the git stack editor lets you define environment variables that override values from the repository's env files during deployment. This is useful for setting deployment-specific values (like server URLs, ports, or feature flags) without modifying the repository. Secrets are never written to disk — they are stored in the database and injected via shell environment at deploy time.
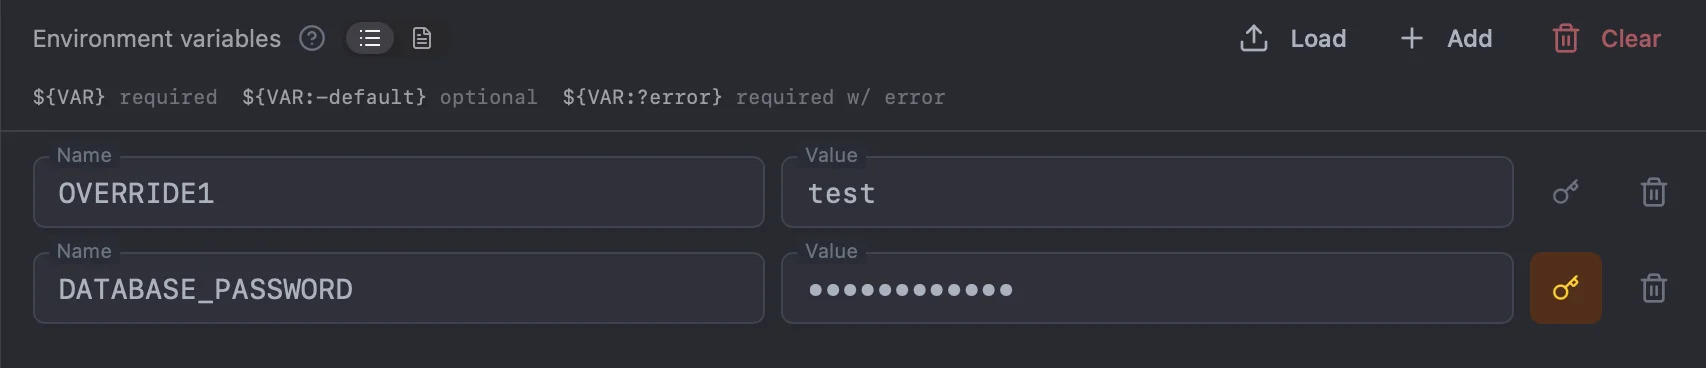
How it works
At deploy time, Dockhand chains --env-file flags in order of precedence:
.envin the compose directory (auto-detected, base defaults)- Additional env file if configured (e.g.
.env.production) - A generated
.env.dockhandoverride file (your edits from the right panel)
Docker Compose applies env files in order, so later files override earlier ones. This means your overrides always win over repository defaults.
Complete example with all three env files:
docker compose -p mystack -f docker-compose.yml \
  --env-file .env \
  --env-file .env.production \
  --env-file .env.dockhand \
  up -d --remove-orphans --force-recreate
Secret variables
Variables marked as secret are stored encrypted in the database and injected via shell environment at deploy time — never written to any file on disk. See Secrets for full details on storage, injection, and the Docker restart caveat.
What gets saved
Only variables that differ from the repository's env file (or are new) are stored in the database. Unchanged values are not saved, so if the repository updates a default, your stack picks up the new value automatically.
How overrides reach your containers
Variables set in the overrides panel (and secrets) are injected into the shell environment of the docker compose process. This means they are available for compose file interpolation using ${VAR_NAME} syntax, but they are not automatically passed into containers.
To make Dockhand-managed variables available inside your containers, you must explicitly reference them in your compose file:
Option 1: Using the environment: section (recommended)
services:
  web:
    image: myapp:latest
    environment:
      - SECRET_KEY=${SECRET_KEY}
      - DATABASE_URL=${DATABASE_URL}
      - DEBUG=${DEBUG:-false}
Option 2: Reference .env.dockhand in env_file:
Dockhand writes non-secret overrides to .env.dockhand. You can reference it directly in your compose file:
services:
  web:
    image: myapp:latest
    env_file:
      - .env            # Base values from repo
      - .env.dockhand   # Dockhand overrides (later files win)
Note: Secrets are never written to disk, so they won't appear in .env.dockhand. Use environment: with ${VAR} syntax for secrets.
Using only env_file: .env in your compose file reads the raw file from disk, bypassing Dockhand's overrides entirely. If you need overrides to reach containers via env_file:, add .env.dockhand as a second entry.
Force recreate behavior
When environment variables change in the repository, Docker Compose doesn't automatically detect this (it only detects compose file changes). Dockhand handles this by using --force-recreate whenever git changes are detected in the compose directory:
| Git changes detected | Force recreate | Result |
|---|---|---|
| No | No | Skipped (no changes) |
| Yes | Yes | Containers recreated with updated env vars |
The --force-recreate flag ensures containers are recreated even if the compose file hasn't changed. This is necessary when only environment variables (in .env or the additional env file) were updated, as Docker Compose wouldn't otherwise detect the change.
Webhooks
Trigger stack deployments from external services like GitHub, GitLab, or CI/CD pipelines.
Push to repo → webhook triggers → Dockhand pulls changes → deploys updated stack
Webhook URL
Each Git stack gets a unique webhook URL:
https://your-dockhand.com/api/git/stacks/{id}/webhookSupported methods
- POST - Standard webhook with signature verification (GitHub, GitLab, CI/CD)
- GET - Simple trigger with secret as query parameter
Webhook secret
For security, configure a webhook secret. Dockhand supports three authentication methods:
| Method | Header / parameter | Best for |
|---|---|---|
| HMAC-SHA256 | X-Hub-Signature-256: sha256=<hex> |
GitHub webhooks |
| Plain token | X-Gitlab-Token: <secret> |
GitLab webhooks and CI/CD |
| Query parameter | ?secret=<secret> (GET only) |
Simple scripts, quick testing |
GitHub
In your GitHub repository, go to Settings > Webhooks > Add webhook. Paste the webhook URL, set content type to application/json, and enter your secret. GitHub sends the X-Hub-Signature-256 header automatically.
GitLab
In your GitLab project, go to Settings > Webhooks. Paste the webhook URL and enter your secret as the Secret token. GitLab sends the X-Gitlab-Token header automatically.
Gitea / Forgejo
In your Gitea/Forgejo repository, go to Settings > Webhooks > Add webhook > Gitea. Paste the webhook URL into Target URL and enter your secret in the Secret field. Leave other settings at their defaults.
Gitea/Forgejo sends the X-Hub-Signature-256 header (same format as GitHub), so signature verification works automatically.
GITEA__webhook__ALLOWED_HOST_LIST (Gitea) or FORGEJO__webhook__ALLOWED_HOST_LIST (Forgejo) environment variable to allow outbound webhook requests. See the Gitea docs / Forgejo docs for details.
CI/CD pipelines
You can trigger webhooks from any CI/CD pipeline using curl. Store the webhook secret as a CI/CD variable (e.g. DOCKHAND_WEBHOOK_SECRET).
GitLab CI (recommended — uses native GitLab token header):
deploy:
  stage: deploy
  script:
    - |
      curl -sf -X POST "https://dockhand.example.com/api/git/stacks/42/webhook" \
        -H "X-Gitlab-Token: $DOCKHAND_WEBHOOK_SECRET" \
        -d '{}'
GitHub Actions / generic CI (HMAC-SHA256 signature):
PAYLOAD='{}'
SIGNATURE="sha256=$(echo -n "$PAYLOAD" | openssl dgst -sha256 -hmac "$DOCKHAND_WEBHOOK_SECRET" | awk '{print $NF}')"
curl -sf -X POST "https://dockhand.example.com/api/git/stacks/42/webhook" \
  -H "Content-Type: application/json" \
  -H "X-Hub-Signature-256: $SIGNATURE" \
  -d "$PAYLOAD"
Simple GET (easiest, secret visible in URL):
curl -sf "https://dockhand.example.com/api/git/stacks/42/webhook?secret=$DOCKHAND_WEBHOOK_SECRET"Webhooks only trigger a redeploy if there are new commits since the last sync. If nothing changed, the webhook returns {"success": true, "skipped": true} and no containers are restarted.
Secrets management Since 1.0.42
Dockhand can pull deploy-time secrets from an external secret store and inject them into a stack, so a password never lives in your compose file or a plaintext .env on disk. Secrets are resolved when the stack is deployed, started, recreated, or a service is updated, and are passed to docker compose through the shell environment - exactly like Dockhand's built-in secrets. Nothing is written to disk. Values pulled from a provider are also masked (***) in the container inspect view, so they are not exposed there in plaintext.
Dockhand fetches the value from the provider when the stack deploys, keeps it only in memory, and passes it to docker compose through the shell environment. It is never written to the on-disk .env, never stored in the container image, and never committed anywhere.
Secrets are re-resolved on deploy, start, recreate, and service update - every time the stack is (re)brought up. A plain restart reuses the container's existing environment and does not re-resolve.
Supported providers
Configure providers under Settings → Secrets, then bind one to a stack using the Secret provider dropdown in the stack editor (next to the environment variables, above the compose/env panes). It defaults to None — disabled.
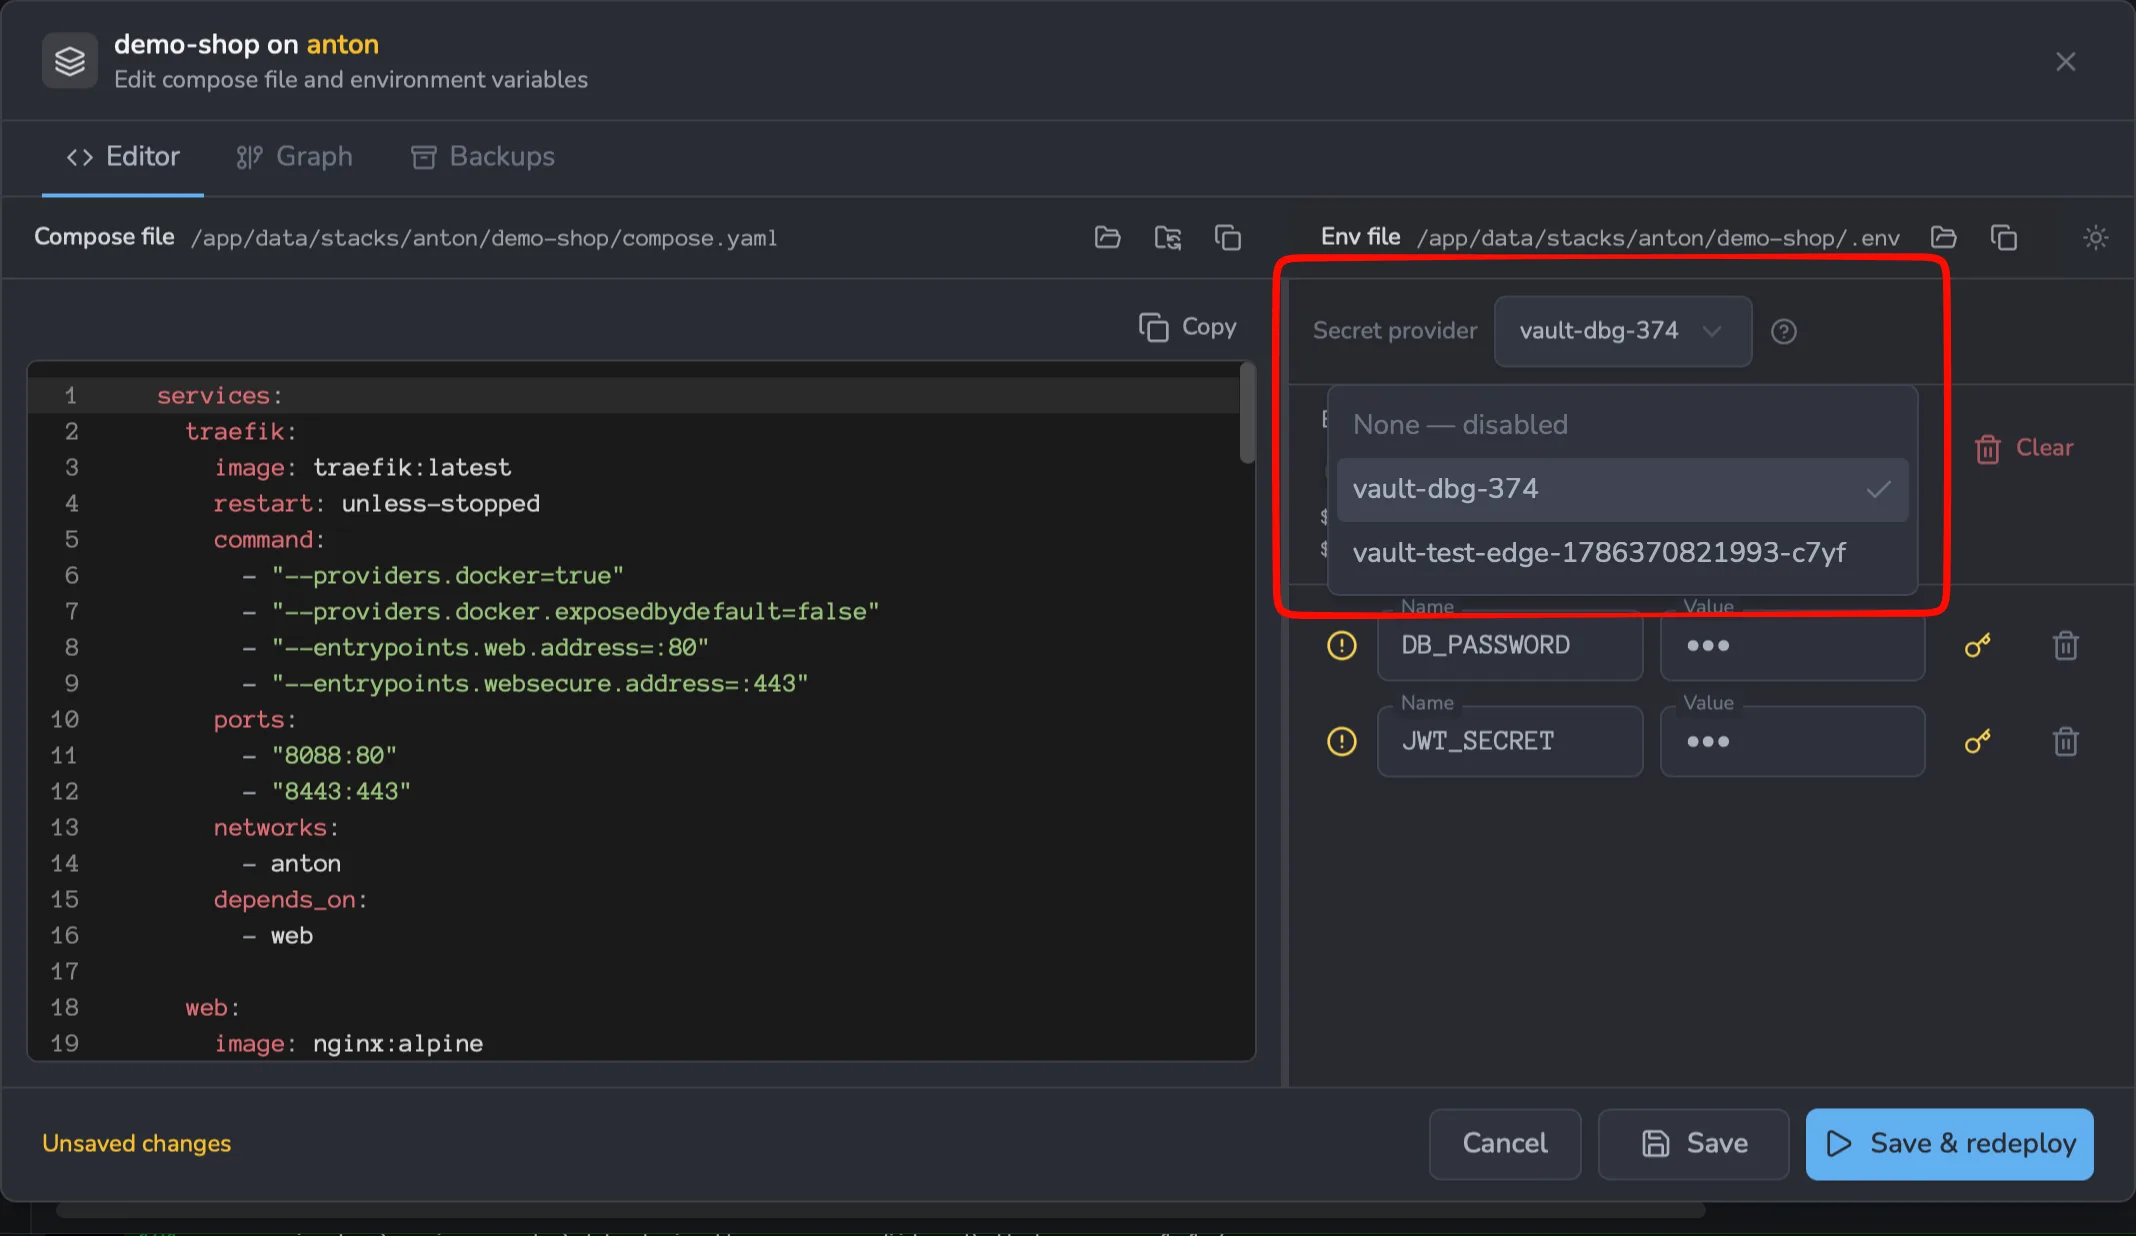
In editions with role-based access control, binding a provider to a stack requires the Secrets permission — a user who can edit stacks but has no secrets permission cannot attach a provider (and so cannot pull its secrets into a container).
Each provider supports one or both resolution modes. Pick your provider below for its setup and a worked example; this table is the overview:
| Provider | Inline references | Bulk pull |
|---|---|---|
| 1Password (service account) | Yes (op://) | Yes (Environment) |
| 1Password Connect | Yes (op://) | No |
| HashiCorp Vault (KV v2) | No | Yes (KV path) |
| Infisical | No | Yes (project / environment / path) |
| Doppler | No | Yes (the token's config) |
| Bitwarden Secrets Manager Since 1.0.43 | No | Yes (Project UUID) |
| Proton Pass Since 1.0.43 | Yes (pass://) | Yes (vault name) |
| Azure Key Vault Since 1.0.44 | Yes (azurekv://) | Yes (whole vault) |
| KeePassXC Since 1.0.45 | Yes (keepass://) | Yes (group) |
Bulk pull & inline references
Inline references replace a single variable whose value is a reference in the backend's own syntax. Bulk pull fetches every secret under a selector as a flat key/value map. Explicitly configured secrets always win over bulk-pulled ones. In both cases the resolved values reach your services through normal compose interpolation - you reference them with ${VAR}.
| What you write in the stack | Mode | What Dockhand does |
|---|---|---|
DOCKHAND_SECRET_SELECTOR=dockhand/prod (as a stack env var)then POSTGRES_PASSWORD: ${DB_PASSWORD} (in compose) | Bulk | Pulls every secret under dockhand/prod; ${DB_PASSWORD} resolves iff a secret is literally named DB_PASSWORD. Selector var is stripped. |
STRIPE_KEY=op://Production/stripe/api_key (as a stack env var)then STRIPE_KEY: ${STRIPE_KEY} (in compose) | Inline ref (1Password / Proton Pass) | Resolves that one field; the variable name (STRIPE_KEY) is free - the reference path picks the field. The reference goes in the stack env, not the compose file. |
DB_PASSWORD: hunter2 (marked secret) | Neither | Stores the literal encrypted in Dockhand and injects it. No provider lookup - "secret" is about storage, not sourcing. |
API_URL: https://api.example.com | Neither | Plain value, passed through as-is. |
The Secret toggle on a stack env var only controls how Dockhand stores and displays that value: a secret var is kept encrypted in Dockhand's database and masked in the UI, instead of being written to the on-disk .env file. It does not fetch anything from a provider. What triggers a provider lookup is the value or the selector, independent of the toggle:
- A variable whose value is an
op://reference is resolved by the bound 1Password provider - whether or not it is marked secret. - Setting the
DOCKHAND_SECRET_SELECTORvariable triggers a bulk pull from the bound provider - the selector itself is stripped.
So marking a plain literal (e.g. DB_PASSWORD=hunter2) as secret just stores that literal encrypted; it is never looked up in Vault/1Password/etc. To source a value from a provider you must use one of the two mechanisms above. Marking the provider-facing variables as secret is still a good idea - it keeps the op:// reference (or the selector) out of the on-disk .env and masks it in the UI.
How bulk pull works
The selector variable DOCKHAND_SECRET_SELECTOR goes in the stack's environment variables, not in the compose file. It triggers the pull and is then stripped, so it never reaches the stack. The pulled keys become available to your compose as ${KEY}.
When you pick a provider in the stack editor, a labelled field appears next to the dropdown - Environment for 1Password, KV v2 path for Vault, Secret path for Infisical (Doppler needs none). Type the selector there; it is the same value as the DOCKHAND_SECRET_SELECTOR environment variable, just shown as a field, so you can set it either way.
Putting DOCKHAND_SECRET_SELECTOR inside a service's environment: block in the compose file does nothing - Dockhand only looks for it among the stack's own environment variables.
Names must match exactly. A bulk pull injects each secret under its own key from the provider. So ${DB_PASSWORD} only resolves if the secret is named DB_PASSWORD in the store - the variable name and the secret's key must be identical, character for character (case-sensitive). A secret named db-password in Vault will not fill ${DB_PASSWORD}; it would be a separate ${db-password} key. Rename on the provider side if they don't line up. The selector value differs per provider - see each provider's section below.
How inline references work
With a provider that supports references bound, a variable whose value is a reference (op://..., pass://..., azurekv://..., or keepass://...) is resolved in place at deploy time and injected as a secret - the reference string is never written into the container. Unlike bulk pull, the variable name is yours to choose; the reference itself points at the vault/item/field.
compose environment: blockDockhand resolves references that live in the stack's environment variables - the stack editor's Environment tab, or the stack's .env file. A reference written directly inside a service's environment: block in the compose file is not resolved: that value is a literal Docker Compose passes straight into the container, and Dockhand does not rewrite your compose file. Declare the reference as a stack env var, then interpolate it in compose with ${VAR}.
1. In the stack's environment (stack editor → Environment tab, or the .env file) - the value is the reference:
# stack environment (NOT the compose file)
STRIPE_KEY=op://Production/stripe/api_key
SMTP_PASSWORD=op://Production/smtp/password
2. In the compose file - reference the resolved value by name:
services:
  app:
    image: myapp:latest
    environment:
      STRIPE_KEY: ${STRIPE_KEY}
      SMTP_PASSWORD: ${SMTP_PASSWORD}
At deploy time Dockhand resolves STRIPE_KEY / SMTP_PASSWORD from the provider, injects the real values as secrets via the shell environment (never written to disk), and ${STRIPE_KEY} interpolates them into the container.
Seeing what the provider supplies
With a provider bound to the stack, the editor tells you two things: what was injected at the last deploy, and which variables are in the provider right now.
- A green banner in the Environment variables panel names the provider (icon, type and instance name) and lists the secret keys that were pulled at the last deploy - injected into the container, never written to
.env. This banner is post-deploy feedback, so a brand-new stack shows nothing until its first deploy. - In the compose editor, a
${VAR}that currently exists in the bound provider gets a green IN VAULT badge instead of the red MISSING one, and it no longer counts toward the panel's missing total or the Add missing list. This is checked live as you edit - reference a new${VAR}the provider already holds and it turns green immediately, no deploy needed. - A
${VAR}the provider does not supply still shows the red MISSING badge - so a genuine gap is still obvious. - If Dockhand can't reach the provider (network, wrong token, wrong selector path), the editor keeps showing MISSING rather than a false green, and the panel adds a short line explaining what went wrong.
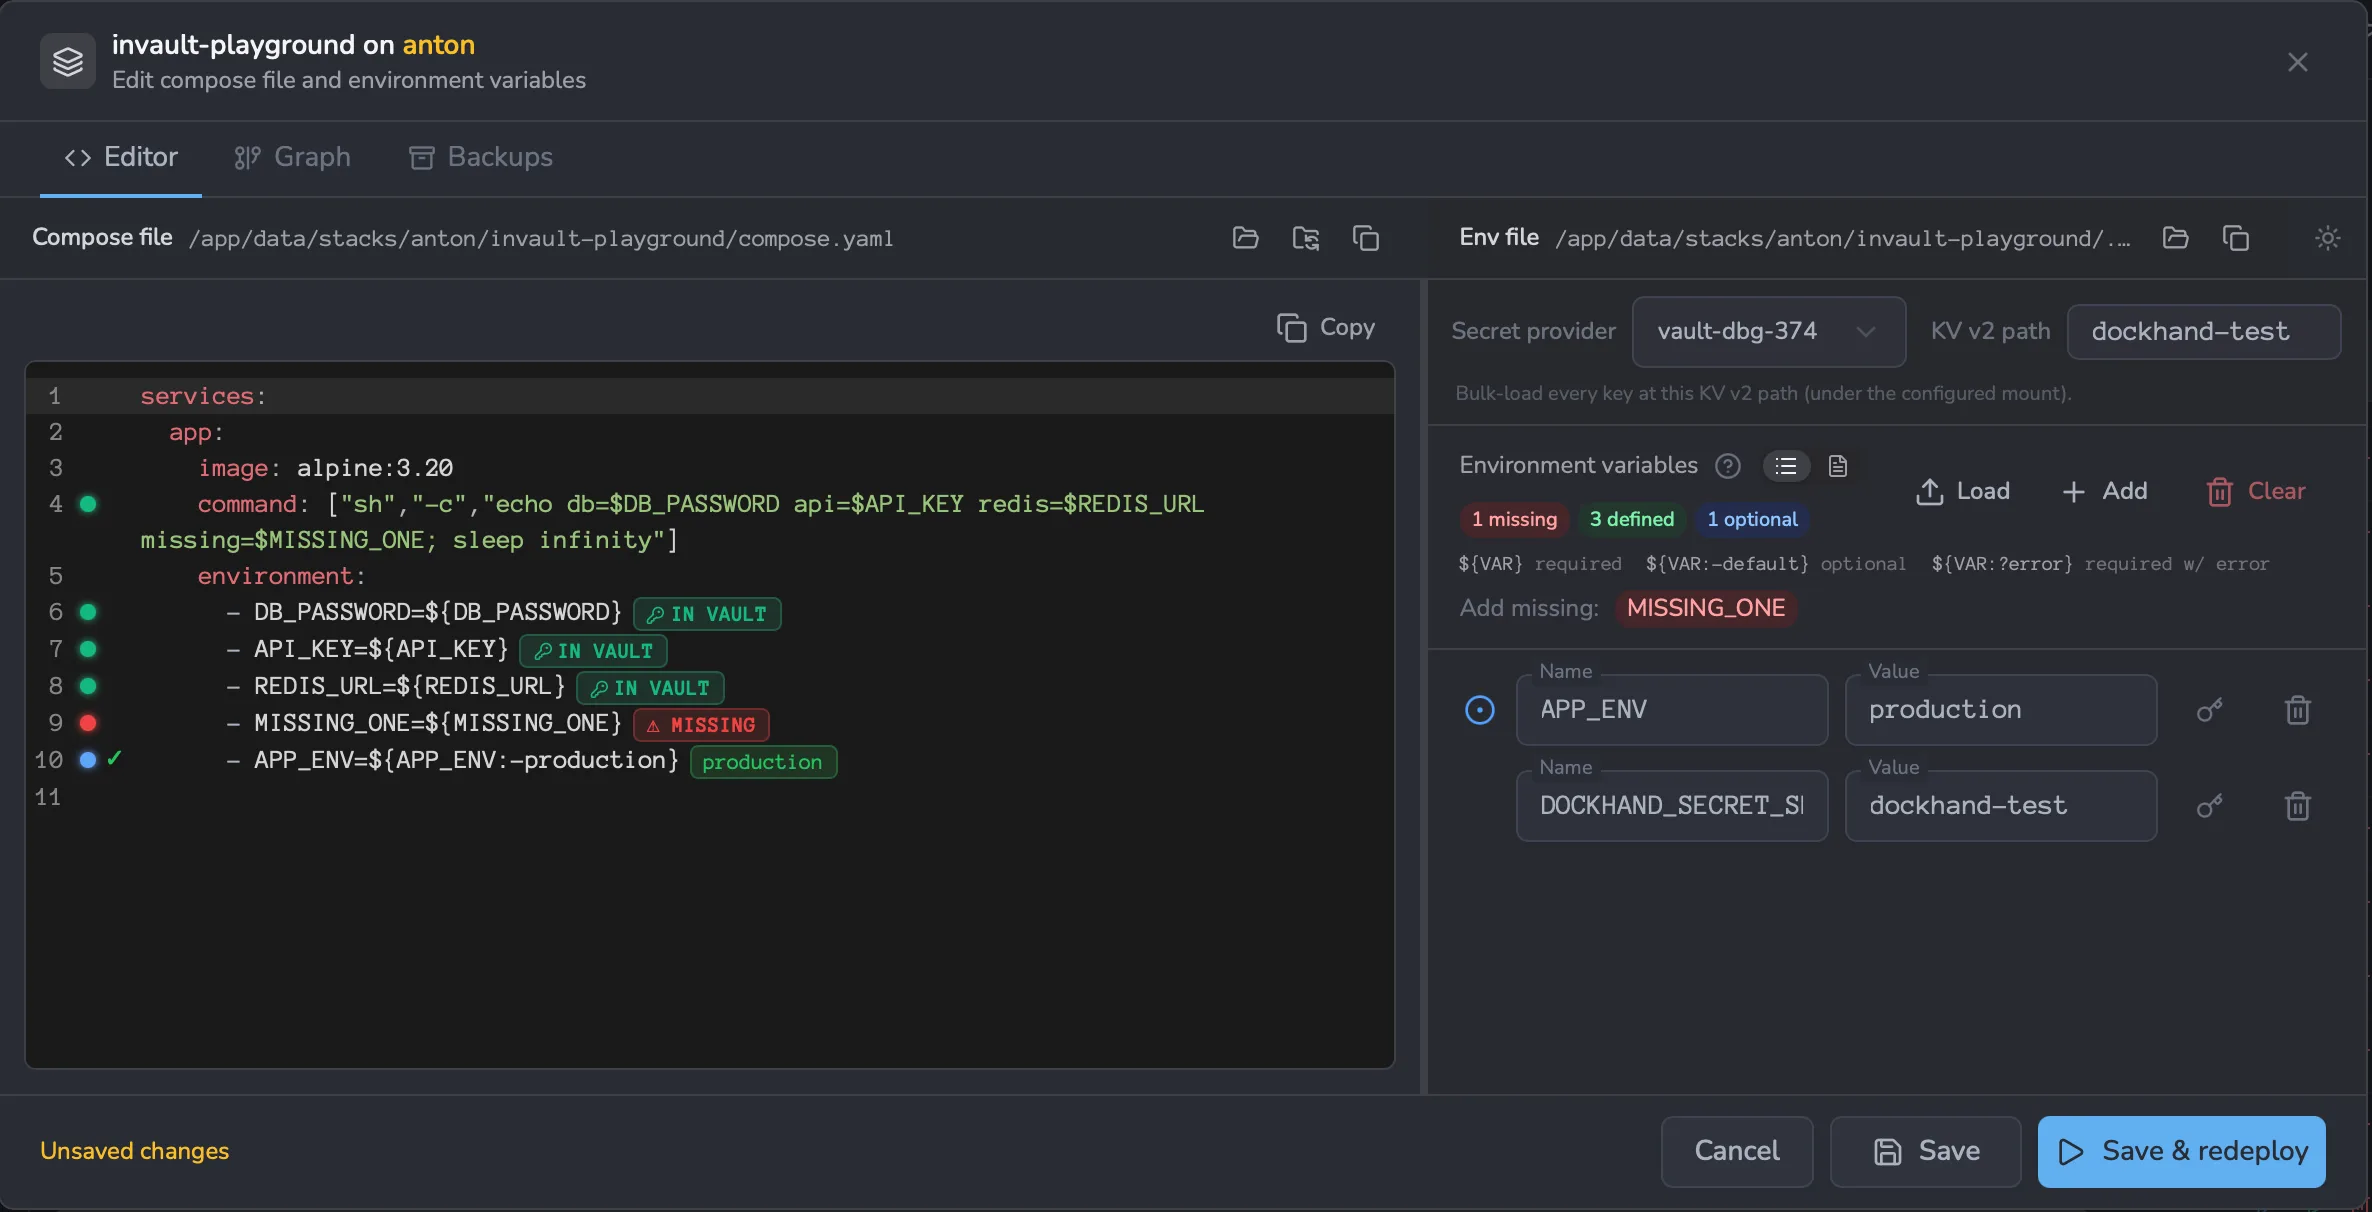
1Password (service account & Connect)
Two 1Password providers are supported: a service account (bulk pull + op:// references) and 1Password Connect (op:// references only, no bulk). Configure one under Settings → Secrets and bind it to the stack.
Bulk pull (service account only): the selector DOCKHAND_SECRET_SELECTOR is a 1Password Environment id; every variable in that Environment is pulled. The alias OP_ENVIRONMENT_ID is also accepted for the same selector.
# stack environment
# OP_ENVIRONMENT_ID is also accepted here (a 1Password alias for the same selector)
DOCKHAND_SECRET_SELECTOR=<your Environment id>
# compose
services:
db:
image: postgres:17
environment:
POSTGRES_PASSWORD: ${DB_PASSWORD}Inline reference (both providers): the value is an op:// reference. The variable name is free; the reference points at the field.
op://<vault>/<item>/<field>              # a field on an item
op://<vault>/<item>/<section>/<field> # a field inside a section- vault - the vault's name (the service account must have access to it).
- item - the item's title, e.g. a Login named
stripe. - field - the field's label, e.g.
api_key, orpasswordon a Login item.
# stack environment (Environment tab or .env)
# the var name (DB_PASSWORD) is yours; the reference picks which field to read.
DB_PASSWORD=op://Production/database/password
STRIPE_KEY=op://Production/stripe/api_key
SMTP_PASSWORD=op://Shared/smtp/password
# field inside a section: op://<vault>/<item>/<section>/<field>
TLS_CERT=op://Production/certs/web/certificate
# compose - reference each resolved value by name
services:
db:
image: postgres:17
environment:
POSTGRES_PASSWORD: ${DB_PASSWORD}The literal op:// string is never written to the container or back to disk.
HashiCorp Vault (KV v2)
Vault is bulk-only. The selector DOCKHAND_SECRET_SELECTOR is a KV v2 path under the mount: dockhand/prod reads secret/dockhand/prod. Every key at that path becomes a variable.
A secret named DB_PASSWORD at KV path secret/dockhand/prod:
# stack environment
DOCKHAND_SECRET_SELECTOR=dockhand/prod
# compose - ${DB_PASSWORD} must match the secret's name in Vault
services:
db:
image: postgres:17
environment:
POSTGRES_PASSWORD: ${DB_PASSWORD}Infisical
Infisical is bulk-only. Its DOCKHAND_SECRET_SELECTOR is a secret path (folder) within one project (/ or /backend) — it does not switch projects. Point a provider at a project, then use a folder per stack:
- Add the provider under Settings → Secrets, type Infisical. API host:
https://us.infisical.com(or your EU / self-hosted URL). - Access token: in Infisical, Organization → Access Control → add a Token Auth method and create a token. Make sure the project you'll use appears under that identity's Projects — if not, add it as a member.
- Project ID: open the project in Infisical; it's the ID in the URL after
/secret-management/. - Environment:
prod(or your slug). Secret path:/to start. - One project, folder per stack: in the project, use Add Secret → New Folder and name it after your stack. Then in the stack editor, bind the Infisical provider and set the Secret path (the
DOCKHAND_SECRET_SELECTOR) to/YourFolderName. Every secret in that folder is pulled.
If you want hard isolation instead of folders, add one Dockhand provider per Infisical project. (A st. service token already targets one project, so its Project ID / Environment are optional.)
Infisical accepts two ways to authenticate - fill in one or the other:
- Access token - a static service/access token, sent straight through as a bearer token. The simplest option.
- Universal Auth (Machine Identity) - a Client ID + Client secret from an Infisical Machine Identity. Dockhand exchanges them for a short-lived access token via Infisical's Universal Auth login endpoint and caches it until shortly before it expires. Prefer this for least-privilege setups: a Machine Identity can be scoped per project / environment / path and rotated on its own, independently of any static token.
Leave the Access token field blank when you use Universal Auth, and leave the Client ID / Client secret blank when you use a static token. The Client ID is the identity's Universal Auth client ID (shown under the identity's Authentication tab), not the identity's own ID.
An Infisical service token (st.) already targets one project, so the Project ID and Environment fields are optional for it - leave them blank and Infisical takes both from the token. One exception: a service token with more than one scope, or a glob secret path, cannot be resolved from the token alone, so for those you still fill in the Project ID and Environment. Universal Auth and any non-st. token always need both.
A secret named DB_PASSWORD at path / in the bound project/environment:
# stack environment
DOCKHAND_SECRET_SELECTOR=/
# compose
services:
db:
image: postgres:17
environment:
POSTGRES_PASSWORD: ${DB_PASSWORD}Doppler
Doppler is bulk-only. The selector value is ignored - the token identifies the config, so any non-empty DOCKHAND_SECRET_SELECTOR triggers the pull.
The token type matters: a service token (dp.st.) is scoped to one config and needs nothing else; a personal token (dp.pt.) is account-wide, so set the provider's Project and Config fields (otherwise Doppler answers "You must specify a project"). Doppler's own DOPPLER_PROJECT/DOPPLER_CONFIG/DOPPLER_ENVIRONMENT keys are stripped and never reach the stack.
A secret named DB_PASSWORD in the config the token points at:
# stack environment
DOCKHAND_SECRET_SELECTOR=x
# compose
services:
db:
image: postgres:17
environment:
POSTGRES_PASSWORD: ${DB_PASSWORD}Bitwarden Secrets Manager Since 1.0.43
The Bitwarden provider is an adapter around the official bws command-line client, which the operator installs — Dockhand does not bundle, download, or redistribute it. It runs /usr/local/bin/bws by default; set the absolute-path DOCKHAND_BWS_PATH process variable to point elsewhere. For the official Dockhand container, mount the operator-managed binary read-only, e.g. -v /opt/dockhand-tools/bws:/usr/local/bin/bws:ro. Obtaining, verifying, updating, and licensing bws remains the operator's responsibility.
Bitwarden is bulk-only. Configure a Machine Account access token in the provider settings and set the selector DOCKHAND_SECRET_SELECTOR to the Bitwarden Project UUID; every secret in that Project is pulled. For Bitwarden EU or a self-hosted server, also set the optional server URL.
A secret named DB_PASSWORD in a Bitwarden Project:
# stack environment
DOCKHAND_SECRET_SELECTOR=123e4567-e89b-42d3-a456-426614174000
# compose
services:
db:
image: postgres:17
environment:
POSTGRES_PASSWORD: ${DB_PASSWORD}Proton Pass Since 1.0.43
The Proton Pass provider is an adapter around the official pass-cli command-line client, which the operator installs — Dockhand does not bundle, download, or redistribute it. It runs /usr/local/bin/pass-cli by default; set the absolute-path DOCKHAND_PASS_CLI_PATH process variable to point elsewhere. For the official Dockhand container, mount the operator-managed binary read-only, e.g. -v /opt/dockhand-tools/pass-cli:/usr/local/bin/pass-cli:ro. Because the container is headless with no system keyring, Dockhand defaults pass-cli to its filesystem key provider (PROTON_PASS_KEY_PROVIDER=fs) so it works out of the box with no configuration on your side. You only need to set PROTON_PASS_KEY_PROVIDER yourself if you want to override that default (for example kernel on a host that does have a keyring); leave it unset and the fs default applies. Obtaining, verifying, updating, and licensing pass-cli remains the operator's responsibility.
Configure a Proton Pass personal access token (pst_...) in the provider settings. The token is handed to pass-cli through its own environment channel, never on the command line, inside an isolated session that is logged out after each lookup. Proton Pass supports both modes.
Bulk pull: the selector DOCKHAND_SECRET_SELECTOR is a vault name; each item becomes a variable keyed by its title.
# stack environment
DOCKHAND_SECRET_SELECTOR=Personal
# compose
services:
db:
image: postgres:17
environment:
POSTGRES_PASSWORD: ${DB_PASSWORD}Inline reference: put a pass://SHARE_ID/ITEM_ID/FIELD value in the stack environment and interpolate it in compose. The FIELD segment is required.
# stack environment (Environment tab or .env)
DB_PASSWORD=pass://ajQOpSS.../nTIWqIq.../passwordshare_id from pass-cli, not the browser extension or desktop appProton Pass shows a different share_id for the same vault in the browser extension and desktop app than the one pass-cli uses - and Dockhand resolves pass:// references through pass-cli. A share_id copied from the extension or app will not be found and the lookup fails silently. The item_id is the same everywhere; only the share_id differs.
Get the share_id pass-cli expects by listing the vault's items with the same binary Dockhand runs:
pass-cli item listBuild the reference with the share_id from that output. The item_id can come from anywhere (extension, app, or the same listing) - it is identical everywhere: pass://<share_id>/<item_id>/<field>.
By vault and item name Since 1.0.44: instead of ids you can use human-readable names - pass://VAULT_NAME/ITEM_NAME/FIELD. pass-cli resolves the names to ids itself, and names are the same across every Proton Pass client, so this avoids the share_id mismatch above entirely. Names may contain spaces; the field label is a single token.
# stack environment (Environment tab or .env) - names, not ids
DB_PASSWORD=pass://dockhand/database/password
API_KEY=pass://Work/GitHub Account/token
Azure Key Vault Since 1.0.44
Azure Key Vault supports both modes.
Bulk pull: the selector is ignored (a vault has no sub-paths, so a bulk pull is every secret in the vault); any non-empty DOCKHAND_SECRET_SELECTOR triggers it. Each secret becomes a variable keyed by its name.
# stack environment
DOCKHAND_SECRET_SELECTOR=x
# compose
services:
db:
image: postgres:17
environment:
POSTGRES_PASSWORD: ${DB_PASSWORD}Inline reference: put an azurekv://<secret-name> value in the stack environment and interpolate it in compose.
# stack environment (Environment tab or .env)
DB_PASSWORD=azurekv://db-password
KeePassXC Since 1.0.45
The KeePassXC provider is an adapter around the keepassxc-cli command-line client, which the operator installs — Dockhand does not bundle, download, or redistribute it. It reads a local .kdbx database file; no networked service is involved. It runs /usr/bin/keepassxc-cli by default; set the absolute-path DOCKHAND_KEEPASSXC_CLI_PATH process variable to point elsewhere.
Mounting the client and the database. For the official Dockhand container, install keepassxc-cli in the container (or mount the operator-managed binary) and bind-mount the .kdbx file (and the key file, if any) read-only. The provider's Database path and Key file path fields are the paths as seen inside the container. Example compose:
services:
  dockhand:
    image: fnsys/dockhand
    volumes:
      - dockhand_data:/app/data
      # the KeePass database (and optional key file), read-only
      - /host/secrets/passwords.kdbx:/secrets/passwords.kdbx:ro
      - /host/secrets/db.keyx:/secrets/db.keyx:ro
      # if keepassxc-cli is not in the image, mount the operator-managed binary
- /opt/dockhand-tools/keepassxc-cli:/usr/bin/keepassxc-cli:roThe official Dockhand image is a minimal Wolfi build with no package manager and no KeePassXC package, so you can't simply apk add it. Provide the binary yourself, one of:
- A container that has it — build a thin image
FROM fnsys/dockhandthat addskeepassxc-cliand its shared libraries, or run Dockhand on a base where it is already present. - Bind-mount the binary and its libraries — the
keepassxc-clibinary pulls in a large dependency closure (Qt, X11, libGL — around 65 shared objects). Copying just the binary is not enough; mount the wholelddclosure and invoke it through the interpreter, e.g. a small wrapper that sets a private library path for that call only. Do not setLD_LIBRARY_PATHon the container itself — it would also affect Dockhand's own Node.js process.
Worked example for the bind-mount approach. On the host, extract keepassxc-cli and its full library closure from a Debian/Ubuntu package into one folder, then write a wrapper that runs it through the bundled loader:
# on the host, build a self-contained tools folder
mkdir -p /opt/dockhand-tools/keepassxc/lib
apt-get download keepassxc   # or: dpkg-deb -x keepassxc_*.deb ...
dpkg-deb -x keepassxc_*.deb /tmp/kxc
cp /tmp/kxc/usr/bin/keepassxc-cli /opt/dockhand-tools/keepassxc/
# copy every shared object the binary needs, plus the dynamic loader.
# NOTE: a single ldd pass lists only DIRECT dependencies - it misses libraries
# pulled in transitively (e.g. libgssapi_krb5 via Qt Network), and the binary then
# fails at runtime with "cannot open shared object". Resolve the closure fully:
# the simplest reliable way is to copy the package's whole library directory.
cp -Ln /tmp/kxc/usr/lib/x86_64-linux-gnu/*.so* /opt/dockhand-tools/keepassxc/lib/ 2>/dev/null || true
ldd /tmp/kxc/usr/bin/keepassxc-cli | grep -o '/[^ ]*\.so[^ ]*' \
  | xargs -I{} cp -Ln {} /opt/dockhand-tools/keepassxc/lib/
cp /lib64/ld-linux-x86-64.so.2 /opt/dockhand-tools/keepassxc/

# wrapper: sets the private library path for THIS call only, not the container
cat > /opt/dockhand-tools/keepassxc/run <<'EOF'
#!/bin/sh
here=$(dirname "$0")
exec "$here/ld-linux-x86-64.so.2" --library-path "$here/lib" \
  "$here/keepassxc-cli" "$@"
EOF
chmod +x /opt/dockhand-tools/keepassxc/run
Mount that folder and point the provider at the wrapper (add :z on SELinux, see below):
services:
  dockhand:
    image: fnsys/dockhand
    environment:
      # absolute path INSIDE the container to the wrapper
      - DOCKHAND_KEEPASSXC_CLI_PATH=/opt/keepassxc/run
    volumes:
      - /opt/dockhand-tools/keepassxc:/opt/keepassxc:ro
      - /host/secrets/passwords.kdbx:/secrets/passwords.kdbx:ro
On SELinux hosts (Fedora, RHEL, Rocky), add :z (or :Z) to the bind mounts — without a relabel the process is denied access and keepassxc-cli can segfault with nothing useful in the logs.
A note on lighter CLIs. keepassxc-cli is Qt-based on purpose — upstream declines to ship a GUI-free build because nearly all of its dependencies are still needed. Qt-free command-line readers for .kdbx exist (for example kpcli), but Dockhand's provider is written against keepassxc-cli's exact command surface and does not currently drive an alternative client, so the binary above is what the provider needs.
Then configure the provider under Settings → Secrets: the in-container Database path (e.g. /secrets/passwords.kdbx), and a Master password and/or a Key file path (at least one is required). The password is stored encrypted and handed to keepassxc-cli on standard input, never on the command line. KeePassXC supports both modes.
Bulk pull: the selector is a group name. Every entry under that group becomes a variable keyed by the entry title, with the entry's Password as the value. Leave the selector blank to inject only inline keepass:// references (no bulk pull). Titles that are not valid environment-variable names (a dash, a space) are skipped with a warning, and if the same title appears in more than one subgroup the first one wins.
# stack environment
DOCKHAND_SECRET_SELECTOR=Web
Inline reference: a keepass://GROUP/ENTRY/FIELD value. Groups may nest; the last segment is the attribute to read (Password, UserName, URL, or any custom attribute), and everything before it is the entry path. A field is required.
# stack environment (Environment tab or .env)
DB_PASSWORD=keepass://Web/Postgres/Password
API_TOKEN=keepass://APIs/Stripe/tokenProvider config (tokens, hosts) is stored encrypted and never leaves the server; API responses carry provider summaries only. A missing or unsupported provider leaves values untouched and logs a warning rather than failing the deploy; a provider that errors mid-resolution fails the deploy so you never ship a half-resolved stack.
Images
The Images page shows all Docker images on the selected environment, grouped by repository.
Load an image from a .tar (air-gapped)
On hosts with no registry access, use Load from tar on the Images page to upload a docker save archive (.tar) and load it directly into the daemon. The file is streamed to the server without being held in memory, so multi-gigabyte images work. Available on local and direct-TCP environments; on Hawser-connected hosts, copy the tar over and run docker load there instead. In editions with role-based access control this requires the Load images from tar permission, which is separate from Pull because it accepts an arbitrary, unsigned image rather than one from a trusted registry.
Image actions
| Action | Description |
|---|---|
| Run | Create a new container from this image |
| Scan | Scan for vulnerabilities (if scanner configured) |
| Tag | Add a new tag to this image |
| Push | Push to a configured registry |
| Export | Download as tar/tar.gz archive |
| History | View image layer history |
| Delete | Remove the image |
Unused images indicator Since 1.0.7
Images not used by any container (running or stopped) display an amber Unused badge. This helps identify images that can be safely removed to reclaim disk space.
Prune unused images Since 1.0.7
Click Prune unused in the Images toolbar to remove all images not used by any container. This is equivalent to running docker image prune -a.
Pruning removes all unused images including tagged images. This cannot be undone - you will need to pull the images again if needed.
Exclude an image from pruning Since 1.0.44
To keep a specific image that would otherwise be removed by a "Prune unused" (manual or scheduled), label it dockhand.prune=false. Dockhand's unused-image prune then skips it. This is useful for images that are pulled or built on demand and look unused between uses.
Add the label when you build or pull the image, for example:
docker build --label dockhand.prune=false -t myimage .Or on an existing image by re-tagging through a one-line build:
echo "FROM kasmweb/chrome:1.17.0" | docker build --label dockhand.prune=false -t kasmweb/chrome:1.17.0 -Only the "prune unused" action honors the label; the dangling (untagged) prune is unaffected. Removing the label (or setting it to any other value) lets the image be pruned normally again.
Docker 29.0 through 29.4.0 with the containerd image store (the default in Docker 29) has a bug where the label filter is ignored during an image prune, so a "prune unused" removes nothing at all. This was fixed in Docker Engine 29.4.1. If your daemon runs an affected version, either upgrade it or keep the image alive another way (for example a stopped holder container).
Pulling images
Click Pull image to download a new image:
- Optionally select a registry (default: Docker Hub)
- Enter the image name (e.g.,
nginx,redis) - Enter the tag (e.g.,
latest,alpine) - Click Pull
Progress is shown layer-by-layer with download percentages.
Vulnerability scanning
Dockhand integrates with Grype and Trivy vulnerability scanners to identify security issues in your images. Configure scanner settings in Settings → Environments.
Severity levels
| Severity | Color | Description |
|---|---|---|
| Critical | Red | Severe vulnerabilities requiring immediate attention |
| High | Orange | Important vulnerabilities to fix soon |
| Medium | Yellow | Moderate risk vulnerabilities |
| Low | Blue | Minor vulnerabilities |
Export formats
Scan results can be exported in multiple formats, both from the scan dialog and the aggregated Vulnerabilities dashboard:
- Markdown - Human-readable report (per-image scan dialog)
- CSV - Spreadsheet format for analysis
- JSON - Raw data for automation
- SARIF - SARIF 2.1.0 for security platforms such as DefectDojo, Dependency-Track, and GitHub code scanning Since 1.0.37
The Vulnerabilities dashboard export respects the active search and severity/image/container/stack filters, so the download matches what is on screen. Exports are also available programmatically — see the API reference.
Scan caching
Scan results are cached by image SHA256. Re-scanning the same image version returns cached results unless you force a fresh scan.
Registry operations
Pushing images
Push images to configured registries. Select the target registry and optionally specify a new tag.
Image history
View the layer-by-layer build history of an image, including:
- Layer size
- Creation timestamp
- Command that created the layer
Volumes
Manage Docker volumes for persistent data storage. Mount volumes to containers when creating new containers.
Volume actions
- Browse - Open volume browser (uses helper container)
- Clone - Create a new named volume and copy the source volume's data into it (via a temporary helper container; the source is mounted read-only). Driver, options, and labels are preserved.
- Inspect - View detailed volume information
- Export - Download volume contents as tar archive
- Delete - Remove the volume (fails if in use)
Volume browser
Browse the contents of Docker volumes using a helper container.
Volume browsing uses a busybox:latest helper container that mounts the volume. If the volume is currently in use by another container, it is mounted read-only to prevent conflicts. If the volume is not in use, it is mounted read-write. The helper container is automatically pulled if not present and removed when you close the browser.
Networks
Manage Docker networks for container communication.
Network drivers
| Driver | Description |
|---|---|
bridge |
Default network for standalone containers |
host |
Container uses host's network stack |
overlay |
Multi-host networking (Swarm mode) |
macvlan |
Assign MAC address for direct network access |
ipvlan |
IPvlan L2/L3 networking (shares the parent's MAC) |
none |
No networking |
Creating networks
The Create network dialog is organized into tabs:
- Basic - Name, driver, and the core toggles: Internal (restrict external access) and Attachable (allow manual container attachment). For the
macvlanandipvlandrivers, the parent interface and mode are set here too. - IPAM - address management: Subnet in CIDR notation (e.g.
172.20.0.0/16), Gateway, IP range, auxiliary addresses, and any IPAM-driver options as key/value pairs. - Options - arbitrary driver options as key/value pairs (see below).
- Labels - metadata labels on the network.
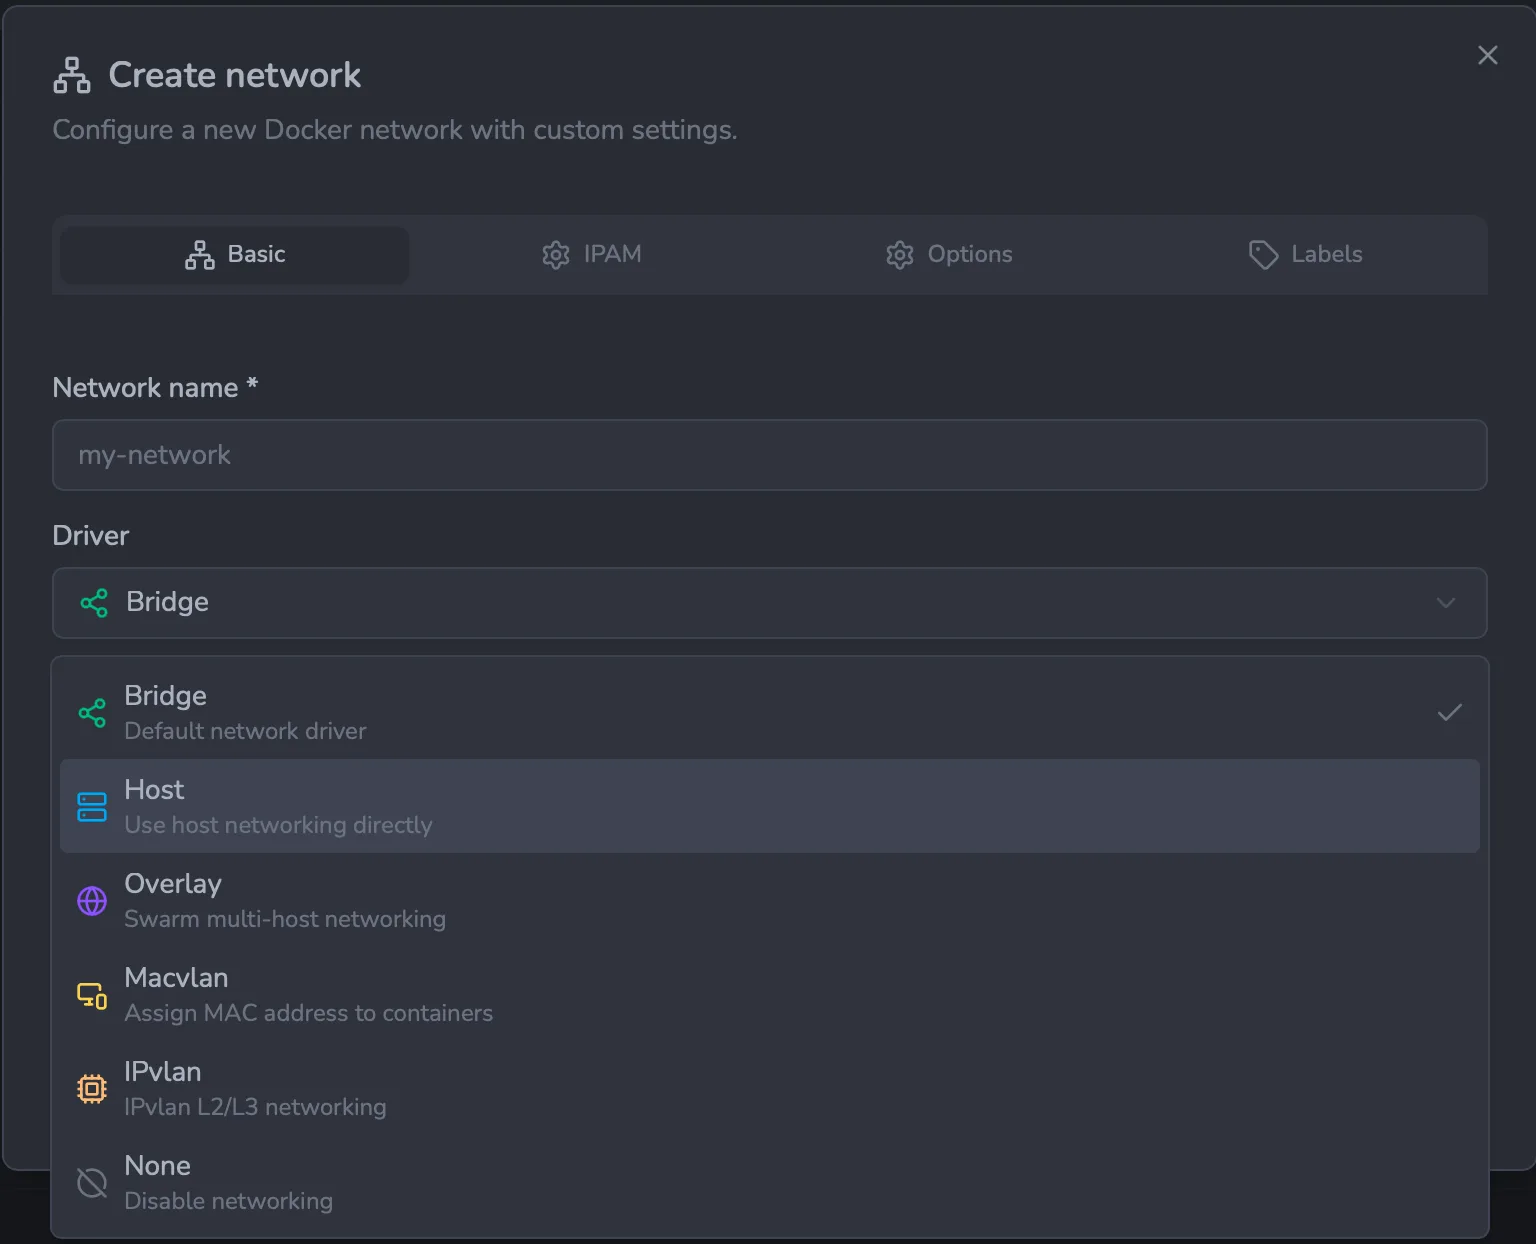
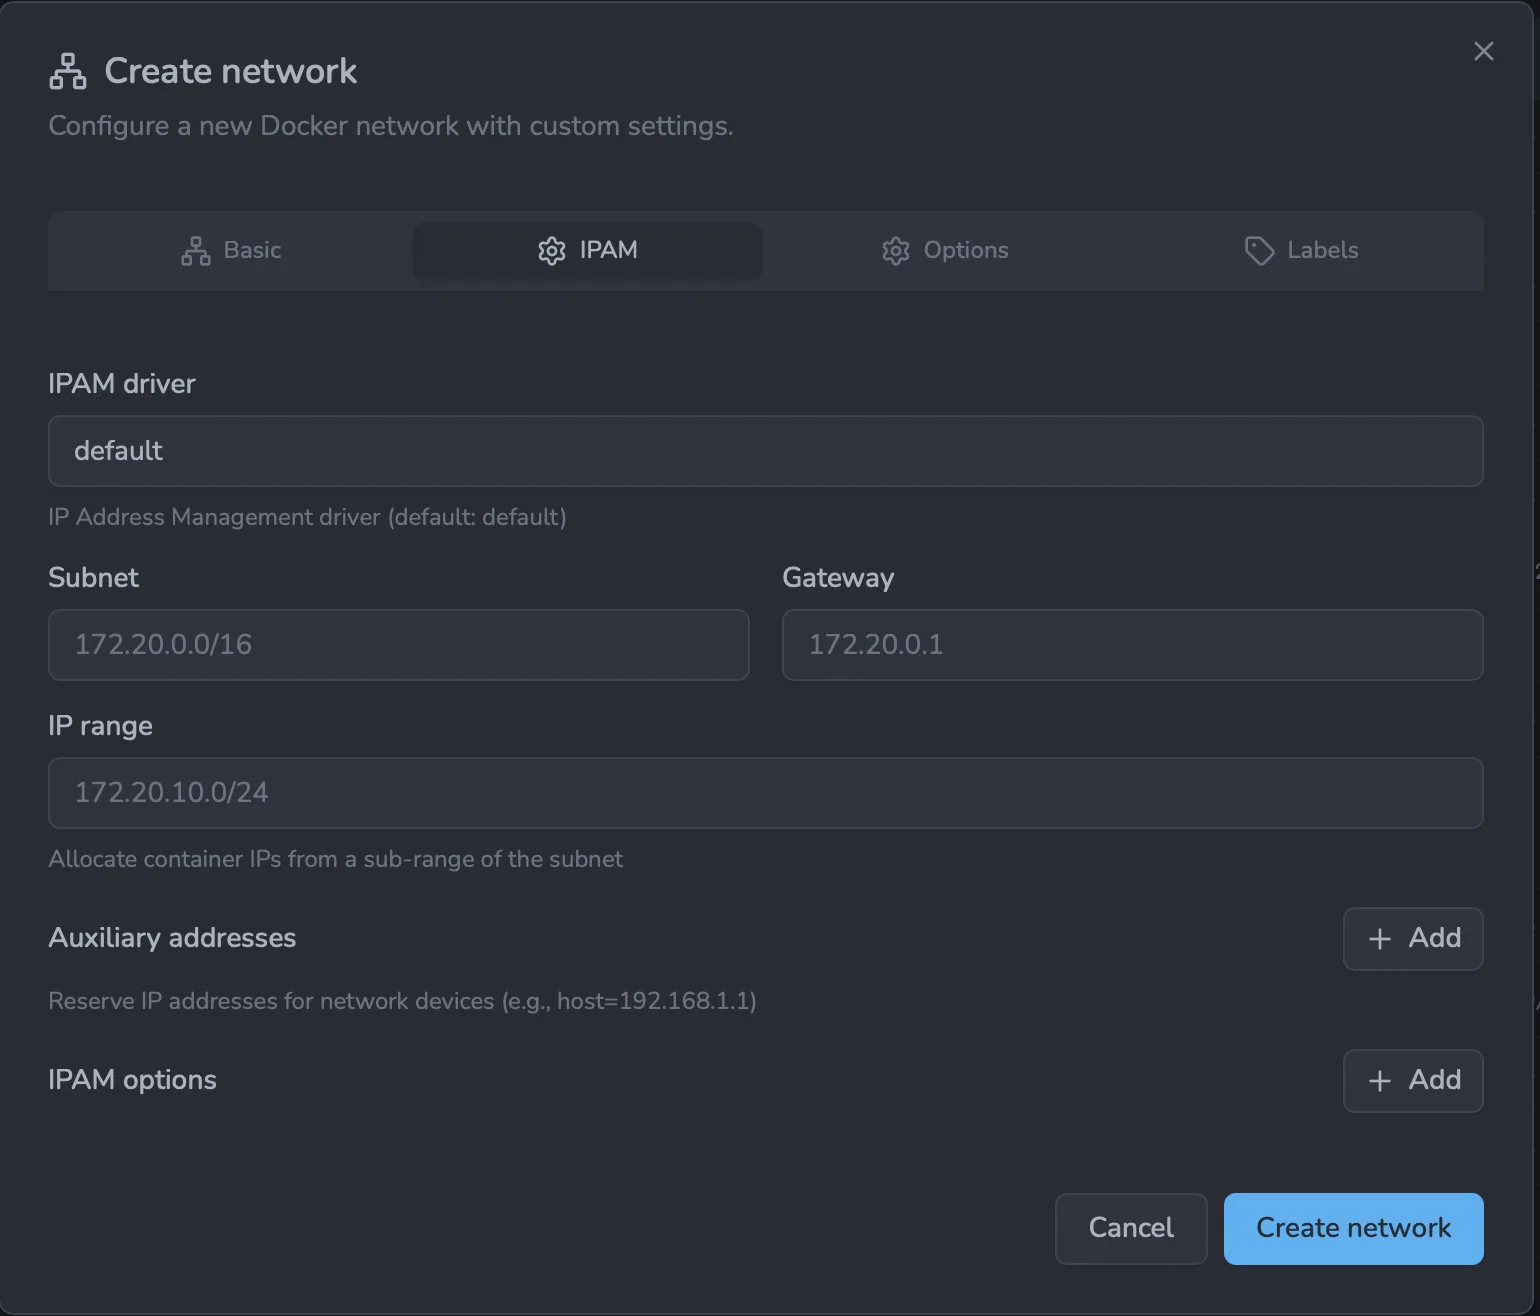
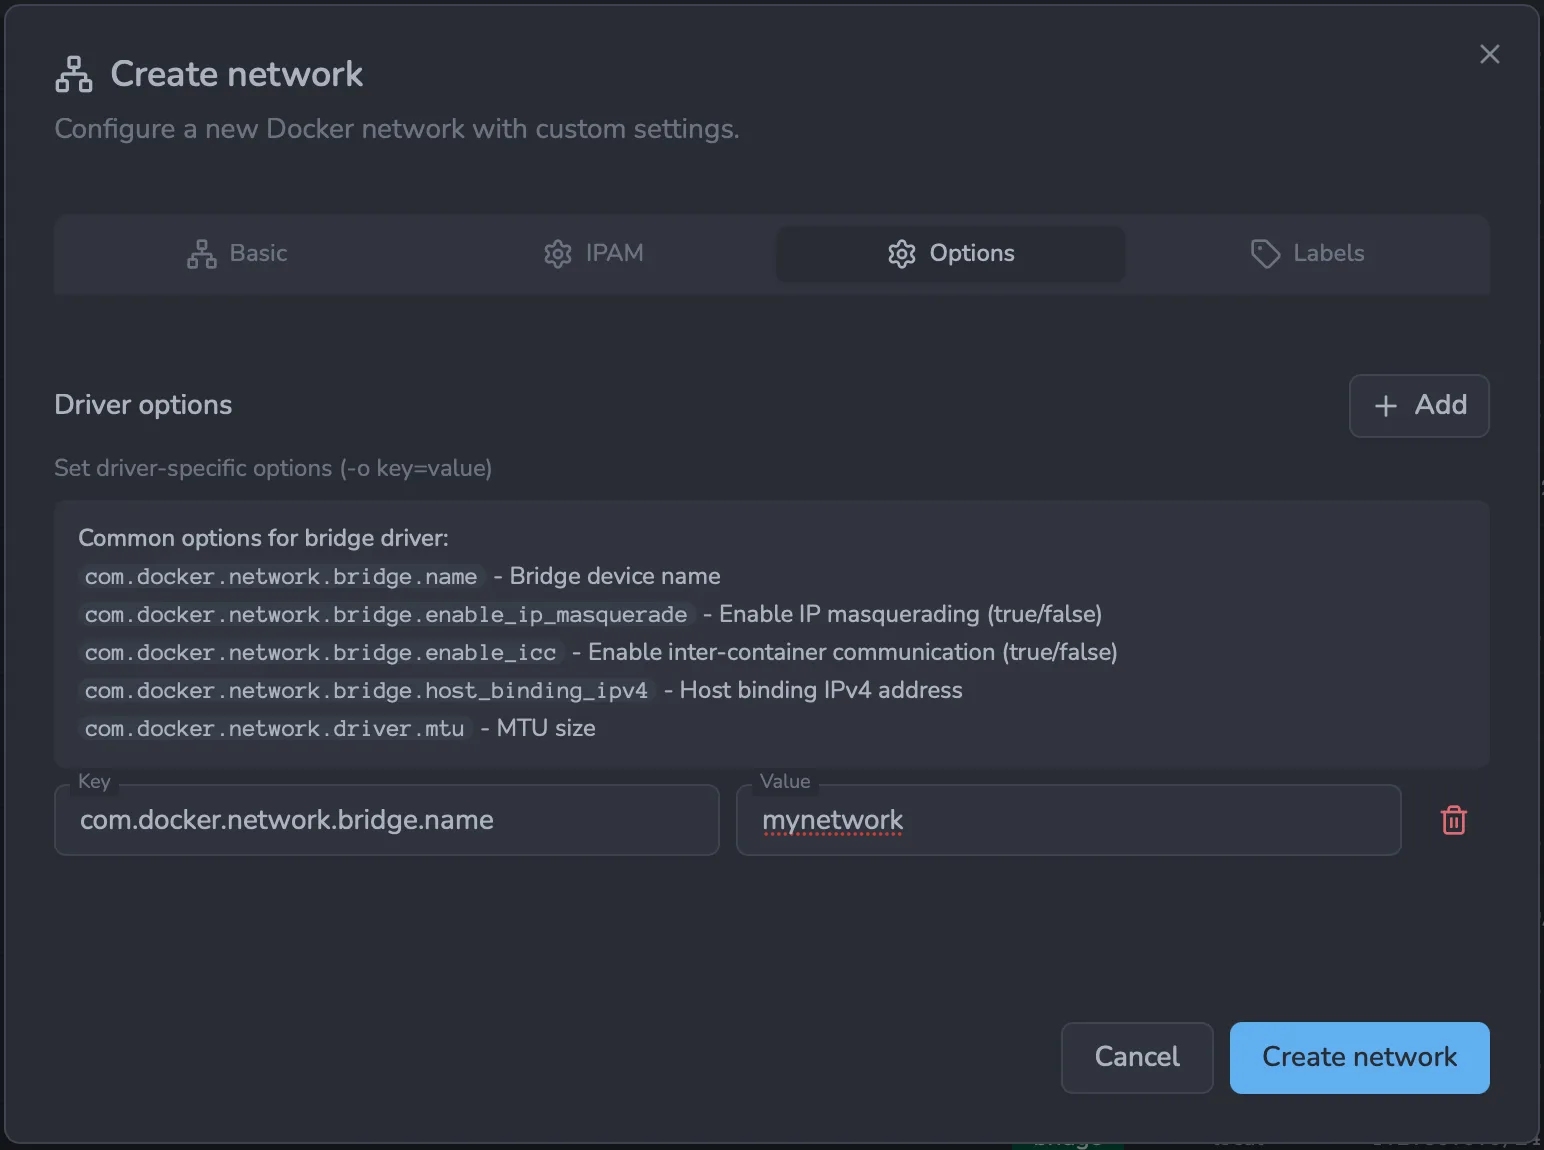
Driver options
The Options tab lets you set any driver-specific option as a key/value pair - the equivalent of docker network create -o key=value. This is how you pass options that have no dedicated field, and Dockhand suggests the common options for the selected driver. For example, on a host with a second interface whose upstream router applies policy routing by source IP, you can pin the network's outbound source address:
| Key | Value |
|---|---|
com.docker.network.host_ipv4 | 192.168.2.20 |
That is equivalent to the following Docker CLI and Compose:
docker network create \
  --driver bridge \
  --opt com.docker.network.host_ipv4=192.168.2.20 \
  vpn_network
networks:
vpn_network:
driver: bridge
driver_opts:
com.docker.network.host_ipv4: "192.168.2.20"Connecting containers
Use the "Connect container" action to attach running containers to a network. You can also configure networks when creating new containers.
Connection options:
- Aliases - DNS aliases for the container on this network
- IPv4 address - Specific IP address assignment
The default bridge, host, and none networks cannot be deleted. They are marked with a "Built-in" badge.
Registry browser
Browse and search Docker registries to discover and pull images. Configure registries in Settings → Registries.
Features
- Search across configured registries
- View available tags for each image
- Pull images directly from search results
- View image details and manifests
Configure registries in Settings > Registries. Private registries require authentication credentials.
Templates Since 1.0.34
Browse and one-click deploy Docker containers and Compose stacks from curated template catalogs. Templates open in the standard stack editor with image, ports, volumes, and environment variables pre-filled, so you can review and adjust before deploying.
Browsing and deploying
The Templates page shows a grid of template cards aggregated from all enabled catalog sources. Use the search box, category filter, and source filter at the top to narrow the list. Clicking a card opens the stack deploy modal with all fields pre-populated — you can change ports, edit environment variables, and then deploy. Templates always deploy to the environment currently selected in the header dropdown.
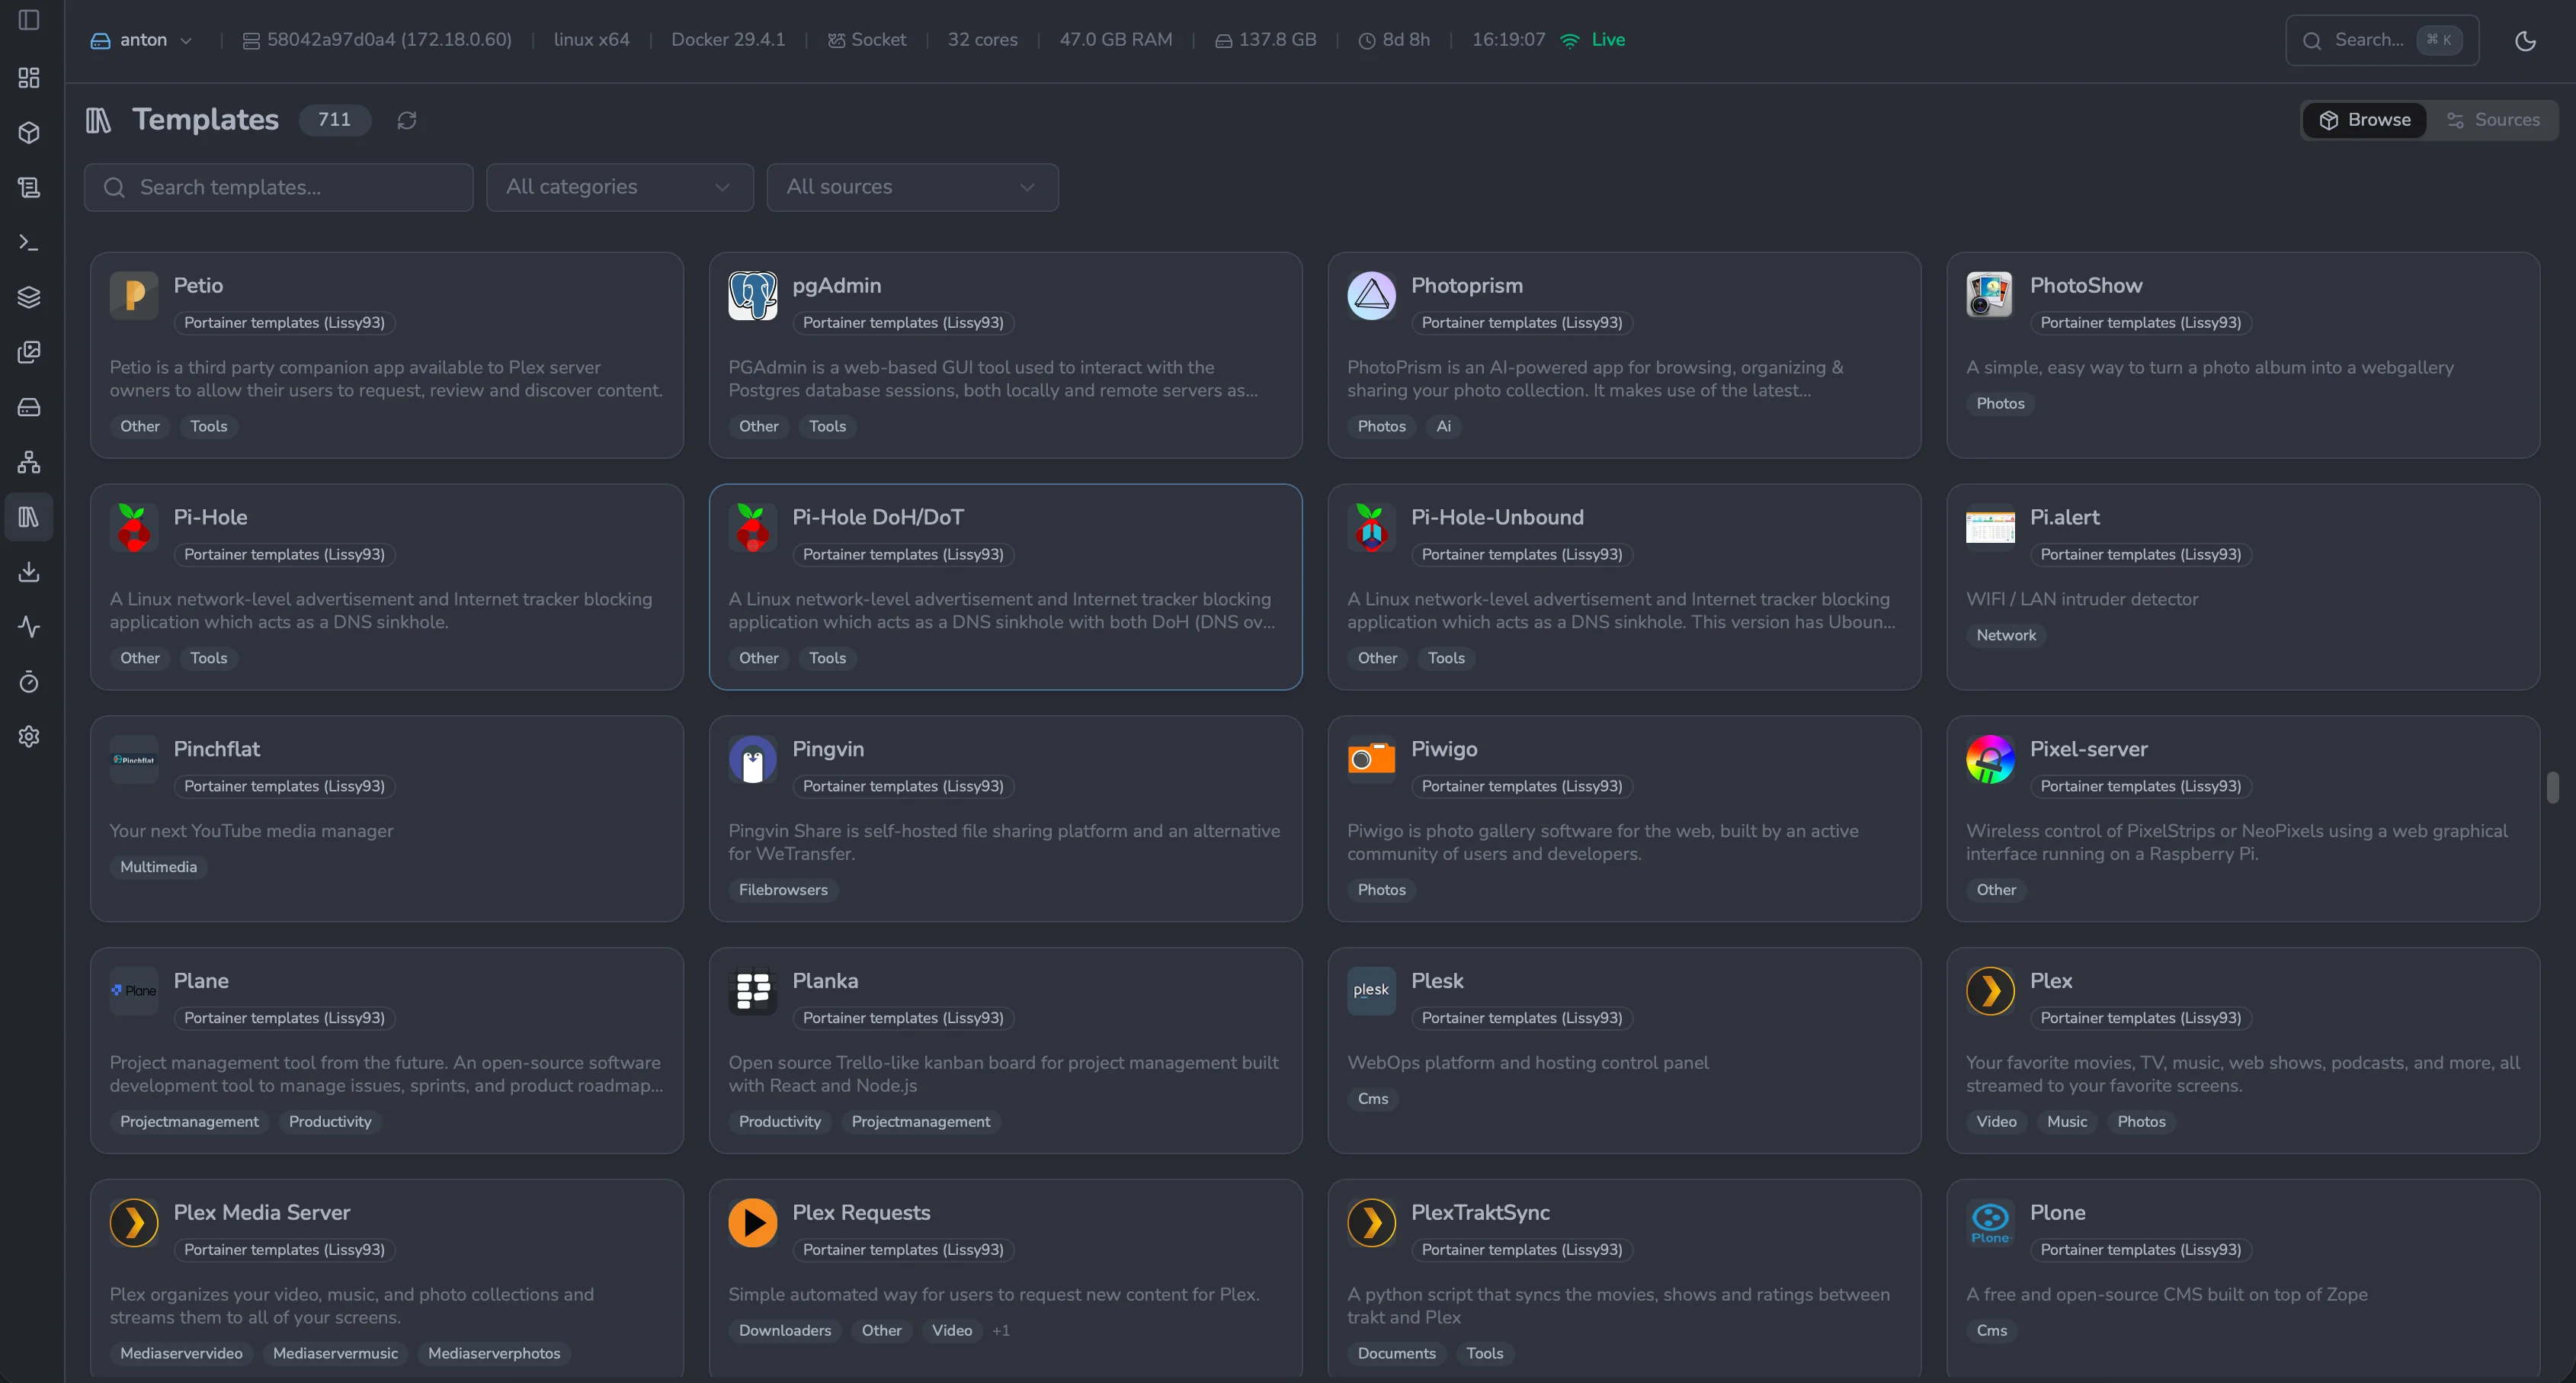
Each card can carry up to two reference links in its footer. Project opens the template's homepage or source repository (taken from the catalog entry), so you can read more about the app or report an issue with the template. Details appears for templates from the Lissy93 catalog and opens the matching rich guide on the community site portainer-templates.as93.net, which walks through configuration, ports, volumes, and troubleshooting. The Details link is only shown when a matching page actually exists on that site.
Sources tab
Switch to the Sources tab to manage the catalogs Dockhand pulls templates from. Each row shows a source name, URL, status, and an enable/disable toggle.
- Enable / disable — toggle individual sources without removing them
- Validate all sources — fetches each enabled URL and reports the template count or error
- Disable inactive — bulk-disables any source that failed validation
- Delete — only available for custom sources you added; built-ins can be disabled but not removed
Built-in catalogs
Dockhand ships with a selection of well-known community catalogs. A small number are enabled by default; the rest are disabled and can be turned on from the Sources tab as needed. Built-in sources can be disabled but not deleted.
Adding your own catalog
You can point Dockhand at any URL that returns a JSON template catalog. On the Sources tab, fill in a Name and URL and click Add. The URL must return JSON in the Portainer v2 format (described below). Dockhand fetches each enabled source on first request and caches the result server-side for one hour.
Host the JSON anywhere reachable over HTTPS — a GitHub raw URL, a Gitea raw URL, an S3 bucket, or a static file on your own web server. The endpoint must respond within 15 seconds and return valid JSON.
Catalog JSON format
Dockhand expects the Portainer v2 template format. The top level is either a bare array of templates, or an object with a templates array:
{
  "version": "2",
  "templates": [
    {
      "type": 1,
      "title": "Nginx",
      "description": "High performance web server",
      "logo": "https://raw.githubusercontent.com/example/templates/main/nginx.png",
      "image": "nginx:latest",
      "categories": ["Web", "Proxy"],
      "ports": ["80:80/tcp", "443:443/tcp"],
      "volumes": [
        { "bind": "/host/path/html", "container": "/usr/share/nginx/html" }
      ],
      "env": [
        { "name": "TZ", "label": "Timezone", "default": "Etc/UTC" }
      ],
      "restart_policy": "unless-stopped",
      "network": "bridge"
    },
    {
      "type": 3,
      "title": "WordPress",
      "description": "WordPress + MySQL compose stack",
      "logo": "https://example.com/wordpress.png",
      "categories": ["CMS"],
      "repository": {
        "url": "https://github.com/example/templates",
        "stackfile": "wordpress/docker-compose.yml"
      }
    }
  ]
}
Field reference
| Field | Required | Notes |
|---|---|---|
type |
Yes | 1 = single container, 3 = compose stack (loaded from repository.stackfile). 2 (Swarm) is silently skipped. |
title or name |
Yes | Entries with neither are dropped. |
description |
No | Shown on the template card. |
logo |
No | Image URL displayed on the card. |
categories |
No | Array of strings; feeds the category filter. |
image |
Containers only | Docker image reference. Used as the image when deploying. |
ports |
No | Array of strings like "80:80/tcp". Pre-filled in the deploy modal. |
volumes |
No | Array of { "bind": "...", "container": "..." } objects. |
env |
No | Array of { "name", "label", "default" } objects. Surfaced as editable inputs in the deploy modal. |
restart_policy |
No | Defaults to unless-stopped if omitted. |
network |
No | Docker network name. |
repository.url + repository.stackfile |
Stacks only | The compose file is fetched from the repo at deploy time. |
Once you click Deploy, templates become regular compose stacks managed by Dockhand. The template source has no further connection to the running stack — there's no auto-update from the catalog.
Activity log
Track all Docker container events across your environments in real-time.
Event types
| Event | Icon | Description |
|---|---|---|
create |
+ | Container created |
start |
Play (green) | Container started |
stop |
Stop (red) | Container stopped |
die |
Skull | Container exited |
kill |
X | Container killed |
restart |
Refresh | Container restarted |
pause |
Pause | Container paused |
unpause |
Play | Container unpaused |
oom |
Alert | Out of memory |
health_status |
Heart | Health check result |
Filtering
Filter the activity log by:
- Container name - Text search
- Event type - Select specific event types
- Environment - Filter by environment
- Labels - Filter by environment labels
- Date range - Presets or custom range
Activity collection must be enabled per-environment in Settings > Environments. The dashboard tile shows an amber "Activity" icon when collection is active.
Schedules
View and manage all scheduled jobs in one place.
Schedule types
| Type | Description |
|---|---|
| Container auto-update | Automatic image updates for containers |
| Git stack sync | Automatic sync and deploy from Git repositories |
| System cleanup | Built-in cleanup jobs (schedule execution logs, container events) |
Cron expression editor
When configuring schedules, you can use preset options or write custom cron expressions:
| Preset | Cron Expression | Description |
|---|---|---|
| Daily | 0 3 * * * |
Every day at 3:00 AM |
| Weekly | 0 3 * * 0 |
Every Sunday at 3:00 AM |
| Custom | Your expression | Fine-grained control |
Cron expressions use 5 fields: minute hour day-of-month month day-of-week
*- any value*/15- every 15 units (e.g.,*/15 * * * *= every 15 minutes)0-5- range (e.g.,0 9-17 * * *= hourly from 9 AM to 5 PM)1,15- specific values (e.g.,0 0 1,15 * *= 1st and 15th of month)
The visual cron editor shows a human-readable preview of your schedule (e.g., "At 03:00 AM, every day").
Schedule management
- Enable/Disable - Toggle schedule without deleting
- Last run - When the schedule last executed
- Next run - Calculated next execution time (respects environment timezone)
- Delete - Remove the schedule
System schedules
Dockhand includes built-in cleanup schedules that run automatically:
| Job | Description | Default retention |
|---|---|---|
| Schedule execution cleanup | Removes historical logs from auto-update and Git sync executions, including success/failure status and error messages | 30 days |
| Container event cleanup | Removes old container activity events (start, stop, restart, die) from the activity feed and dashboard timeline | 7 days |
| Volume browser container cleanup | Removes orphaned busybox helper containers used for volume browsing that weren't cleaned up properly (e.g., due to browser crashes or network issues) |
Runs every 15 minutes |
Configure retention periods for schedule execution and container event cleanup in Settings > General > Cleanup jobs. Volume browser container cleanup runs automatically and cannot be disabled.
Backups Beta Since 1.0.38
Backups are turned off by default. Enable them per instance with the FEAT_BACKUPS_ENABLED=true environment variable and restart. Without it, the Backups page and API stay hidden.
The full backup & restore feature set is free — and stays free in the free edition even after it reaches general availability.
docker run -d \
  --name dockhand \
  --restart unless-stopped \
  -p 3000:3000 \
  -v /var/run/docker.sock:/var/run/docker.sock \
  -v dockhand_data:/app/data \
  -e FEAT_BACKUPS_ENABLED=true \
fnsys/dockhand:latestservices:
dockhand:
image: fnsys/dockhand:latest
container_name: dockhand
restart: unless-stopped
ports:
- "3000:3000"
environment:
- FEAT_BACKUPS_ENABLED=true
volumes:
- /var/run/docker.sock:/var/run/docker.sock
- dockhand_data:/app/data
volumes:
dockhand_data:Introduction
Dockhand backs up containers and compose stacks using restic under the hood. A backup snapshot captures the contents of every volume attached to the target, the container or stack metadata (image, env vars, networks, ports, labels, mounts), and — for stacks — the compose file and any sibling files in the stack directory.
What: every volume and bind mount on the target, the container/stack config (metadata.json), and — for a stack — the whole stack folder (compose, .env, and config sidecars). You can narrow the volumes and stack files each config captures — see creating a backup config.
From where: always the host where the target runs — never from Dockhand's own machine. A helper container runs on that host, next to the data, and reads everything locally. For a remote environment that means Dockhand has to know where the stack folder lives on that host; if it can't, the backup fails with a clear message. See where the stack folder is read from, per connection type.
This only applies if you run Dockhand through a Docker socket proxy; if Dockhand talks to the socket directly, you can ignore it. The backup helper connects through the same proxy as Dockhand and needs the archive API, which a locked-down proxy blocks by default: it streams stack files and metadata in and out of the helper container. Without it a backup fails. Set ALLOW_ARCHIVE=1 on the proxy (the recommended setup already enables ALLOW_LOGS=1, which the helper also needs to confirm the backup succeeded) — see the socket proxy setup.
Why restic instead of plain tar, cp, or rsync? A hand-rolled script can copy files, but a backup tool has to do more than copy — and restic is what turns "some files somewhere" into a dependable, restorable history:
- Deduplication — restic splits data into content-addressed chunks and stores each unique chunk once. Ten daily snapshots of a database that barely changes cost roughly one copy plus the deltas, not ten copies. You get the convenience of "full snapshot every run" with the disk footprint of an incremental — no ZFS/Btrfs dedup filesystem required.
- Encryption by default — every repository is encrypted (authenticated) with your password. Backups can safely live on a cloud bucket or a shared server without exposing their contents.
tar/rsyncgive you neither encryption nor integrity out of the box. - Integrity you can verify — snapshots are checksummed, so
restic checkcan prove the repository is internally consistent and--read-datacan re-hash the actual bytes to catch silent bit-rot on the backend. - Snapshots and retention — each run is an immutable point-in-time snapshot. Keep-last / keep-daily / keep-weekly policies expire old ones automatically, and prune reclaims the freed space — history management a copy script would have to reinvent.
- Many backends, one workflow — the same repository format works over local paths, a REST server, and S3/B2/Azure/GCS object storage (see destination types). You learn it once.
- Fully integrated with how you already manage containers — this is the real difference from running restic yourself on the CLI. Dockhand knows what a container or stack is: it discovers the attached volumes for you, captures the container/stack configuration (image, env vars, networks, ports, labels, mounts) and the compose file alongside the data, runs restic inside a helper container right next to that data, and streams live progress into the UI. A restore doesn't just drop files back — it recreates the whole working container or redeploys the whole stack from the snapshot, on the environment you choose (including a different host). Scheduling, retention, prune, integrity checks and restore are all buttons in the same interface you use for everything else — no restic commands, no cron jobs, no glue scripts to maintain.
Learn more about restic itself at the restic homepage, in the restic documentation, or on GitHub .
The metadata is always captured, so a target with no volumes or bind mounts is still a valid backup — it produces a config-only snapshot. There is no volume data to restore, so a restore of one simply recreates the container (or redeploys the stack) from the stored configuration.
Where can I create a backup schedule? There are four entry points, and they all create the same kind of backup config behind the scenes:
- Backups page — full list of configs across all environments, with a "Backup" button
- Container edit modal → Backups tab — schedule a backup for that one container
- Stack modal → Backups tab — schedule a backup for the whole stack
- Settings > Environments > (env) > Backups tab — batch setup: pick a destination and a schedule, then create backup configs for every container or stack in that environment in one click
Creating a backup config
All four entry points open the same backup config dialog and create equivalent configs — only the pre-fill differs. Pick whichever entry point matches the unit of work you're thinking about: a specific container, a specific stack, or "everything on this environment". You can always edit a config later regardless of where it was created.
From the Backups page
The unified Backups page in the main nav shows every config across every environment. Click Backup in the top-right corner; the dialog opens with no pre-fill, so you pick the environment, target (container or stack), and destination from scratch. Best when you want a bird's-eye view of all your scheduled backups before adding one, or when configuring a fresh environment's first backup.
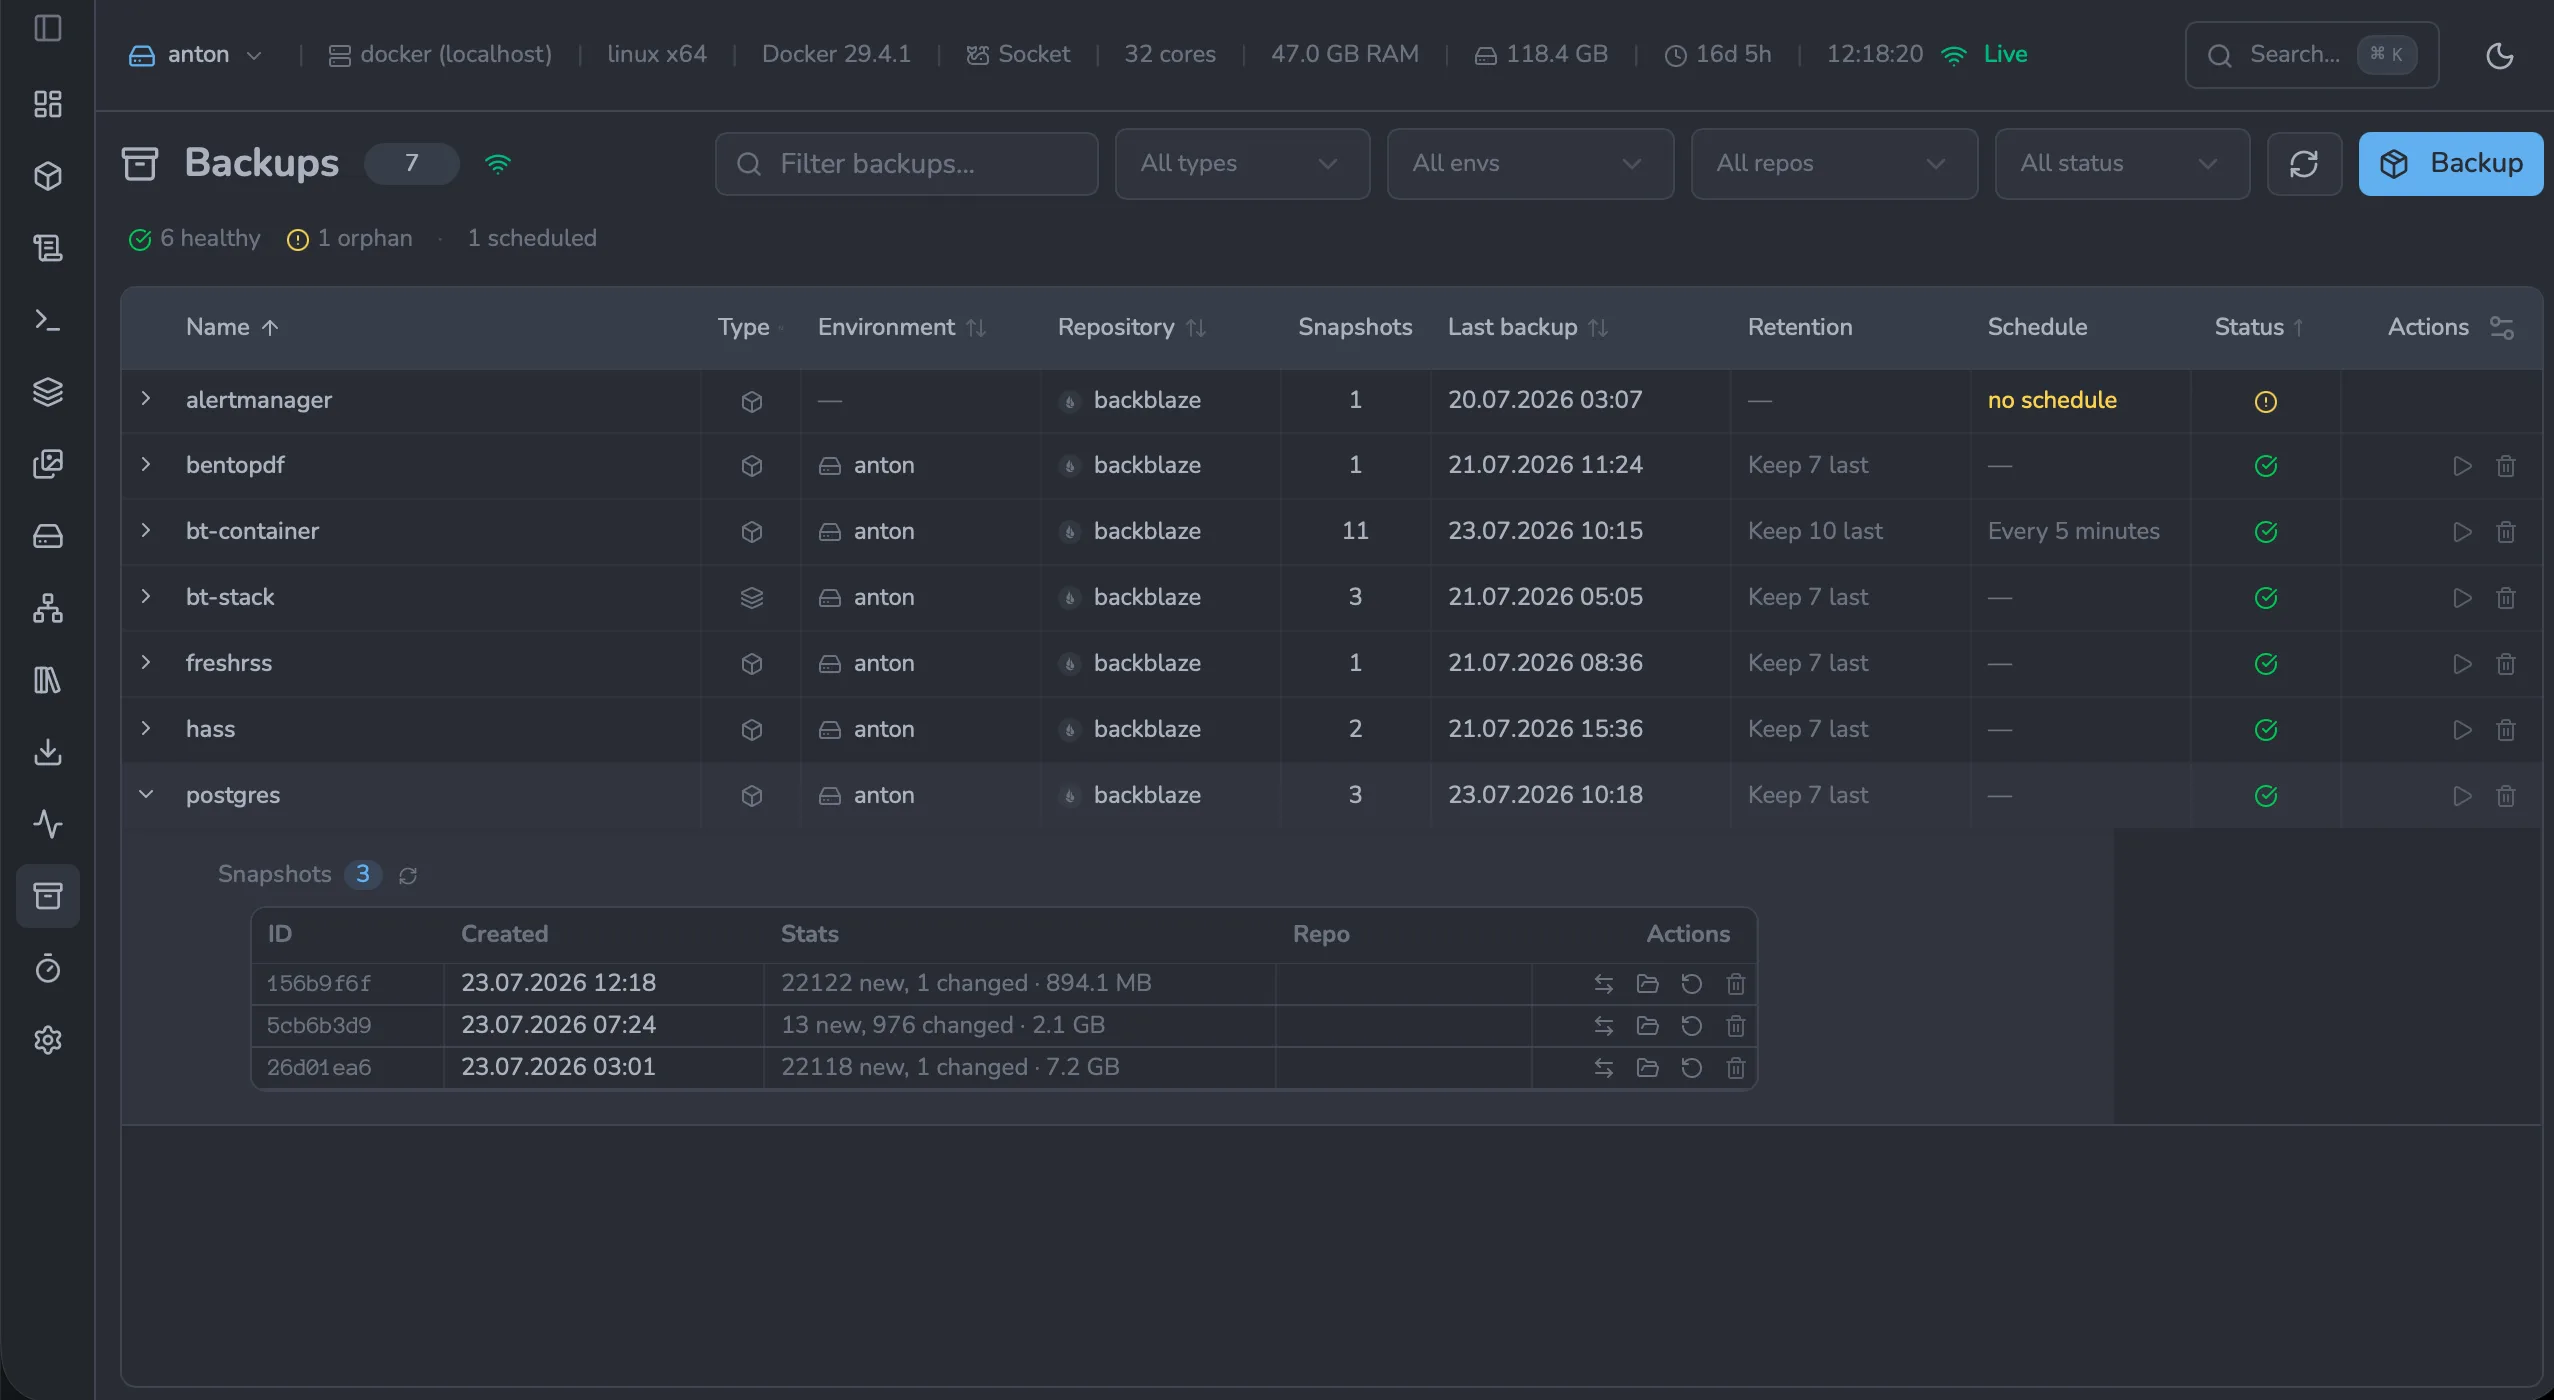
Each row expands inline to show that config's snapshots, which you can browse, restore, or delete without leaving the page.
The page also surfaces orphan snapshots — snapshots that exist in the repository but that this Dockhand instance has no matching config for. That can be a config you deleted earlier, snapshots written by a different Dockhand installation pointing at the same repo, or even snapshots created directly with the restic CLI. Orphans expand inline like regular backups: you can browse their contents and download files or directories. If the orphan was originally written by Dockhand (so the snapshot contains the metadata it needs), you can also restore it like any other snapshot — the target name comes from the snapshot's stored metadata, and you pick the target environment and destinations in the restore dialog.
From the container edit modal
Open any container's edit modal and switch to the Backups tab. The dialog opens with target = this container, environment = its environment, and the volume picker pre-populated with whatever the container has mounted. By default all volumes are included; toggle Backup all volumes off to pick a subset by name. Best for "I want this database container backed up nightly" — minimal clicks, no risk of typing the wrong target name.
The Backups tab has three sub-tabs:
- Schedules — the backup configs for this target: add, edit, enable/disable, run one now, or delete. This is also where you set the cron schedule, retention, and volume selection.
- Snapshots — every snapshot taken of this target, with its id, time, size added, and repository. Restore, browse the files, or delete a snapshot from here.
- History — the run log of past backup executions (success/failure, duration, and output) so you can see what happened and when.
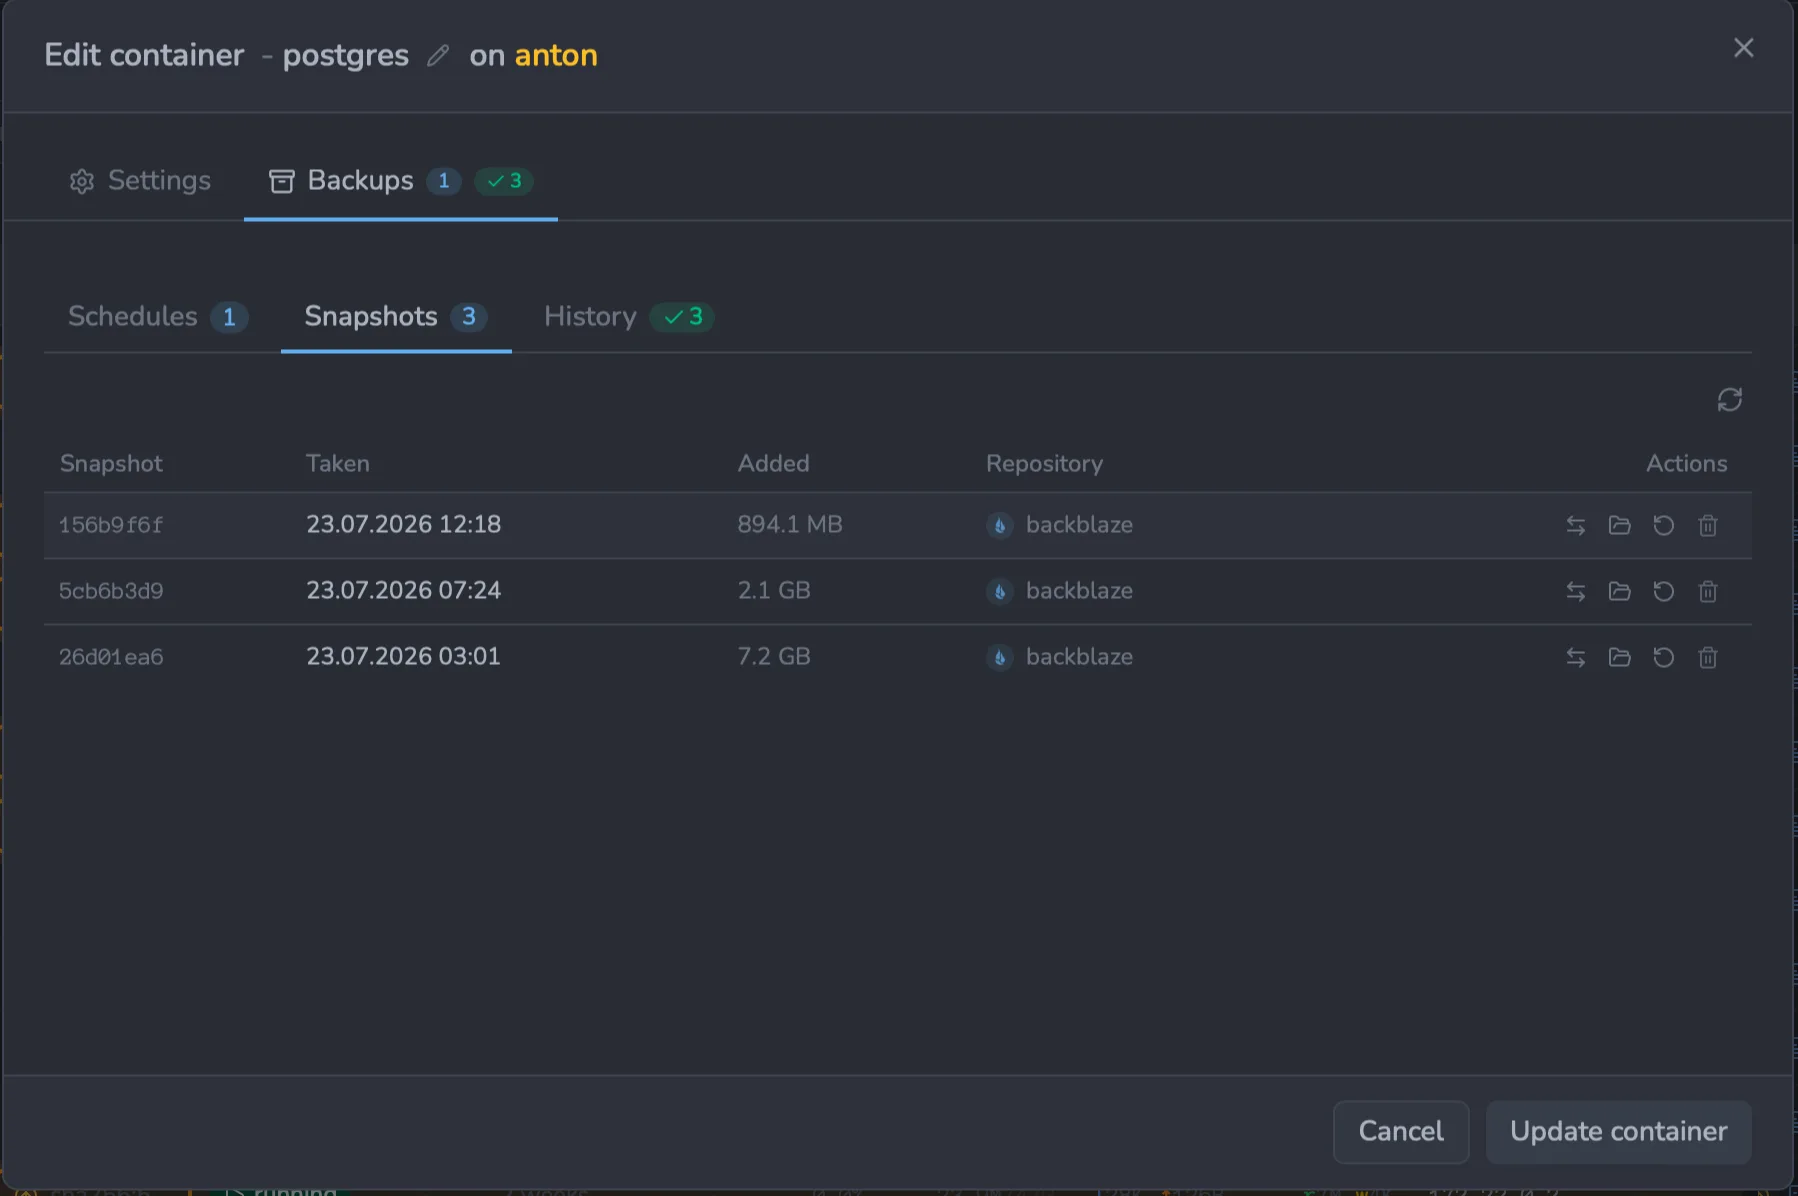
From the stack modal
Stack modal (either in the Stacks page or when editing a stack from anywhere) has a Backups tab too. The dialog opens with target = stack, environment = the stack's environment, and the volume picker showing every volume mounted by every container in the stack. As with the container dialog, all volumes are included by default and you can switch to a hand-picked subset. The stack's whole directory — compose file, .env, and sibling config files — is captured in the snapshot automatically (you can't turn this off — see Stack secrets & backups for why). The helper reads the stack directory straight from the host, so there is no size cap. If Dockhand can't locate the stack folder on the host — a remote environment without matching paths or a Remote stacks directory — the backup fails with a clear message rather than silently skipping the stack files. Best when you treat the stack as the unit of recovery — restoring will redeploy the full compose, not just one container's data.
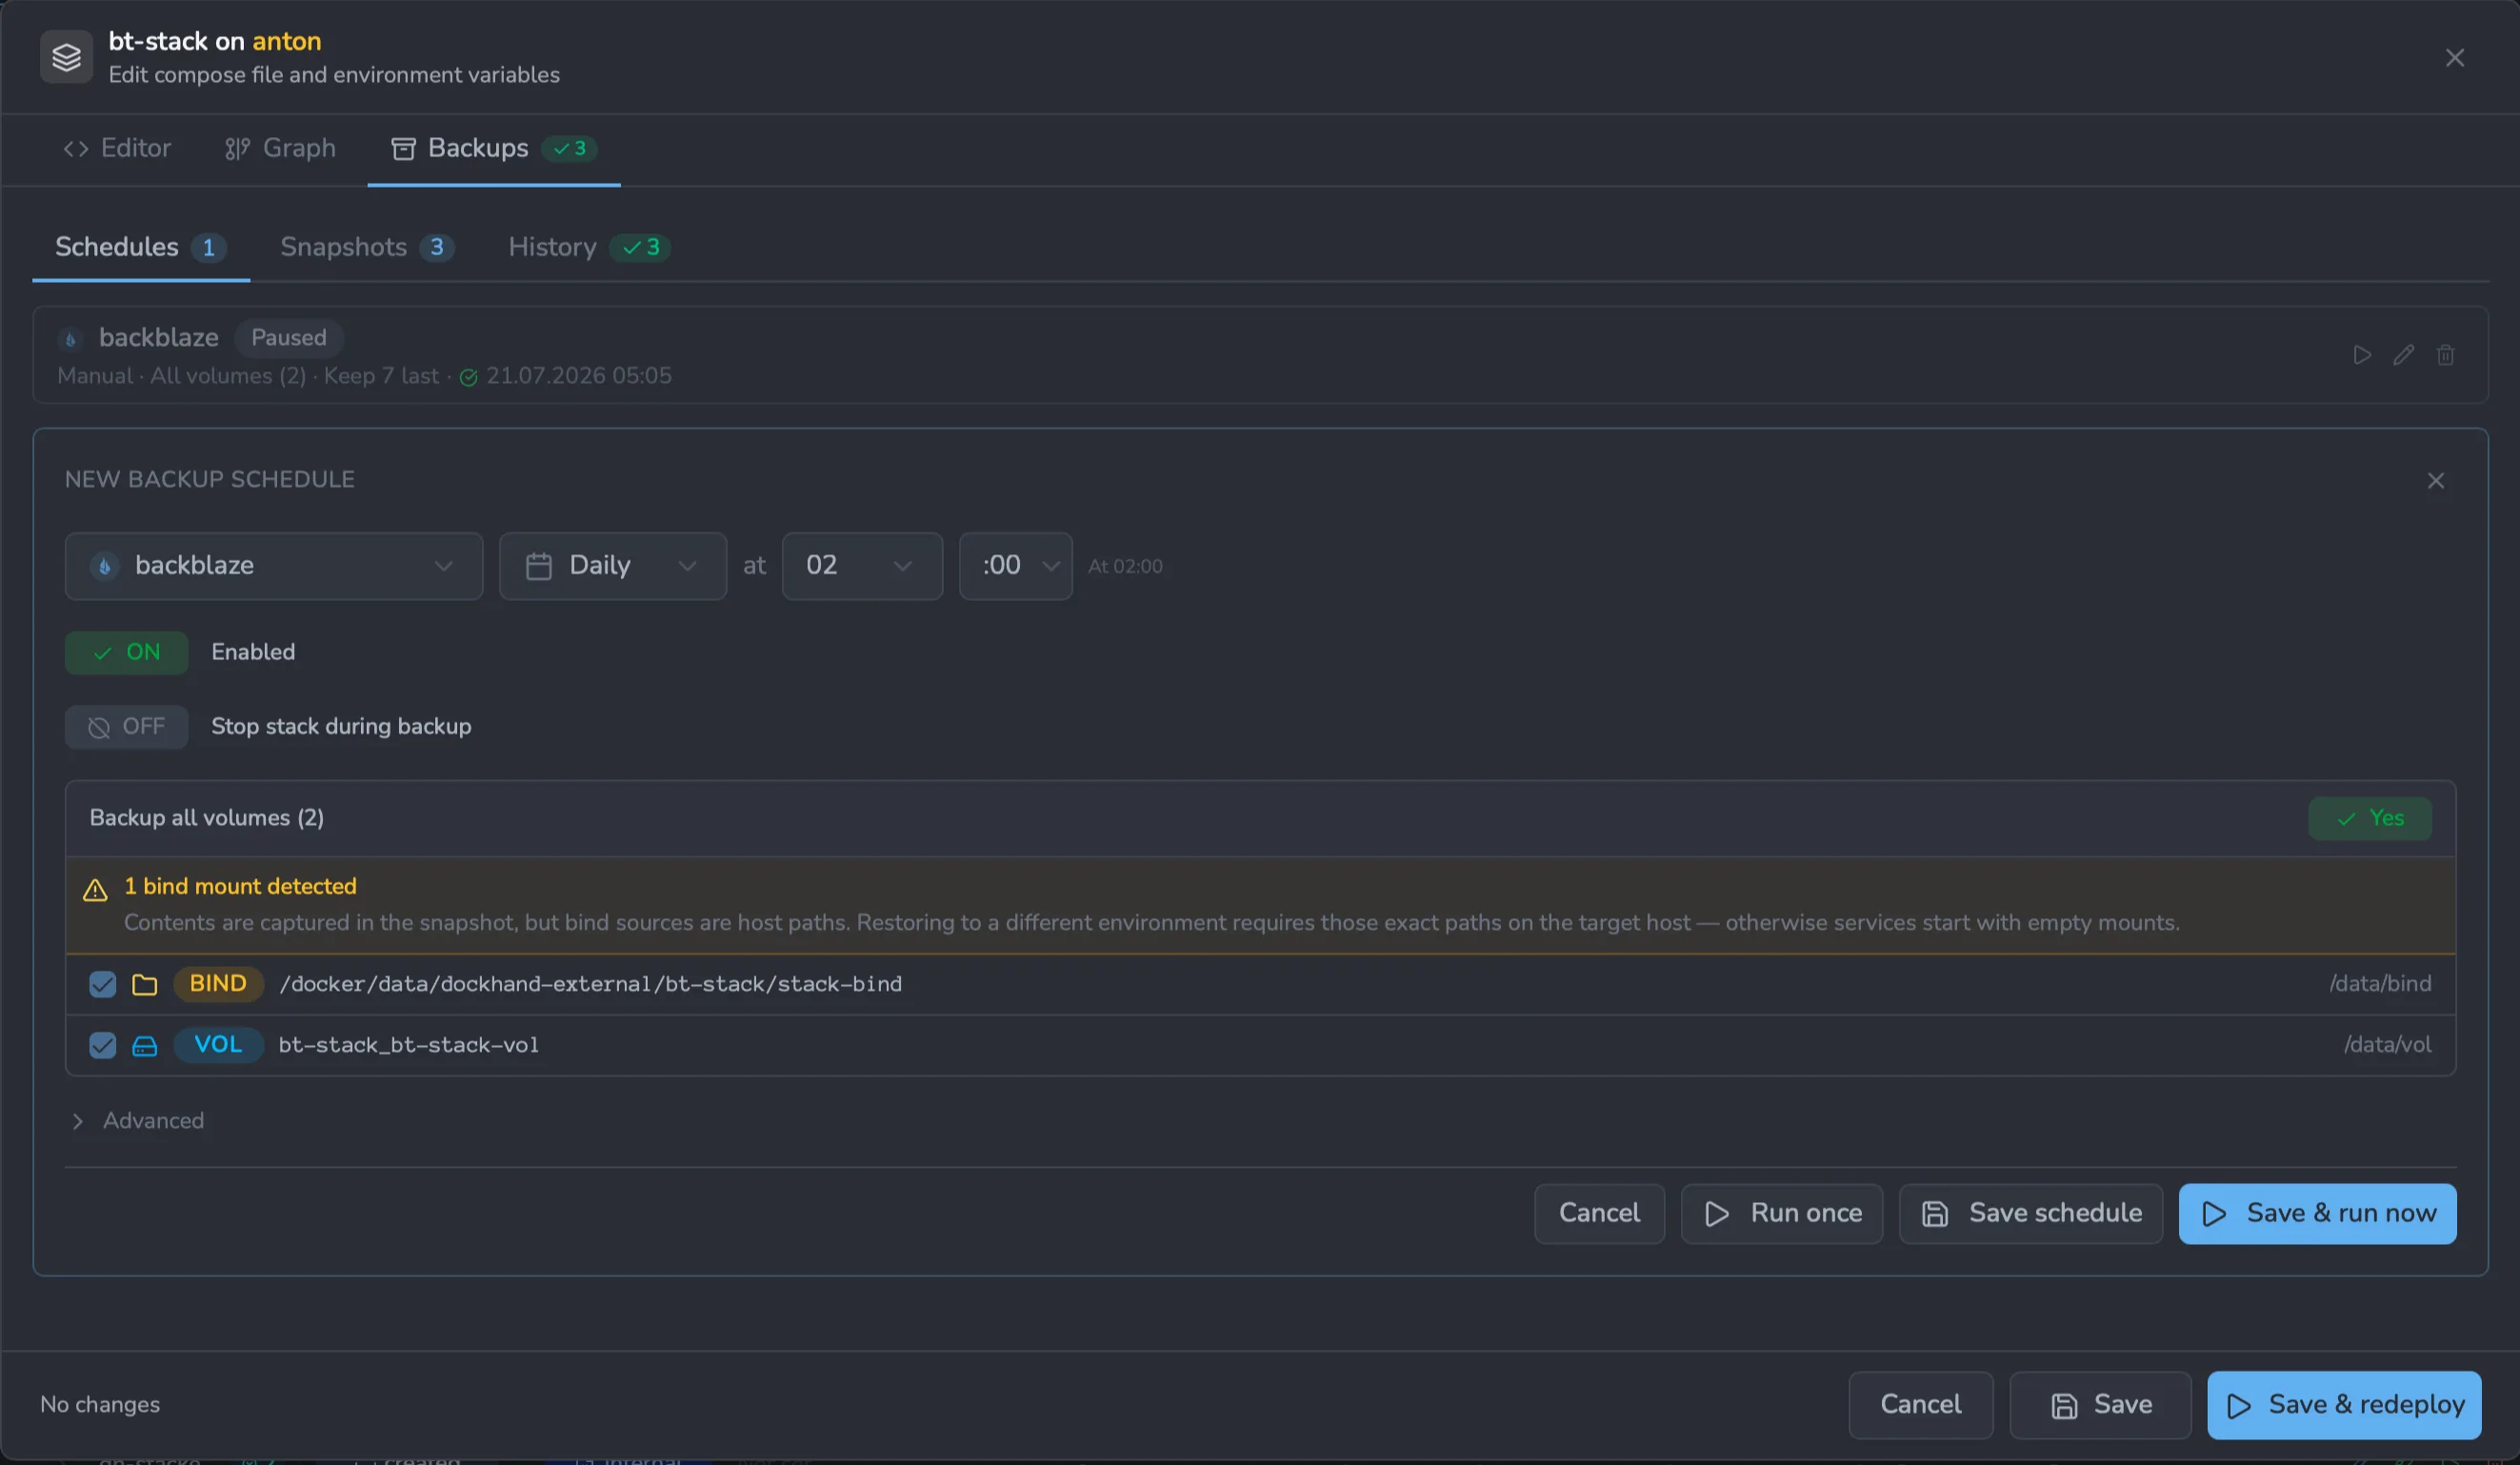
From the environment settings (batch)
In Settings > Environments, open an environment and switch to the Backups tab. The tab lists every container and stack on the environment; each row expands inline to the same backup config form you'd see on the container or stack modal — destination, schedule, volume picker, retention, and so on, all per-target.
The tab also has a Schedule all shortcut at the top: pick one destination and one schedule, and Dockhand creates a backup config for every still-unconfigured container and stack in one click. Batch-created configs always back up all volumes on each target (asking you to pick volumes for dozens of containers at once would be unworkable). To narrow volume selection for any specific target, expand that target's row afterwards and edit its config individually.
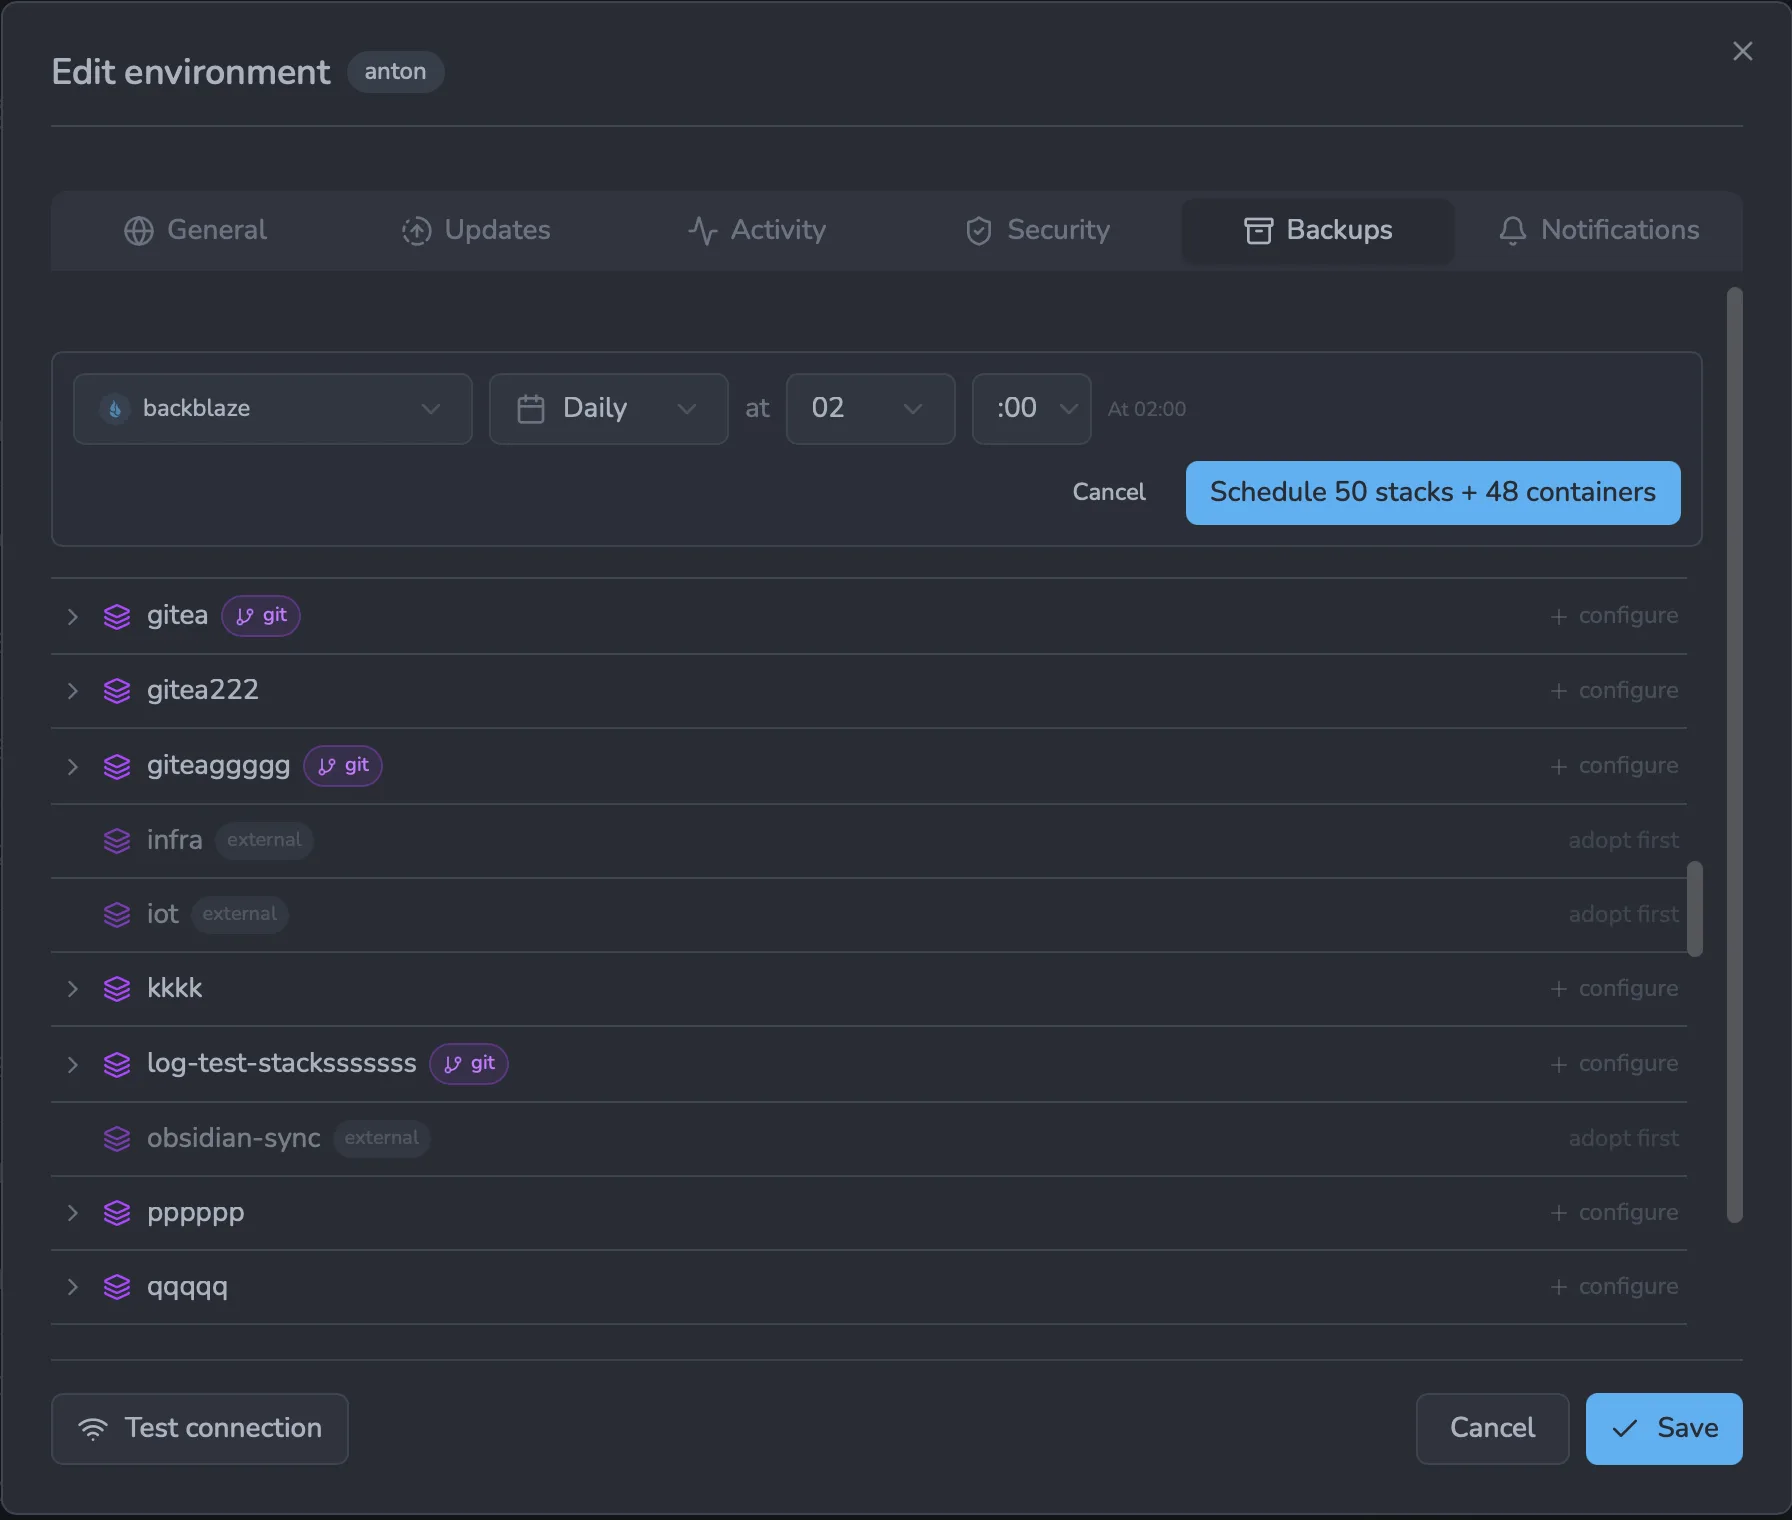
Stacks marked external — discovered running on the host but not managed by Dockhand (their compose file location is unknown) — cannot be backed up as-is. Their row shows adopt first instead of a configure action. A stack backup captures the whole stack directory (compose file, .env, and sibling config) so it can be redeployed on restore; without a known compose location there is nothing complete to capture. Adopt the stack (point Dockhand at its compose file — it becomes internal, files stay in place) and it becomes backup-eligible. Git-managed stacks (marked with a git badge) are already fully managed and can be backed up directly by restic, alongside their git origin.
Destinations
A destination is a restic repository — the place backups are written to. You configure destinations in Settings > Backups. One destination can hold many backups, and a single container or stack can have multiple backup configs pointing at different destinations on independent schedules — e.g. a fast local backup nightly and a cloud backup weekly for off-site disaster recovery.
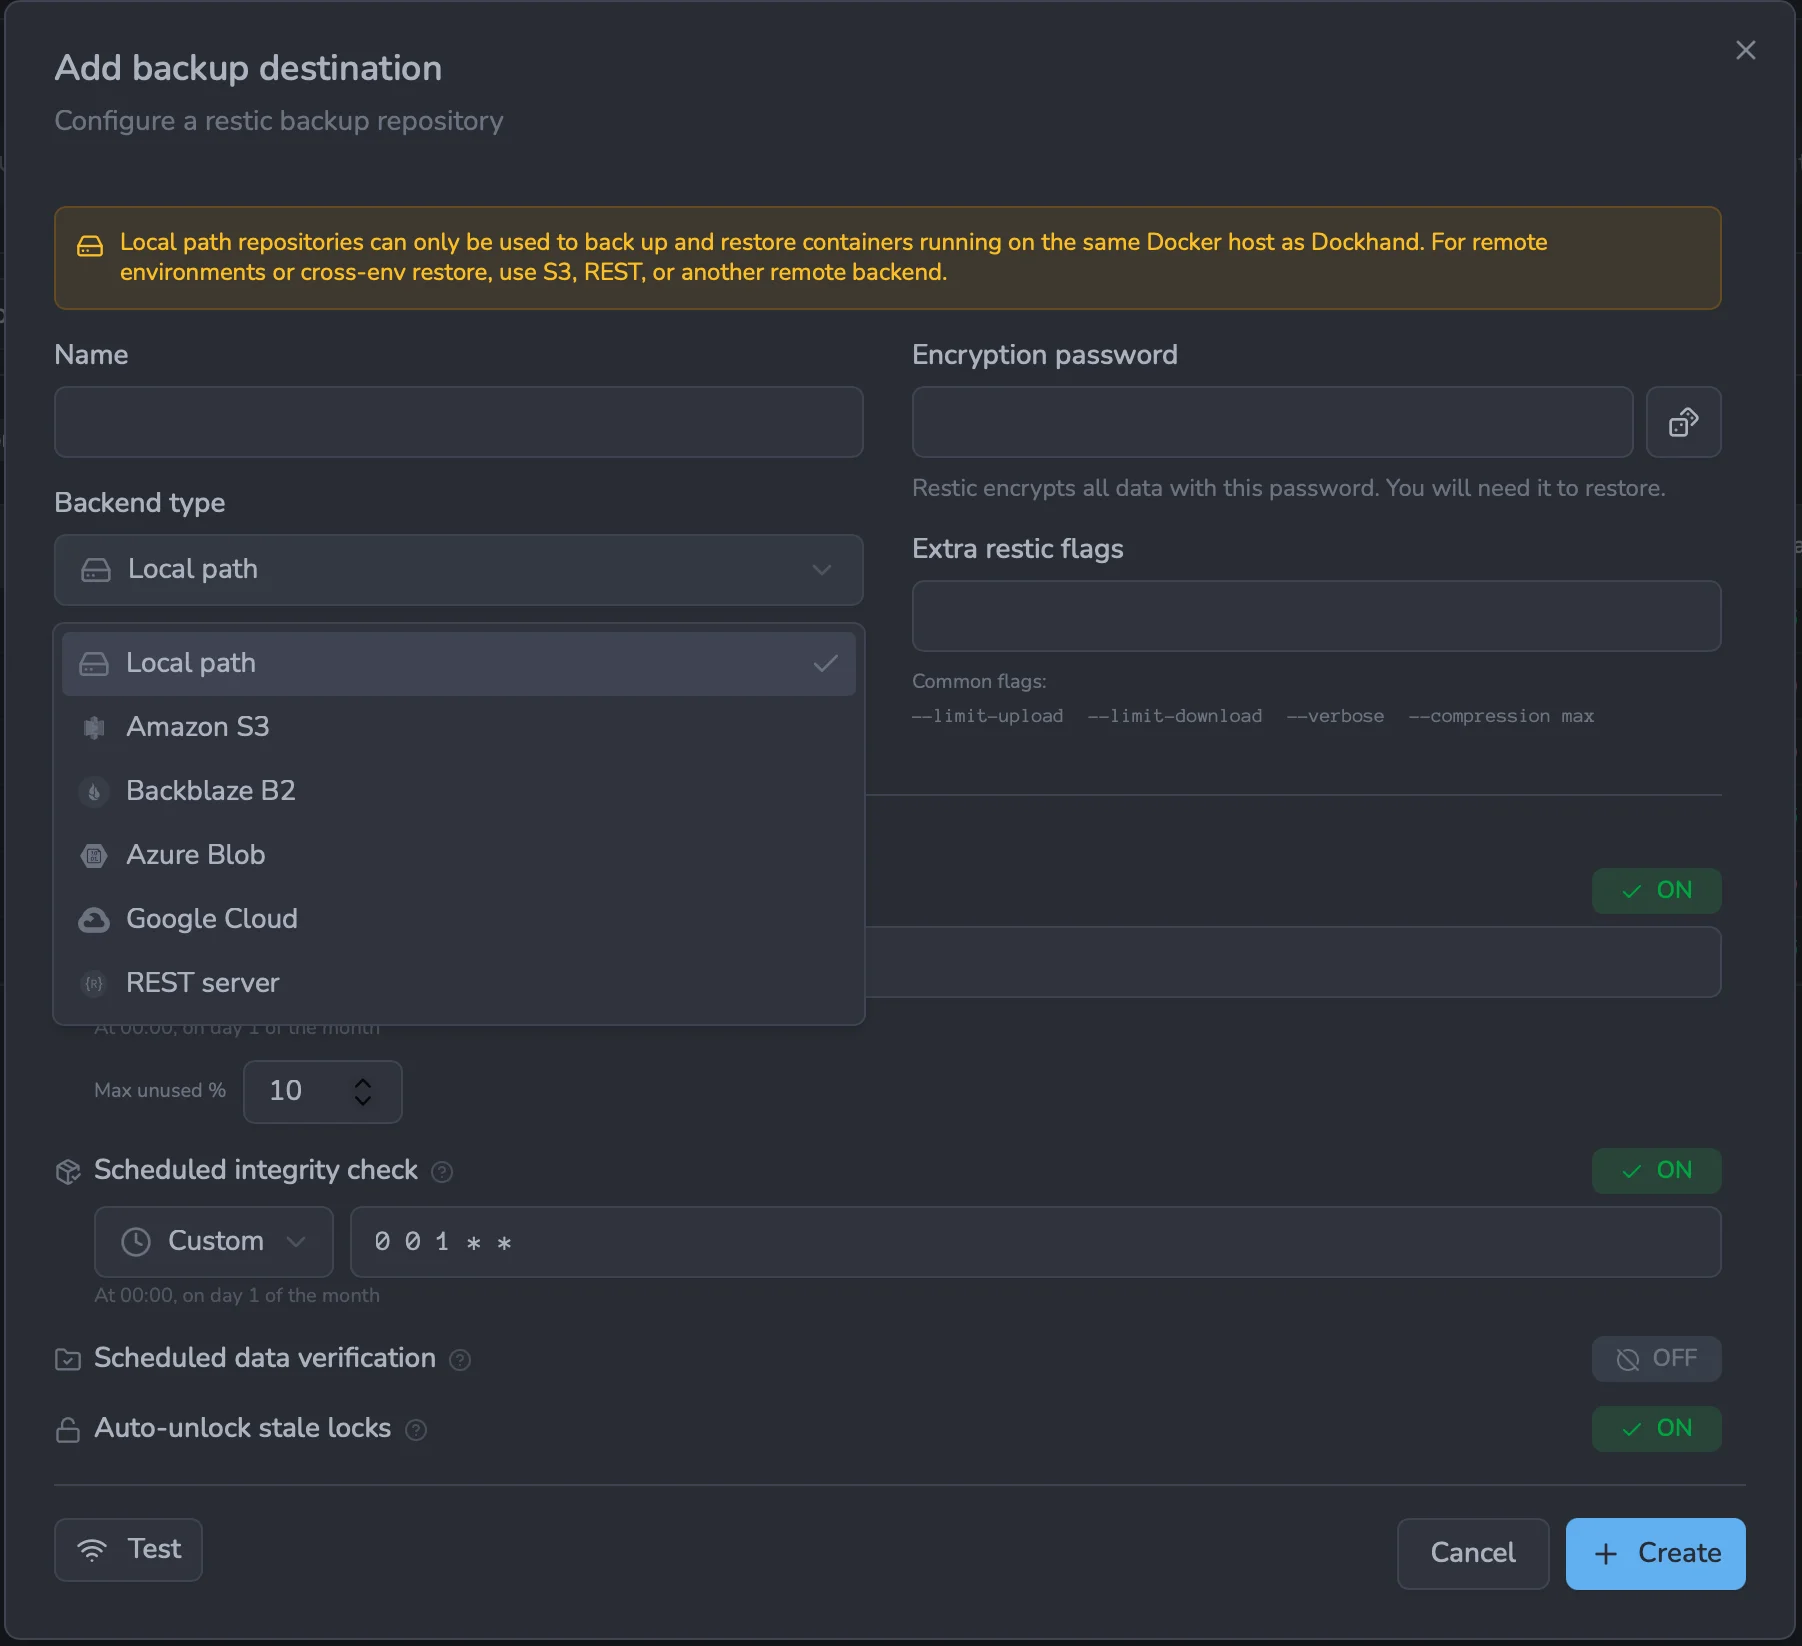
The dialog has two parts. The top configures where and how the repository lives (name, backend, password); the bottom — Repository policies — sets up automatic maintenance. Taking the top first:
- Name — a friendly label for the destination, shown throughout the UI so you don't have to read the full repository URL to recognise it. It's purely cosmetic and can be changed anytime.
- Backend type — Local path, Amazon S3, Backblaze B2, Azure Blob, Google Cloud, or REST server. The fields below adapt to the choice (bucket + access keys for S3, account + key for B2, a host/path for REST, and so on). See Destination types for the exact URL patterns and required credentials.
- Encryption password — restic encrypts all repository data with this password; you need it to restore, so store it safely. The dice button generates a strong random one. Dockhand cannot recover a lost repository password — there is no backdoor.
- Extra restic flags — optional flags passed through to every restic call for this destination, e.g.
--limit-upload,--limit-download,--verbose,--compression max.
The Repository policies section — the bottom half of the dialog — sets up automatic maintenance so the repo stays healthy without you remembering to run it. Each policy has an on/off toggle and its own schedule (a cron picker with presets or a custom expression):
- Scheduled prune — periodically runs
restic pruneto actually reclaim space freed by retention (deleting a snapshot only forgets it; prune removes the now-unreferenced data). Max unused % lets prune leave a small fraction of dead data in place for speed — a higher value makes prune faster but reclaims a little less. - Scheduled integrity check — periodically runs
restic checkto verify the repository's structure (indexes, snapshots, and that every referenced pack exists). Catches metadata corruption early; it reads structure, not the file contents themselves. - Scheduled data verification — a deeper, heavier
restic check --read-data-subsetthat actually re-reads and re-hashes a portion of the stored data to catch bit-rot on the backend. Off by default because it downloads data; enable it for critical repositories. - Auto-unlock stale locks — before a scheduled maintenance task, clear any stale restic lock left behind by a crashed or killed operation, so maintenance isn't blocked waiting on a dead lock. It only removes locks restic can prove are stale, so it's safe alongside other instances sharing the repo.
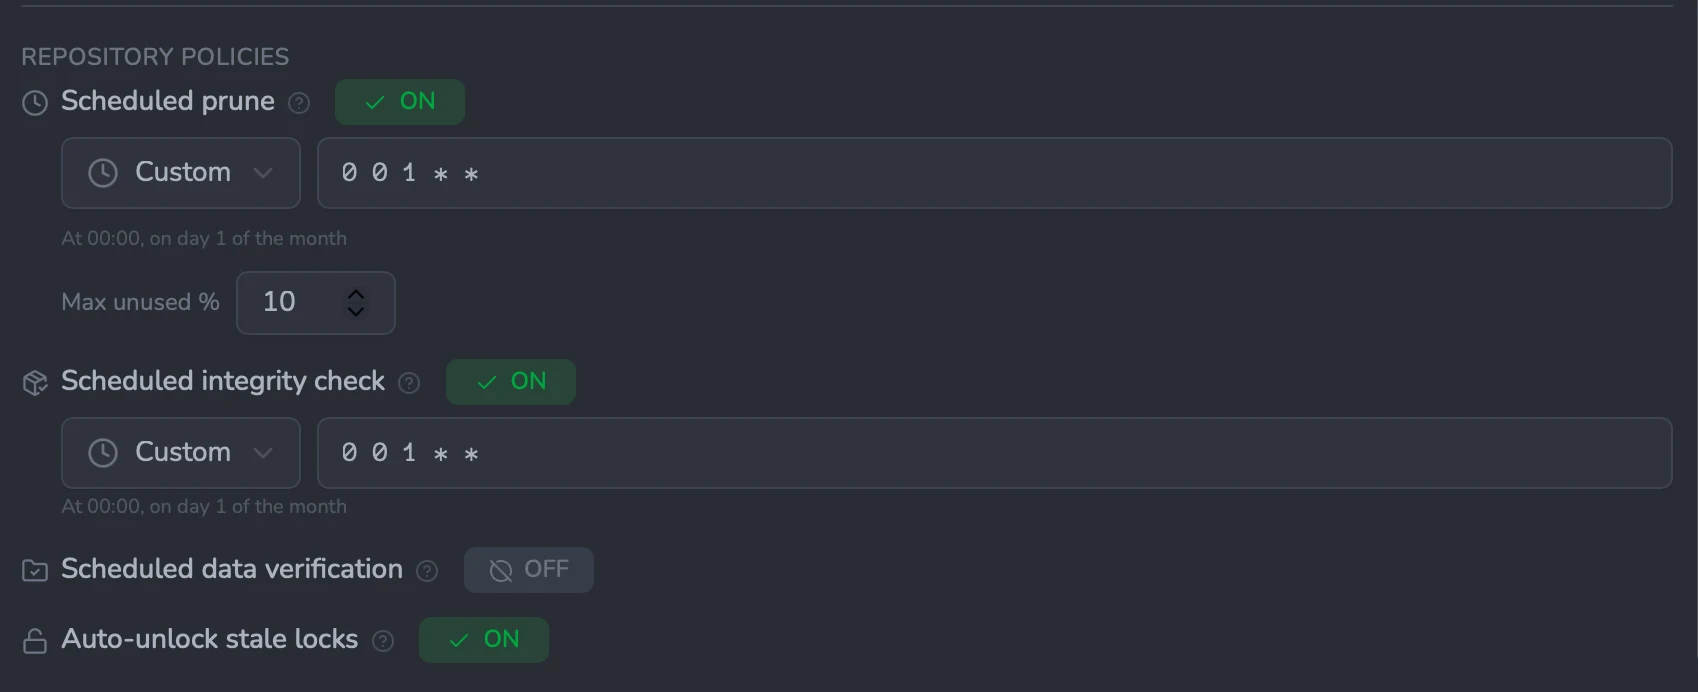
All of these can be changed later, and run on demand, from the destination's row toolbar (see Repository maintenance). Test checks the connection without saving; Create saves the destination and initialises the repository.
When you create a destination, Dockhand:
- Encrypts the repository password and any cloud credentials with AES-256-GCM and stores them in the database
- Calls
restic initagainst the repository (safe to call on already-initialised repos — restic detects an existing repo and skips re-creation) - Registers three maintenance schedules with default cron expressions (see Repository maintenance)
If init fails (wrong credentials, network unreachable, password mismatch on an existing repo), the destination row is still saved so you can fix the configuration without re-entering everything — use Test to diagnose the failure and Initialize from the row's menu to retry.
Within a single Dockhand instance, pointing many backup configs at the same destination is completely fine — Dockhand serializes operations on a repository so they never collide. A restic repository can also be shared by several Dockhand installations (you'll see each other's snapshots as orphans), and that works too.
If you run multiple Dockhand instances, however, we recommend giving each one its own repository. A restic repository is locked exclusively while an operation writes to it, so when independent instances back up to the same repo at the same time they queue behind that lock rather than running in parallel — separate repositories keep them fully independent and avoid the wait. It's a performance and tidiness recommendation, not a safety requirement: sharing is safe, just not concurrent. In practice this is as simple as a distinct bucket or path per instance — e.g. s3:https://host/backups-prod and s3:https://host/backups-staging on the same storage.
Destination types
The destination type is detected from the repository URL prefix. Dockhand supports every backend restic itself supports:
| Type | URL pattern | Required envVars |
|---|---|---|
| Local filesystem | /path/to/repo or ./relative/path |
— |
| S3 (AWS, MinIO, Garage, Wasabi, …) | s3:https://host/bucket/path |
AWS_ACCESS_KEY_ID, AWS_SECRET_ACCESS_KEY |
| Backblaze B2 | b2:account-id:bucket-name |
B2_ACCOUNT_ID, B2_ACCOUNT_KEY |
| Azure Blob | azure:container-name:/path |
AZURE_ACCOUNT_NAME, AZURE_ACCOUNT_KEY |
| Google Cloud Storage | gs:bucket-name/path |
GOOGLE_APPLICATION_CREDENTIALS (path or inline JSON) |
| REST server | rest:https://host:port/path |
— (credentials can be embedded in the URL) |
Local filesystem
A local filesystem destination writes the restic repository to a plain directory on the Docker host - the drive Dockhand is running from, an attached disk, or a mounted NAS share. It's the simplest option when you just want backups on the same machine or a directly-attached volume, with no external service to set up.
It has one extra requirement: the path must be bind-mounted into the Dockhand container at the same host path (e.g. -v /mnt/backup:/mnt/backup), or init and the backup helper end up looking at different directories. See how a backup runs across environments for the details and a diagram.
Local repositories (paths) only work for environments running on the same host as Dockhand. You cannot back up containers running on a remote Docker host to a local path — Dockhand would have nowhere to read the volume contents from.
For remote environments (Direct TCP, Hawser Standard, Hawser Edge) the backup helper container — fnsys/dockhand-backup — is launched on the remote Docker host, not on Dockhand's host. It is that remote container that opens the connection to the destination, so the destination has to be reachable from the remote network: any S3-compatible target or the restic REST server. If you don't already have one available, you can set up a self-hosted REST server or S3 server in minutes — see just below.
Amazon S3
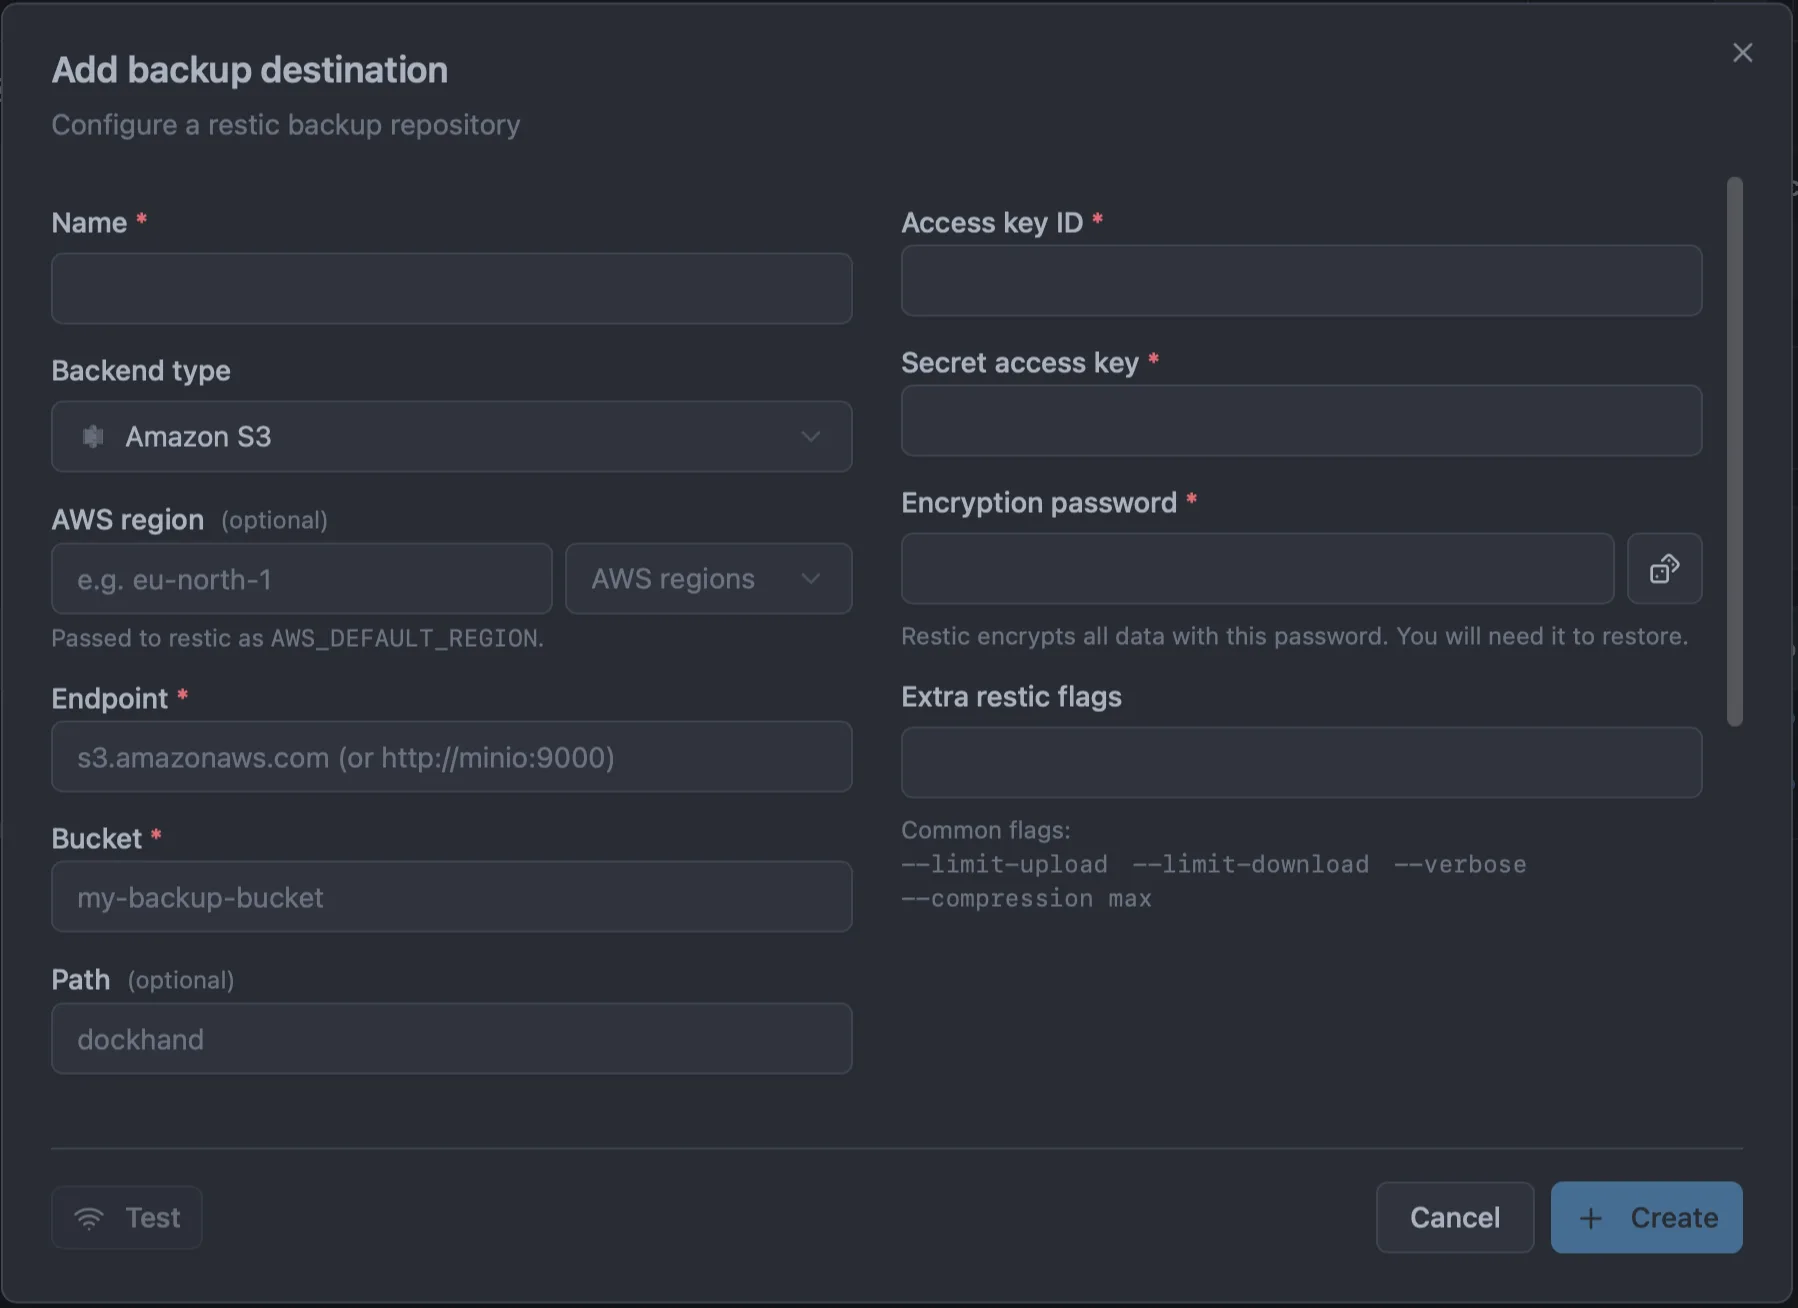
Two things to get right when setting up an AWS S3 destination:
-
Set the region. A bucket lives in one region, and the generic
s3.amazonaws.comendpoint does not know which — pointing at it returns301 Moved Permanentlyon init. Type your bucket's region in the Region field (or pick it from the AWS regions quick-pick, which also fills in the endpoints3.<region>.amazonaws.com). The region is shown in the S3 console next to the bucket name. -
Attach the right IAM policy. The access key needs standard S3 API permissions. Attach
AmazonS3FullAccessto the IAM user. Do not useAmazonS3FilesFullAccess— despite the similar name that policy is for S3 Access Grants and does not grant bucket API access, so restic fails withStat: Access Deniedon init even though the region is correct. (For production, scope a custom policy to just the one backup bucket rather than full access.)
With the region set and AmazonS3FullAccess attached, initialise the repository from the destination row and back up as usual.
Non-AWS S3 providers (MinIO, Wasabi, Cloudflare R2, Garage, …) use the same Amazon S3 backend — just fill the fields by hand instead of using the AWS quick-pick:
| Provider | Endpoint | Region |
|---|---|---|
| MinIO (self-hosted) | http://minio-host:9000 (include http:// for plain HTTP) |
Leave blank, unless your MinIO was started with a specific MINIO_REGION — then match it. |
| Wasabi | s3.<region>.wasabisys.com (e.g. s3.eu-central-1.wasabisys.com) |
The same region, e.g. eu-central-1. |
| Cloudflare R2 | <account-id>.r2.cloudflarestorage.com |
auto |
The Access key ID / Secret access key fields work the same for every provider (they become AWS_ACCESS_KEY_ID / AWS_SECRET_ACCESS_KEY), and the Region field becomes AWS_DEFAULT_REGION — so any provider that needs a region gets one, regardless of endpoint.
Azure Blob
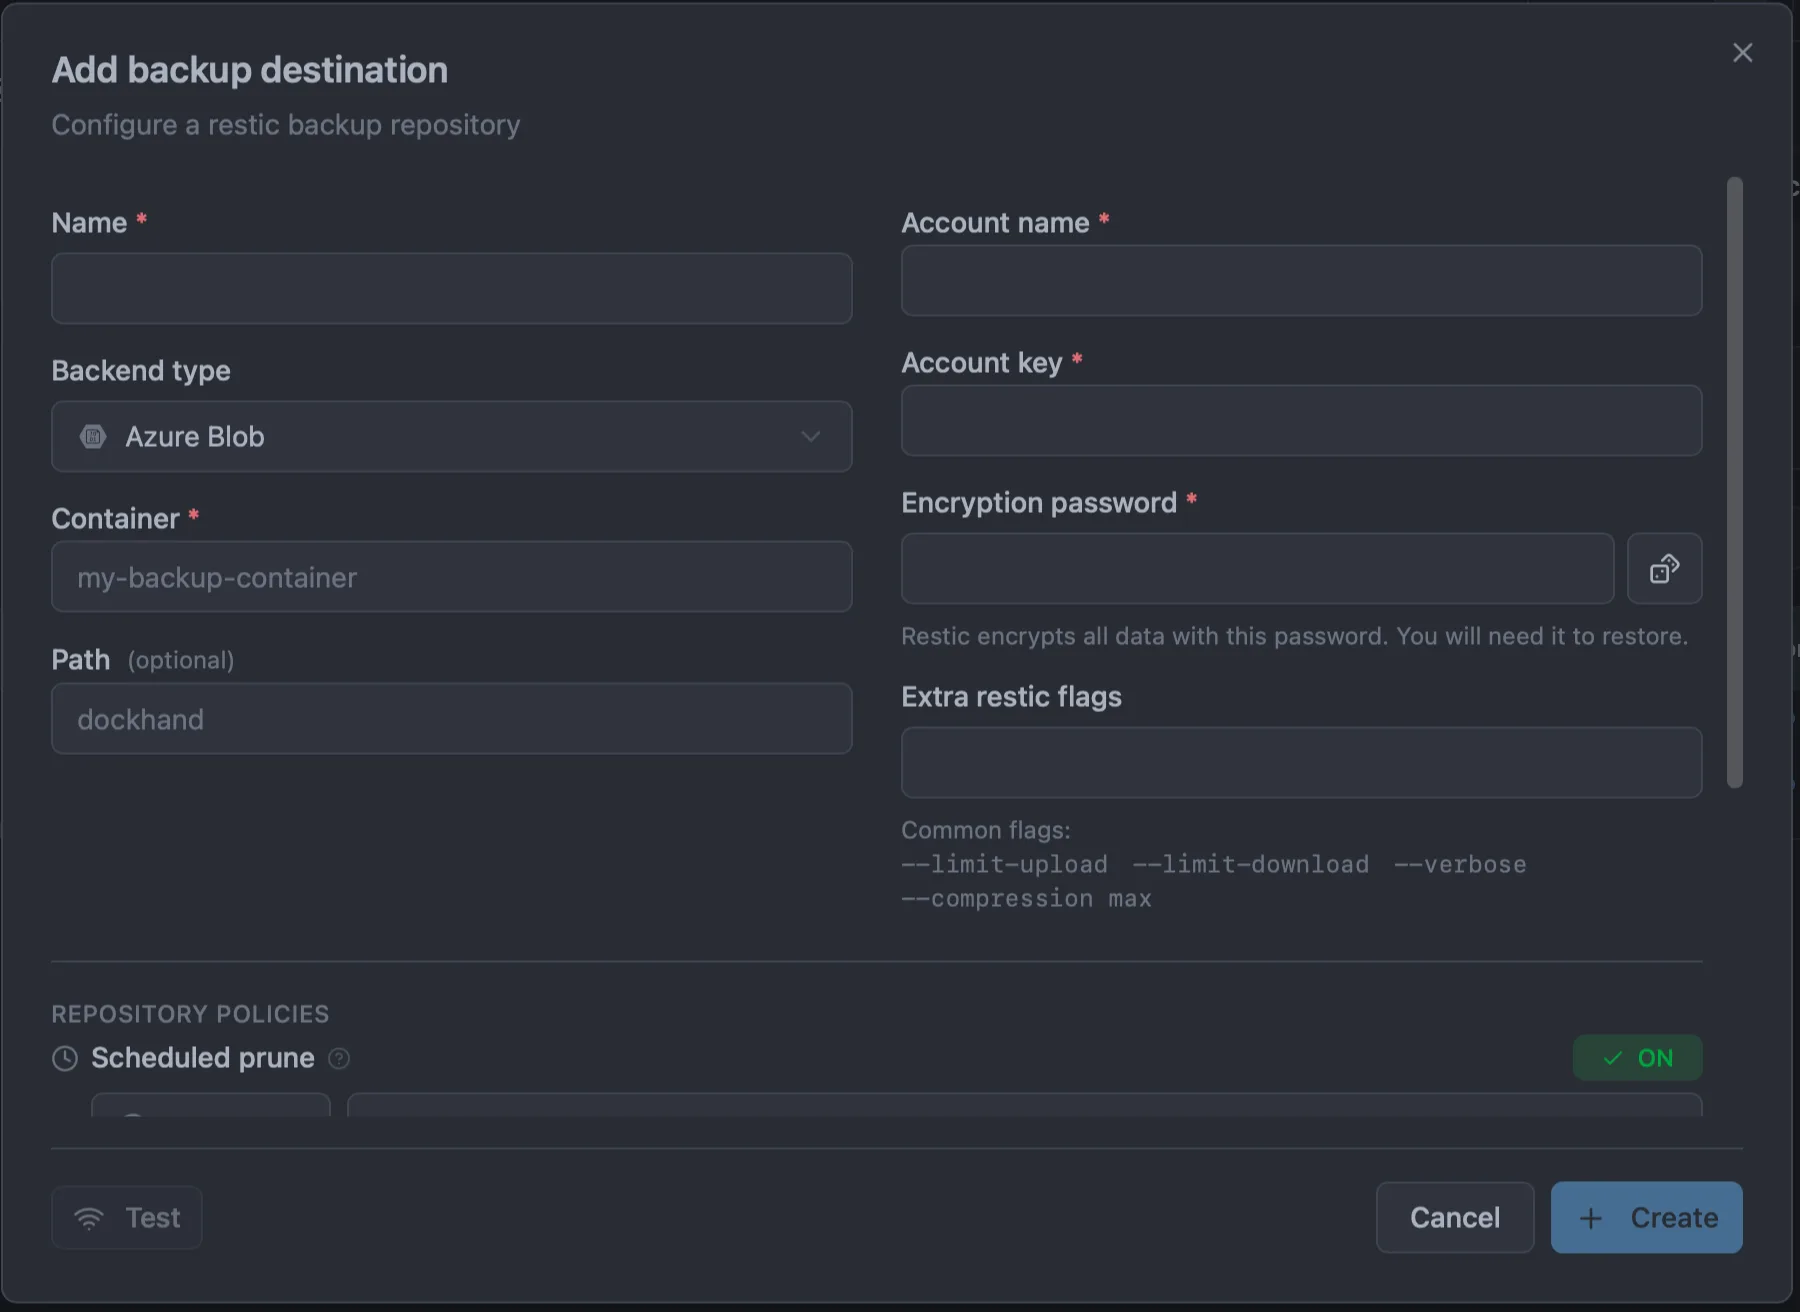
Azure asks for a storage account, a container inside it, and one access key. Set it up from the Azure portal:
- Create a storage account. Search for Storage accounts → Create. Pick a resource group and a globally-unique account name (lowercase letters and digits) — that name goes in the Account name field. Standard performance with LRS redundancy is the cheapest option that works; pick a higher tier or geo-redundant replication if your setup calls for it. The account name resolves to
<account>.blob.core.windows.net, so a wrong name makes the connection hang until it times out. - Create a container. Open the account → Data storage → Containers → + Container. Give it a name (e.g.
backups) with private access — that name goes in the Container field. - Copy an access key. Open the account → Security + networking → Access keys, reveal key1, and copy the Key value into the Account key field. This is a long-lived key (it does not expire), so scheduled backups keep working.
The container must exist before you initialise the repository — Dockhand writes into it but does not create it. Leave Path blank to store snapshots at the container root, or set one (e.g. dockhand) to keep several repositories apart in the same container.
Backblaze B2
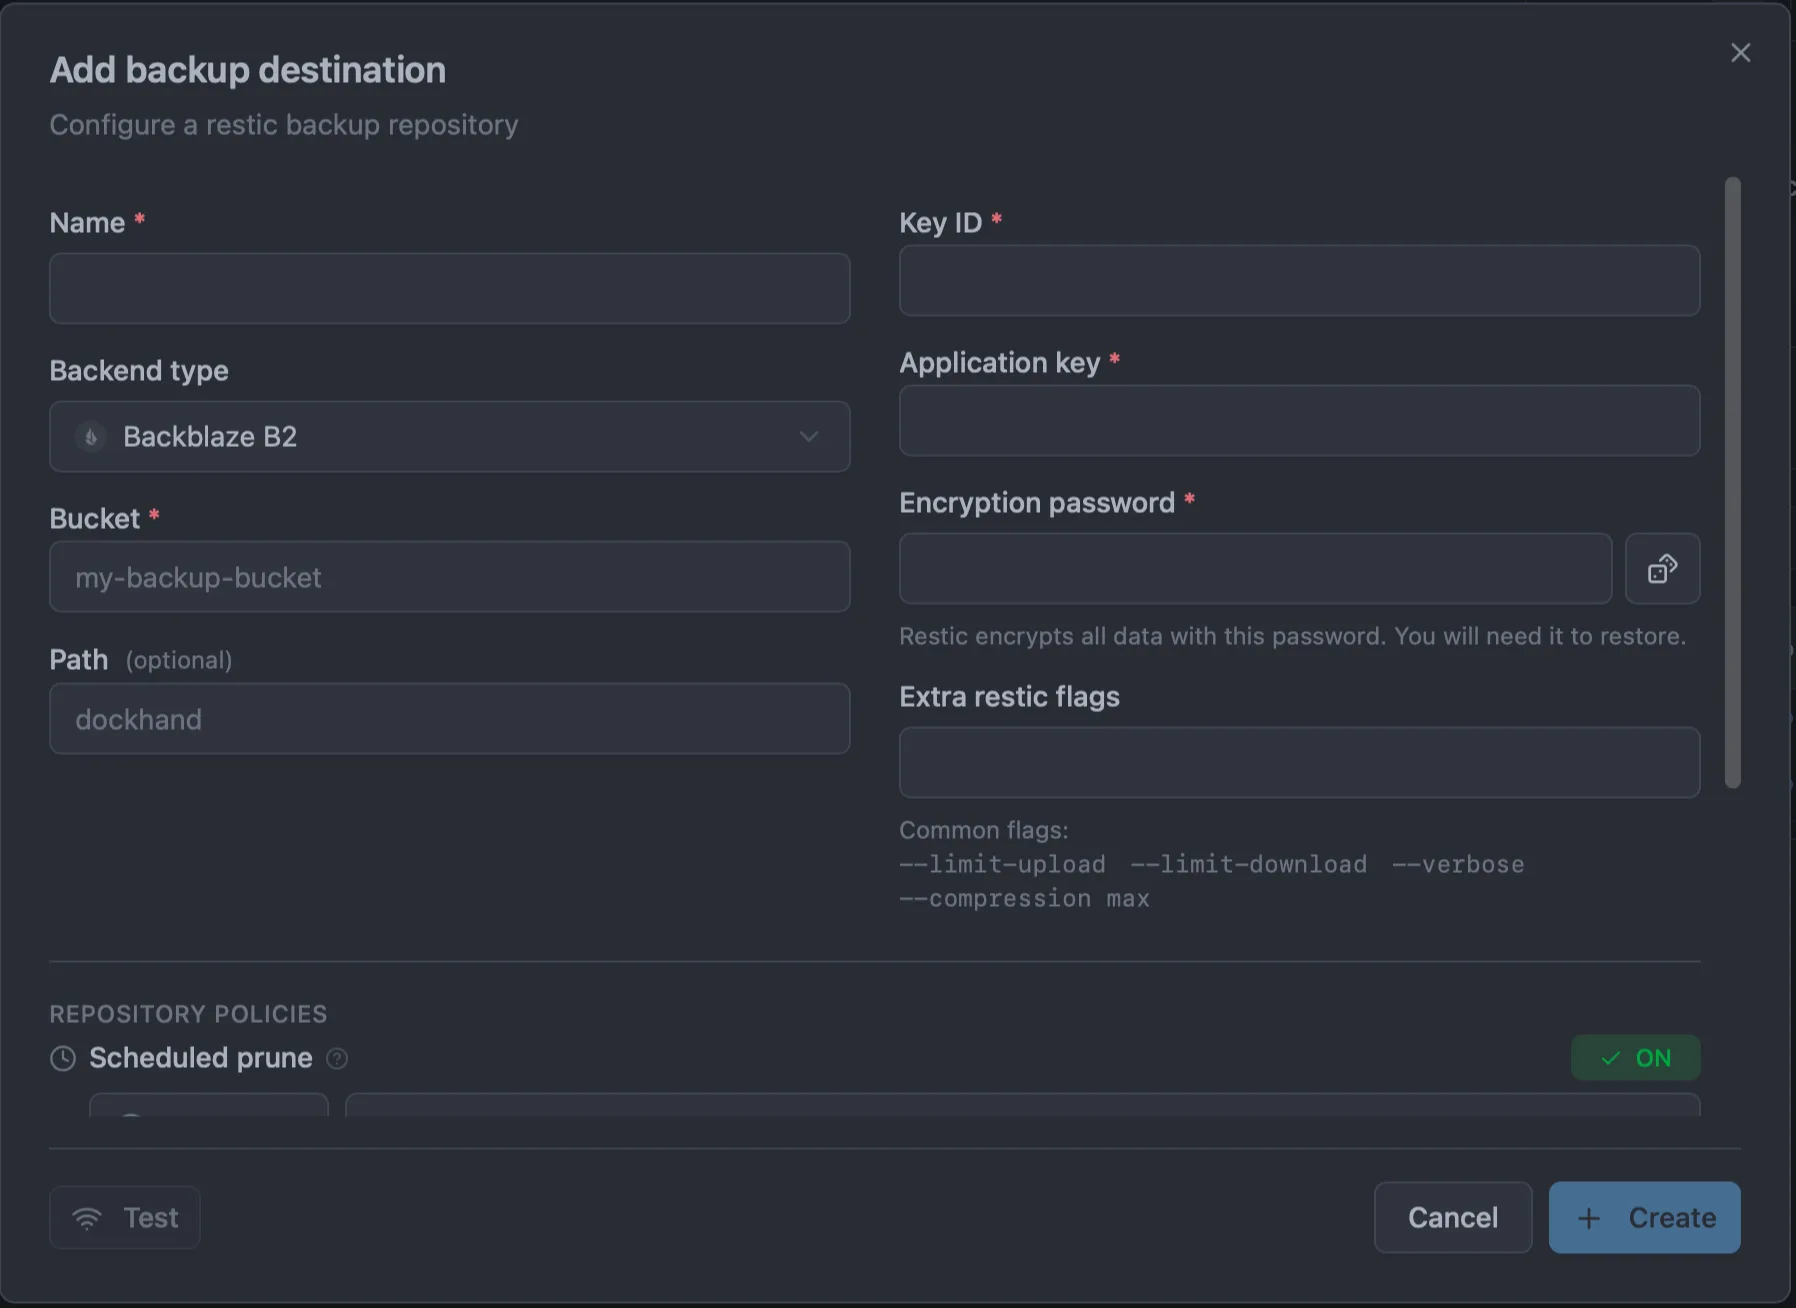
In the Backblaze B2 console create a bucket (its name goes in the Bucket field), then under Application Keys create an application key scoped to that bucket. The keyID goes in Key ID and the applicationKey (shown once) in Application key. Both are long-lived, so scheduled backups keep working.
Google Cloud Storage
Google Cloud authenticates with a service account whose key is a JSON file. Dockhand uses that JSON to obtain and refresh access automatically, so scheduled backups keep working without manual re-authentication. Set it up in the Google Cloud console:
- Create a bucket. Cloud Storage → Buckets → Create. The name is globally unique — it goes in the Bucket field. Keep Public access prevention on and Uniform access control; the service account grants the access, not public ACLs. Note your Project ID from the top bar (it can differ from the project name) for the Project ID field.
- Create a service account. IAM & Admin → Service Accounts → Create service account. Give it a name (e.g.
dockhand-backup) and finish — the optional project-wide role step can be skipped, since access is granted on the bucket instead. - Grant it access to the bucket. Open the bucket → Permissions → Grant access, add the service account's email as the principal, and assign the role Storage Object Admin (
roles/storage.objectAdmin). This scopes it to reading, writing, and deleting objects in that one bucket — restic needs delete for prune/forget, and bucket-scoped access is safer than a project-wide role. - Create a JSON key. On the service account → Keys → Add key → Create new key → JSON. A
.jsonfile downloads once — keep it safe.
In the destination dialog, fill in the Bucket and Project ID, then paste the JSON into the Service account JSON field or use Upload file to load the downloaded .json directly. Leave Path blank to store snapshots at the bucket root, or set one (e.g. dockhand) to keep several repositories apart in the same bucket. The bucket must exist before you initialise the repository — Dockhand writes into it but does not create it.
Self-hosting a REST server destination
The restic REST server is the simplest self-hosted destination — a single container, no buckets, no access keys, no cluster layout. It speaks restic's native HTTP protocol, so it's often faster than going through an S3 gateway. Use the rest: repository type.
Create a password file and start the container. Port 8000 is the REST API:
mkdir -p /srv/rest-server/data

# Create a user (bcrypt). Any htpasswd tool works; here we borrow one from httpd.
docker run --rm httpd:alpine htpasswd -nbB dockhand-user 'a-strong-password' \
  > /srv/rest-server/data/.htpasswd

docker run -d --name rest-server \
  -p 8000:8000 \
  -v /srv/rest-server/data:/data \
  --restart unless-stopped \
  restic/rest-server:latest
The startup log should show Authentication enabled and Loaded htpasswd file. That's the whole setup — no init step here (Dockhand's Test / Init button runs restic init for you).
Then in Dockhand, add a REST server destination with the credentials embedded in the URL:
- Repository:
rest:http://dockhand-user:a-strong-password@<rest-host>:8000/my-backups
The last path segment (my-backups) is the repository name — restic creates it on init. Use rest:https://… if you put the server behind a TLS reverse proxy (recommended, since the password travels in the URL otherwise). For extra safety you can run the server with --append-only so a compromised client can add snapshots but never delete them.
Self-signed or private-CA certificates. Since 1.0.44 If the backend is served over HTTPS with a certificate that isn't signed by a public CA (a self-hosted REST server or MinIO with your own CA, an internal PKI), open the destination's TLS certificates section and paste or upload the CA certificate (PEM). Dockhand stores it encrypted and hands it to restic so the backend's certificate validates. If the backend also requires mutual TLS, add a client certificate (certificate and private key in one PEM). Both fields are optional and apply to any backend type; leave them blank to use the system trust store. The certificates travel with the backup helper, so they work the same on local, Direct TCP, and Hawser environments.
Self-hosting an S3 destination
The s3: repository type works against any S3-compatible server, not just AWS. Two free, open-source options that run as a single container are MinIO and Garage. Pick whichever fits your topology.
| Option | Best for | Notes |
|---|---|---|
| MinIO | Single-host backup target, or a small cluster | The most widely deployed self-hosted S3. Comes with a web console for browsing buckets. Single-node mode is one container. |
| Garage | Geo-distributed clusters, low-resource hosts | Written in Rust, very low RAM footprint. Designed for multi-site replication over the open internet. Single-node setup with the --single-node flag. |
MinIO
Start a single-node MinIO container, exposing the S3 API on port 9000 and the web console on 9001:
docker run -d --name minio \
  -p 9000:9000 -p 9001:9001 \
  -e MINIO_ROOT_USER=dockhand \
  -e MINIO_ROOT_PASSWORD=<strong-password> \
  -v /srv/minio:/data \
  --restart unless-stopped \
  quay.io/minio/minio:latest \
  server /data --console-address ":9001"
Create a bucket for your backups — use the bundled mc client inside the container:
docker exec minio mc alias set local http://127.0.0.1:9000 dockhand <strong-password>
docker exec minio mc mb local/dockhand-backups
Then in Dockhand, create an S3 destination with:
- Repository:
s3:http://<minio-host>:9000/dockhand-backups(usehttps://if you've put TLS in front) - AWS_ACCESS_KEY_ID:
dockhand(or a dedicated user/service account you create in the MinIO console) - AWS_SECRET_ACCESS_KEY: the password you set above
Garage
Garage needs a small TOML config file. Generate an RPC secret and write the config first:
mkdir -p /srv/garage/meta /srv/garage/data
RPC_SECRET=$(openssl rand -hex 32)
cat > /srv/garage/garage.toml <<EOF
metadata_dir = "/var/lib/garage/meta"
data_dir = "/var/lib/garage/data"
db_engine = "sqlite"

replication_factor = 1
rpc_bind_addr = "[::]:3901"
rpc_public_addr = "127.0.0.1:3901"
rpc_secret = "${RPC_SECRET}"

[s3_api]
api_bind_addr = "[::]:3900"
s3_region = "garage"
root_domain = ".s3.garage.local"

[admin]
api_bind_addr = "[::]:3903"
admin_token = "$(openssl rand -hex 32)"
EOF
Start the container — port 3900 is the S3 API, 3903 is the admin API:
docker run -d --name garage \
  -p 3900:3900 -p 3903:3903 \
  -v /srv/garage/garage.toml:/etc/garage.toml \
  -v /srv/garage/meta:/var/lib/garage/meta \
  -v /srv/garage/data:/var/lib/garage/data \
  --restart unless-stopped \
  dxflrs/garage:v2.3.0
Garage v2 needs an explicit cluster layout before the S3 API will accept requests. The bootstrap is a one-time setup:
NODE_ID=$(docker exec garage /garage node id -q | head -c 64)
docker exec garage /garage layout assign -z dc1 -c 1G $NODE_ID
docker exec garage /garage layout apply --version 1

docker exec garage /garage bucket create dockhand-backups
docker exec garage /garage key create dockhand-key
docker exec garage /garage bucket allow --read --write --owner dockhand-backups --key dockhand-key
The key create step prints the Access Key ID and Secret Access Key. Copy them — the secret is shown only once. Then in Dockhand, create an S3 destination with:
- Repository:
s3:http://<garage-host>:3900/dockhand-backups - AWS_ACCESS_KEY_ID: the key ID Garage printed (starts with
GK) - AWS_SECRET_ACCESS_KEY: the secret key Garage printed
How a backup runs across environments
Every backup uses the same primitive: Dockhand asks the target Docker daemon to start a small helper container from fnsys/dockhand-backup. The helper has the target's volumes bind-mounted read-only and runs restic backup inside itself. Restic pushes data directly from the helper to the backup destination repository — the bytes do not tunnel back through Dockhand. What changes between connection types is how Dockhand reaches the target Docker daemon to orchestrate, not the data path.
volumes mounted read-only
runs
restic backup(S3, B2, REST, local…)
The helper runs where the data lives and pushes it straight to the repository — the bytes never pass through Dockhand. Only orchestration (start the helper, watch it) goes through Dockhand.
The connection type only changes the left half of that picture — how Dockhand reaches the target Docker daemon to start and watch the helper. The right half (helper → destination) is identical everywhere.
Local socket (Dockhand and Docker on the same host)
Dockhand reaches the Docker daemon through the shared docker.sock. The helper container starts on the same host, mounts the target's volumes read-only, and pushes data to the destination.
Volumes are mounted from the same host into the helper container, restic ships them to the repository.
Local destinations need the path bind-mounted into Dockhand
A Local filesystem destination (a host path like /mnt/backup/dockhand) is touched by two different containers at two different moments:
- Init, snapshot listing, and maintenance run inside the main Dockhand container.
- The backup itself runs in the helper container, which the daemon starts on the host and which sees the real host path. It looks for the repository at the host path — and doesn't find the one Dockhand created inside its container.
Mount the destination path into the Dockhand container at the same host path. Then init and backup both resolve to the same directory on the host, and restic no longer reports repository not found:
restic initneeds the path mounted
-v /mnt/backup:/mnt/backupthe one restic repository
restic backupsees the host path directly
Mount the local destination into Dockhand at the same path (-v /mnt/backup:/mnt/backup) so init and backup both land on the one host directory. Without the mount, init writes inside the Dockhand container and the helper can't find it.
S3, Backblaze B2, Azure, Google Cloud, and REST destinations are reached over the network from wherever restic runs, so they need no bind mount — they work the same whether the environment is a local socket or a remote host.
Direct TCP (Dockhand and Docker on different hosts)
Dockhand talks to the remote Docker daemon over tcp:// (optionally with mTLS). The helper container runs on the remote host where the volumes are, and streams data straight to the destination — the bytes never tunnel back through Dockhand.
Data path runs from the remote host directly to the repository, not back through Dockhand.
Hawser (Standard or Edge)
Dockhand reaches the remote Docker daemon by tunneling through the Hawser agent. In Standard mode Dockhand initiates the connection; in Edge mode the agent initiates it outbound. Either way, the helper container still runs on the remote host and uploads data directly to the destination.
Control flows through the agent; backup data still flows out from the remote host on its own connection.
Three things follow from this:
- Bandwidth between the target host and the destination matters more than between Dockhand and either. Dockhand only orchestrates; volume bytes travel directly from the target to the backup repo.
- Local repositories only work when Dockhand and the target are the same host. A remote helper can't see a path that exists only on Dockhand's filesystem. Use S3 or REST for any remote env.
- The Hawser agent doesn't carry backup data. It carries Docker API calls. The helper container on the target host opens its own outbound connection to the restic repo.
The backup helper image
By default the helper is fnsys/dockhand-backup pinned to the same version as Dockhand itself (e.g. running Dockhand v1.0.38 pulls fnsys/dockhand-backup:v1.0.38). Pinning to the running version keeps the helper's restic in lock-step with Dockhand — an upgrade never leaves you on a stale helper — and the baseline Dockhand build automatically uses the matching -baseline helper for old CPUs.
You can override it. In Settings > Backups the Backup helper image field sets the image for every backup — point it at your own registry mirror (air-gapped networks, a private pull-through cache, or a pinned digest for reproducibility). A custom value always wins over the built-in default. It must be a Dockhand backup helper image (it bundles restic and the expected entrypoint); an arbitrary image won't work.
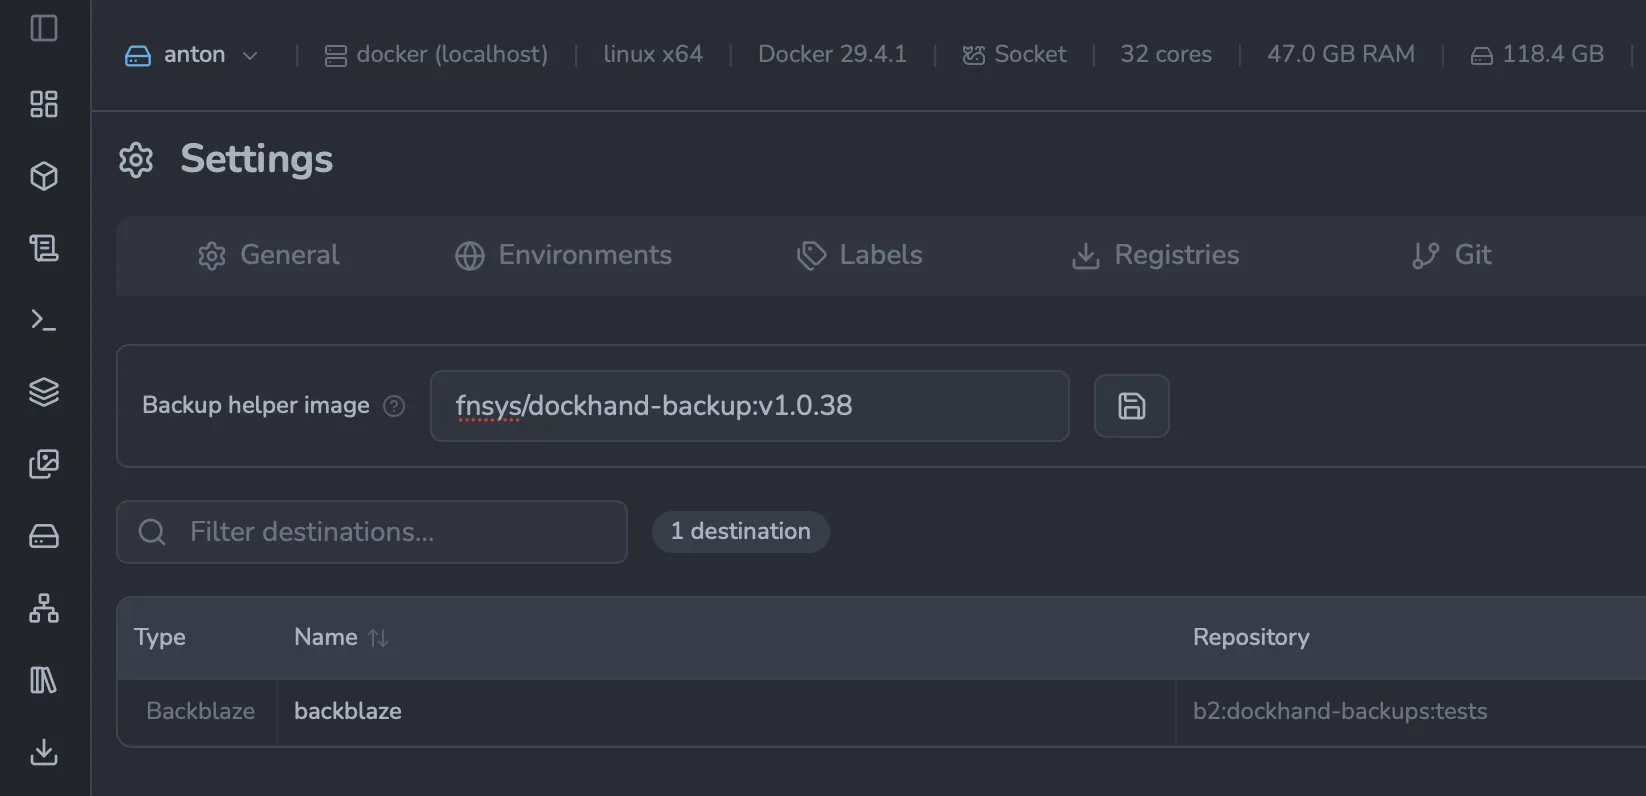
Backup configs
A backup config ties a target (container or stack) to a destination, optionally on a schedule. Each config tracks:
- Target — container or stack name, plus the environment it lives in
- Volume selection — back up all attached volumes (default) or only specific ones
- Stop before backup — gracefully stops the target before snapshotting, restarts after. Optional; useful for databases that don't support hot backups
- Schedule — cron expression. Leave empty for manual-only backups
- Retention — keep-last/daily/weekly/monthly/yearly counts, applied automatically after each backup. This step only forgets old snapshots (a fast, metadata-only operation) so a backup always finishes quickly; the space they used is reclaimed later by the destination's separate prune schedule. If the policy would delete every snapshot for the target (typo'd
keepLast: 0, for example), the step is refused with a warning in the run log; the backup itself still succeeds and existing snapshots are preserved. - Options — compression level, upload/download bandwidth limits, exclude patterns, success/failure webhook URLs
Configs can be triggered manually with the Run now button regardless of whether a schedule is set. A running backup can be cancelled from the same button.
Every backup — scheduled or manual — streams its progress live in a log dialog. You see Dockhand's own steps (collecting metadata, stopping and restarting the target if configured, verifying the snapshot is readable, applying retention) interleaved with restic's own output: the per-file % done progress and the final Done: N new, N changed … MB added summary. Each line is tagged with its source (dockhand or restic) so you can tell exactly what is happening. You don't have to watch it — click Run in background to close the dialog and let the backup finish; it keeps running and the result lands in the target's History.
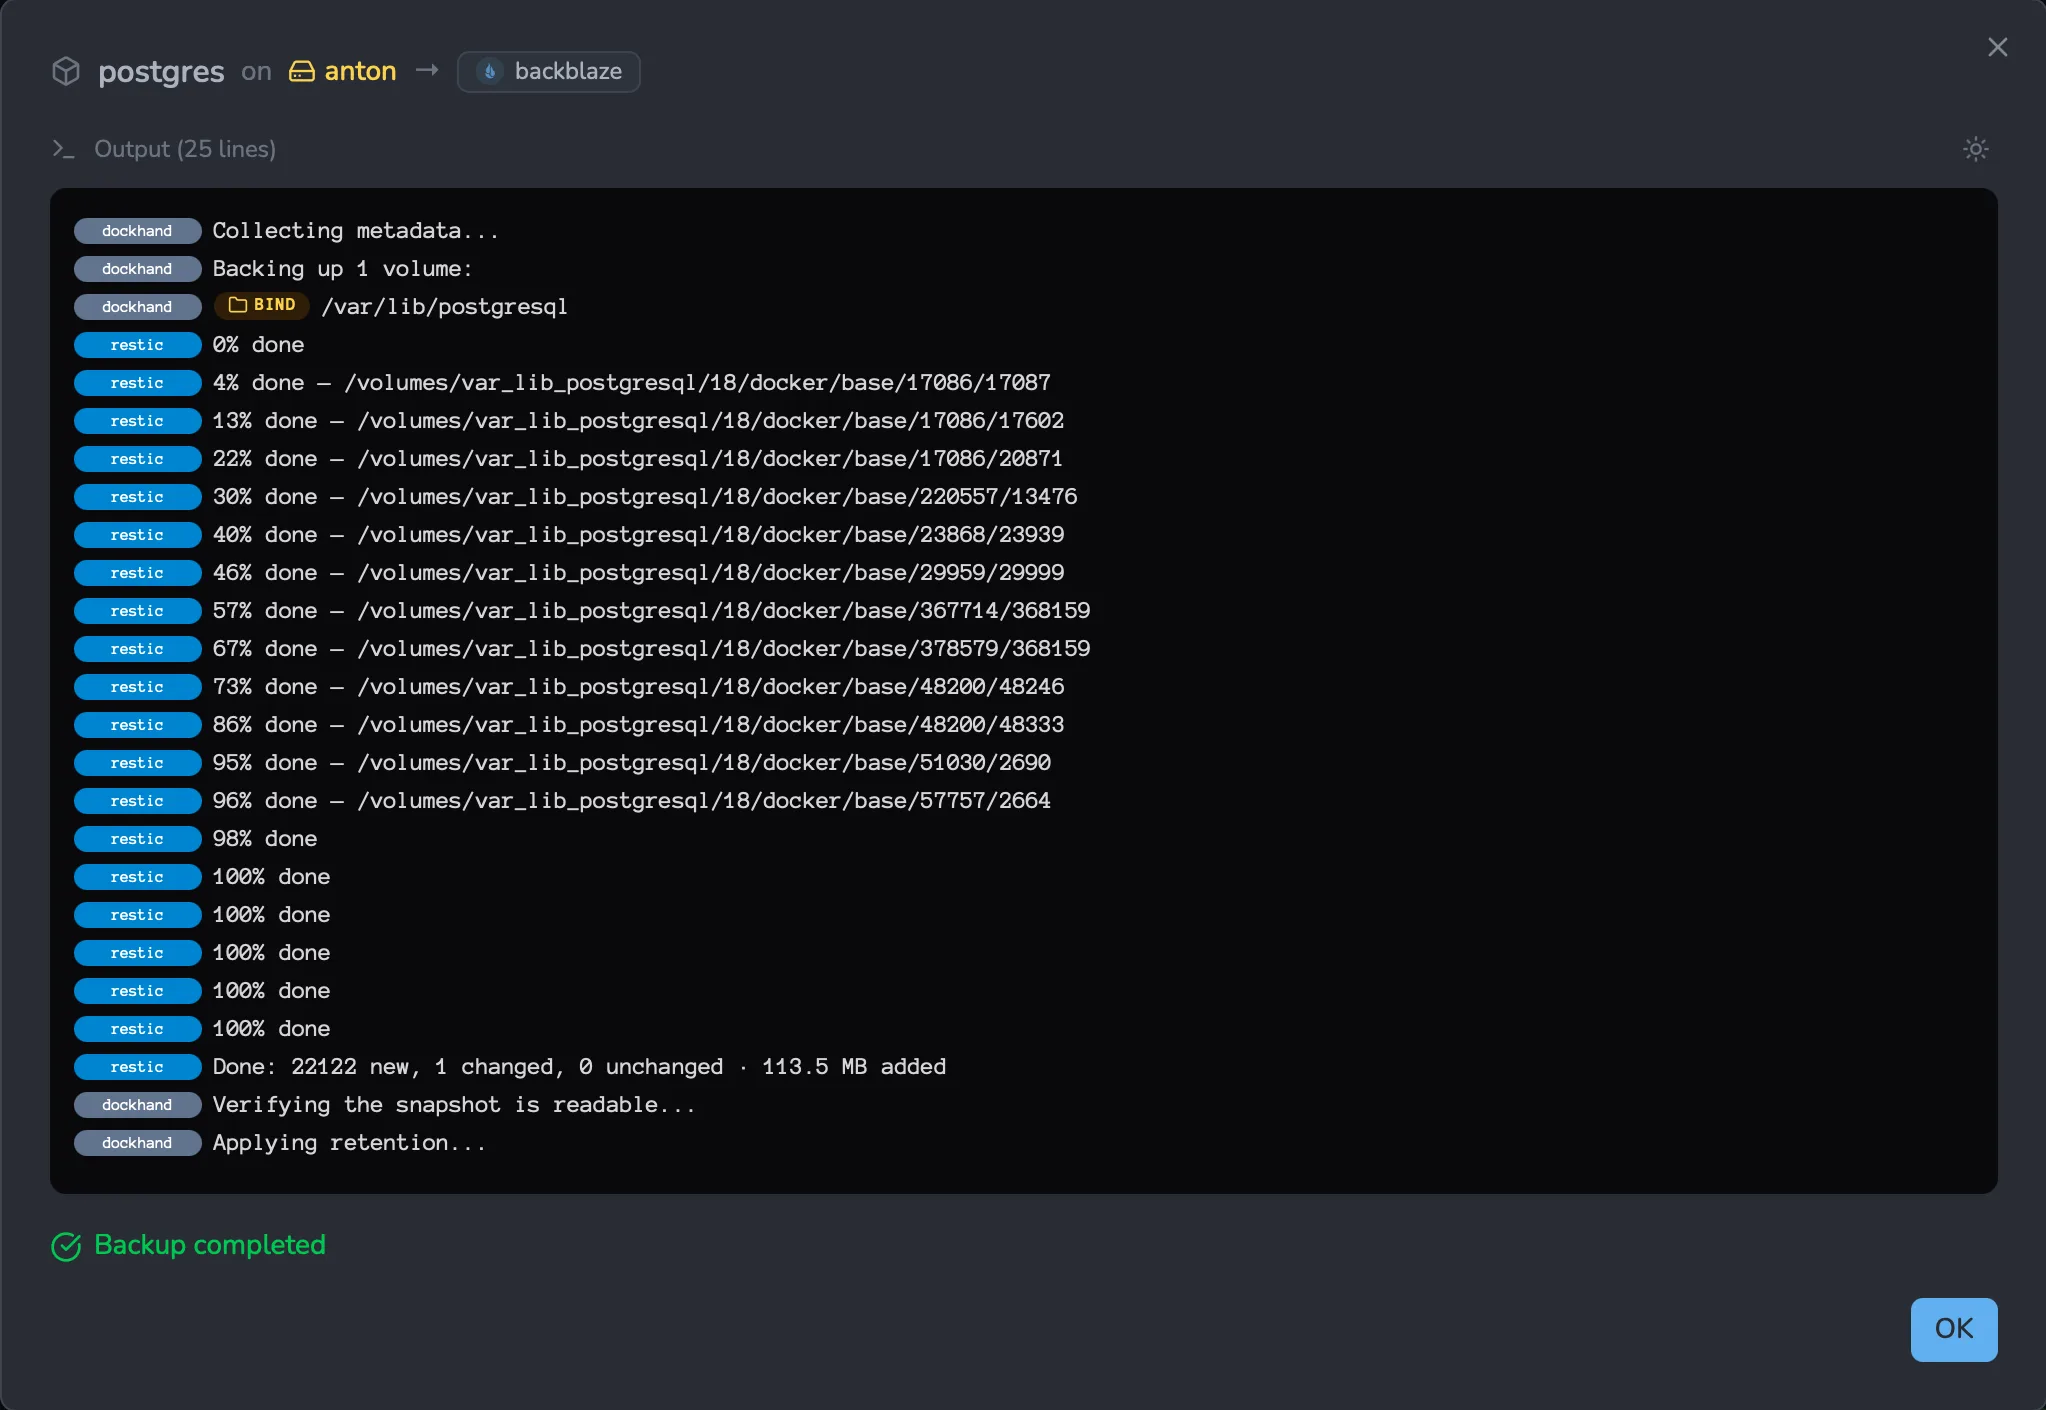
Volumes & bind mounts
Dockhand backs up both named volumes and bind mounts in the same snapshot. The contents are written under /volumes/<name>/ inside the restic repository, alongside a /metadata/ tree describing each container.
The two mount types differ in one important way at restore time:
- Named volumes — restoring creates a named volume on the target environment (its original name by default, or another you pick as the destination) and writes the snapshot contents into it. Portable across environments.
- Bind mounts — the snapshot captures the contents, but the destination is a path on a host. By default it's the original host path; if that path doesn't exist on the target host, Docker will silently create an empty directory and the service starts with no data — so edit the destination to a path that exists there (or a named volume).
Other mount types — tmpfs (RAM-only), Windows npipe, Swarm CSI cluster volumes, and anything new Docker adds in the future — are not backed up. Each skipped mount produces a SKIPPED <type> mount on <container> at <path> line in the backup's run log so you can see exactly what was left out.
The volume type is not fixed at backup time — you choose it at restore. In the restore dialog's What gets restored? step, each captured volume has a destination with a type dropdown: restore a named volume straight back into a named volume, or switch it to a host path (bind) — and vice versa, a captured bind can be restored into a named volume. This is how you make a bind mount portable: back it up on one host and restore it into a named volume on another, sidestepping the host-path problem entirely. One caveat when you redirect a name or type — the after-restore step still rebuilds the target from its stored config, so the mount change is yours to apply: see If you rename a volume or change its type.

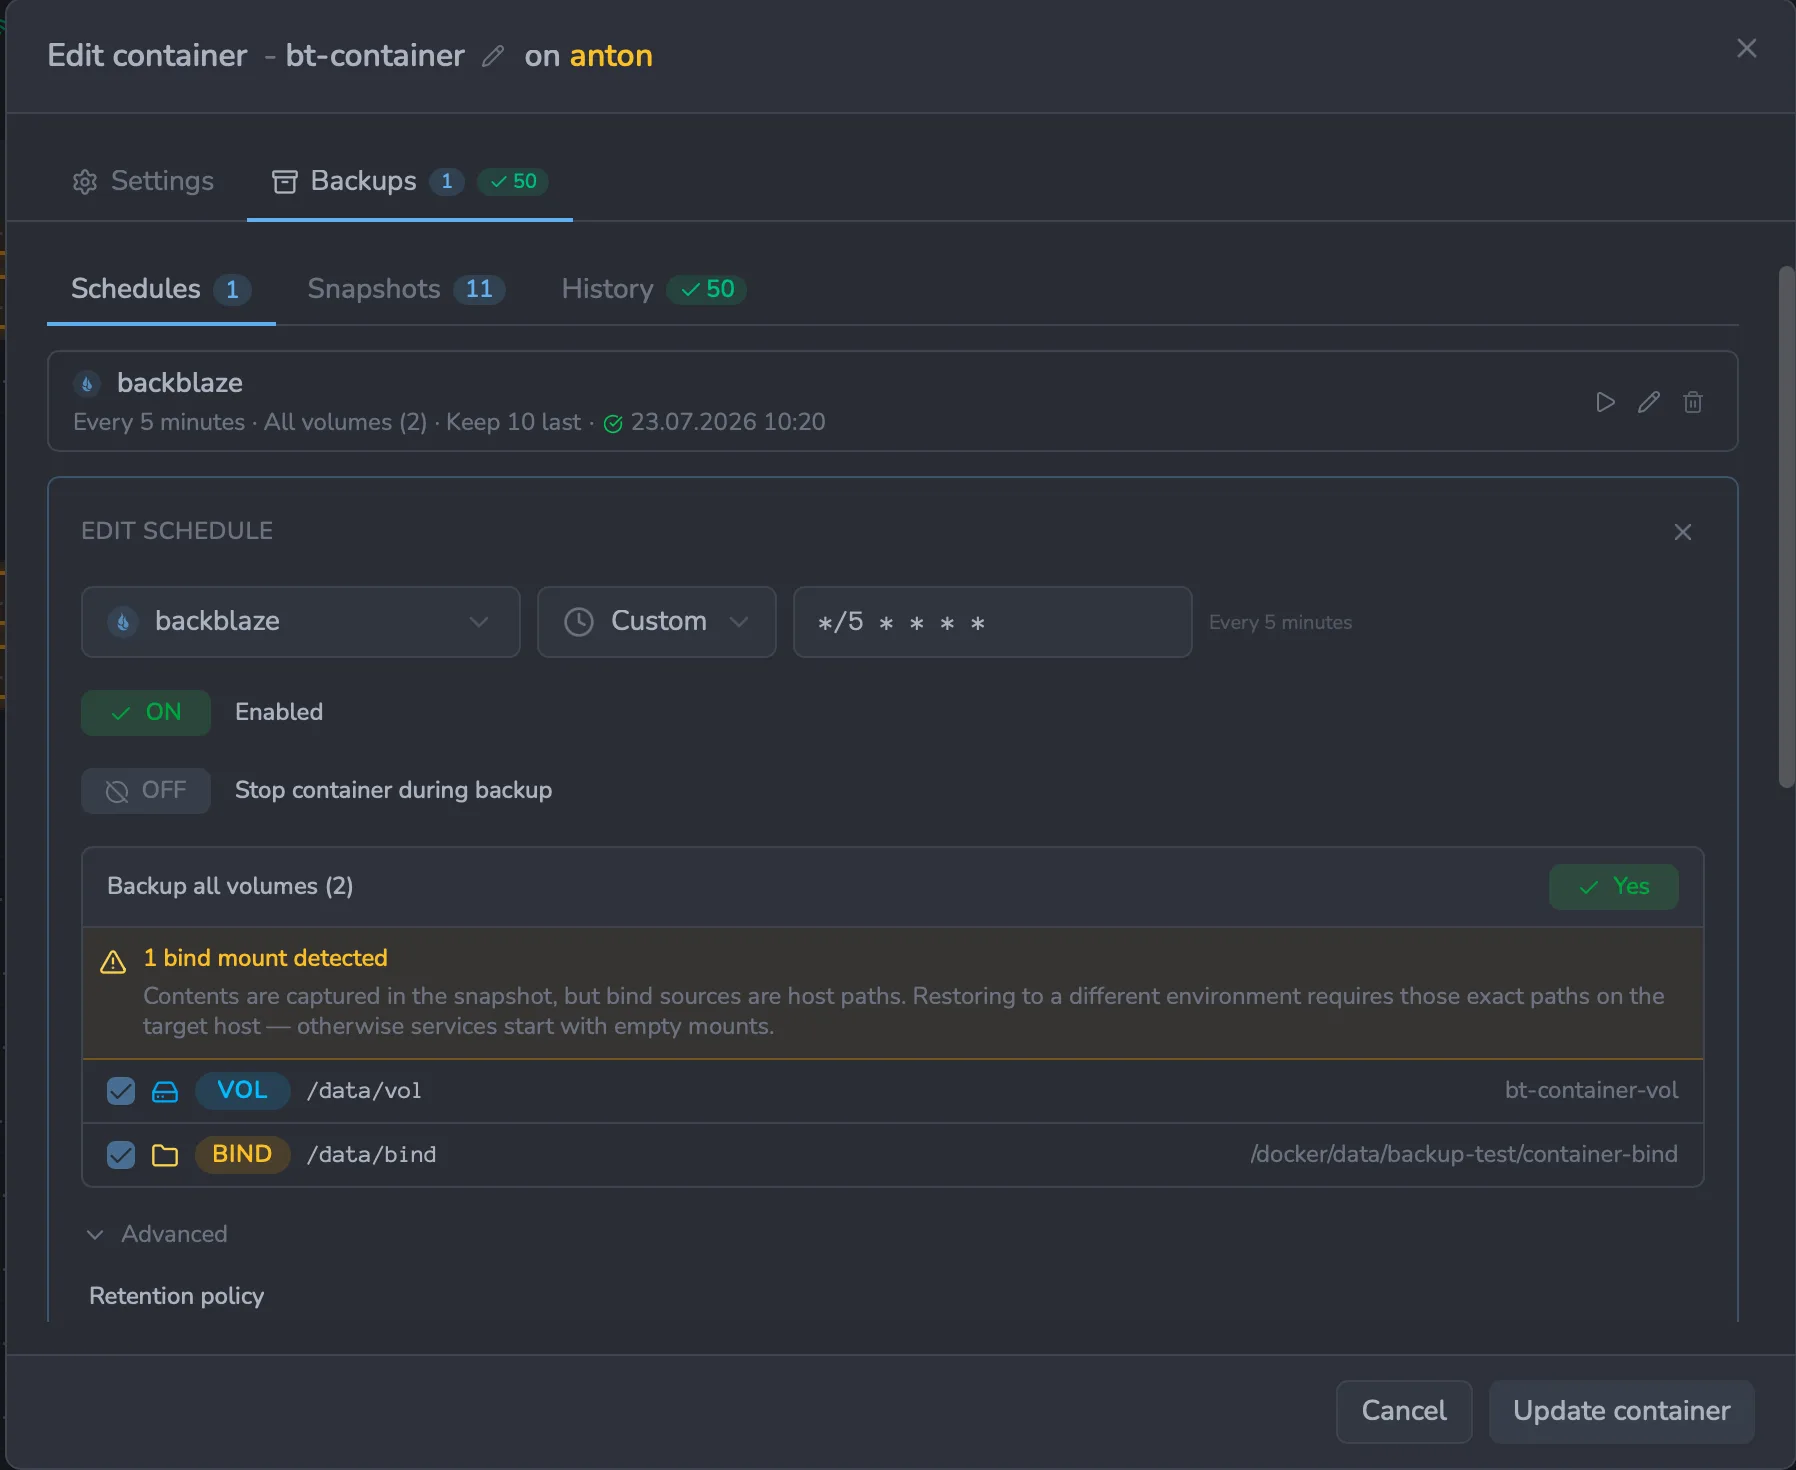
Bind mounts are tied to host paths. If your stack uses ./html:/usr/share/nginx/html or /docker/data/db:/var/lib/postgresql/data and you restore to a different host, those exact paths must exist there — or the services will start with empty mounts.
Dockhand displays a warning in the backup config dialog when bind mounts are detected. In the restore dialog each volume has an editable destination: point a bind at a host path that exists on the target — or at a named volume — before you bring the target up.
For portable disaster recovery, prefer named volumes over bind mounts whenever you have a choice.
Stack files (compose, .env, config)
A stack backup captures the stack's whole directory — the compose file, .env, and any config sidecars (an nginx.conf, a certs/ dir, include files) — so a restore can redeploy the stack exactly, even on a fresh host where nothing of the original remains.
The stack directory is captured the same way as the volume data: the helper container bind-mounts the stack folder read-only from the target host and restic reads it straight from disk. It lands in the snapshot under a reserved path (/volumes/__dockhand_stackdir__), alongside the volume data and a /metadata/ tree describing the container config. Nothing is copied through Dockhand and there is no size cap — the folder is read where it lives, so even a large stack directory backs up fine.
Because the folder is read from the host, the snapshot reflects the stack directory as it actually is on the host — if you drop a file into the stack folder outside Dockhand, it's in the next snapshot too.
starts + watches the helper
restic backup /volumes /metadatavolumes + stack folder + metadata
/volumes/ + metadata/The helper runs on the target host, next to the data. It bind-mounts the volumes and the stack folder read-only from that host and runs one restic backup — volume data and stack files reach the repository through the same helper, in one snapshot. Only orchestration (start the helper, watch it) goes through Dockhand; the bytes never flow Dockhand → destination directly.
Because the helper reads the stack folder from the host, Dockhand has to know where that folder is on the host. Where it looks depends on the environment type:
1. Local (socket)
Dockhand and the Docker daemon share a host, so Dockhand knows the stack folder's path directly — it deployed the stack there. No configuration needed.
2. Direct TCP to a remote host
Set a Remote stacks directory (or use matching paths) so the compose, .env, and config sidecars live in a folder on the remote host — Dockhand backs up the whole folder straight from there. Without it, a stack backup fails with a clear message telling you to set that path; Dockhand does not fall back to backing up its own local copy, so the snapshot always reflects what actually runs on the host. Volume and bind-mount data is always backed up regardless, read from where each mount lives on the remote host.
3. Hawser agent (standard or edge) Since 1.0.41
The agent keeps each stack's folder at <STACKS_DIR>/<stack> on its own host, defaulting to /data/stacks, and Dockhand reads the backup from there. This works out of the box for a standard agent — no configuration needed.
If a stack backup fails because the stack folder can't be found (the message names the path it looked in), set the correct path under Settings → Environments → (edit the environment) → Remote stack path (for backup). This only tells backup where the agent keeps files — it does not change how stacks deploy; the agent always uses its own STACKS_DIR. The create-backup dialog shows the resolved host path so you can confirm it before saving.
If you run Hawser as a container, STACKS_DIR is a path inside the container. Backup needs the host directory that is bind-mounted there. For the standard example agent:
docker run -d --name hawser \
  -v /var/run/docker.sock:/var/run/docker.sock \
  -v /opt/hawser-stacks:/opt/hawser-stacks \
  -e STACKS_DIR=/opt/hawser-stacks \
  ...
the host path is /opt/hawser-stacks — set that. When the host and container sides match (as here), the default just works; they diverge only if you map different paths (e.g. -v /srv/data:/data/stacks), and then you must set the host side (/srv/data).
Because restic reads the folder locally on the agent's host, the file bytes never travel through Dockhand or over the agent connection — so even a large stack folder (many megabytes of config, or a node_modules a user dropped in) backs up fine, including on edge agents over a WebSocket tunnel.
A common layout keeps the bind-mounted data next to the compose file:
stack/
├── compose.yaml
├── .env
├── config/   ← bind-mounted into the container
└── data/     ← bind-mounted into the container
Here config/ and data/ are container data — already backed up by restic as bind mounts. Dockhand recognises that and excludes them from the stack-file capture automatically, so a large data/ folder doesn't get stored twice. Your compose file and .env are always kept (a restore needs them to redeploy). Nothing is lost: the data rides the restic volume, the config rides the stack files.
Snapshots
Each successful backup produces a snapshot — a content-addressed point-in-time view of the target. Snapshots are tagged with metadata so they can be filtered later:
| Tag | Example |
|---|---|
dockhand:instance | dockhand:instance=<uuid> |
dockhand:configid | dockhand:configid=42 |
dockhand:envid | dockhand:envid=3 (or =local) |
dockhand:type | dockhand:type=container or =stack |
dockhand:name | dockhand:name=postgres-prod |
From the snapshots list you can:
- Browse — navigate the directory tree inside the snapshot
- Download — pull individual files or entire directories as tar archives
- Diff — compare two snapshots and see added/removed/modified files
- Restore — see the Restore section
- Delete — runs
restic forget --prune, freeing the space
Opening a snapshot shows two tabs. Files is a read-only browser of the snapshot's contents — navigate with the breadcrumb, preview a file, or download any file or directory. Metadata shows what was captured alongside the data. Both target types share a Backup info summary (type, name, time, environment) and a Volumes & binds list showing each mount's source and destination — but from there the two diverge, because a container and a stack restore differently.
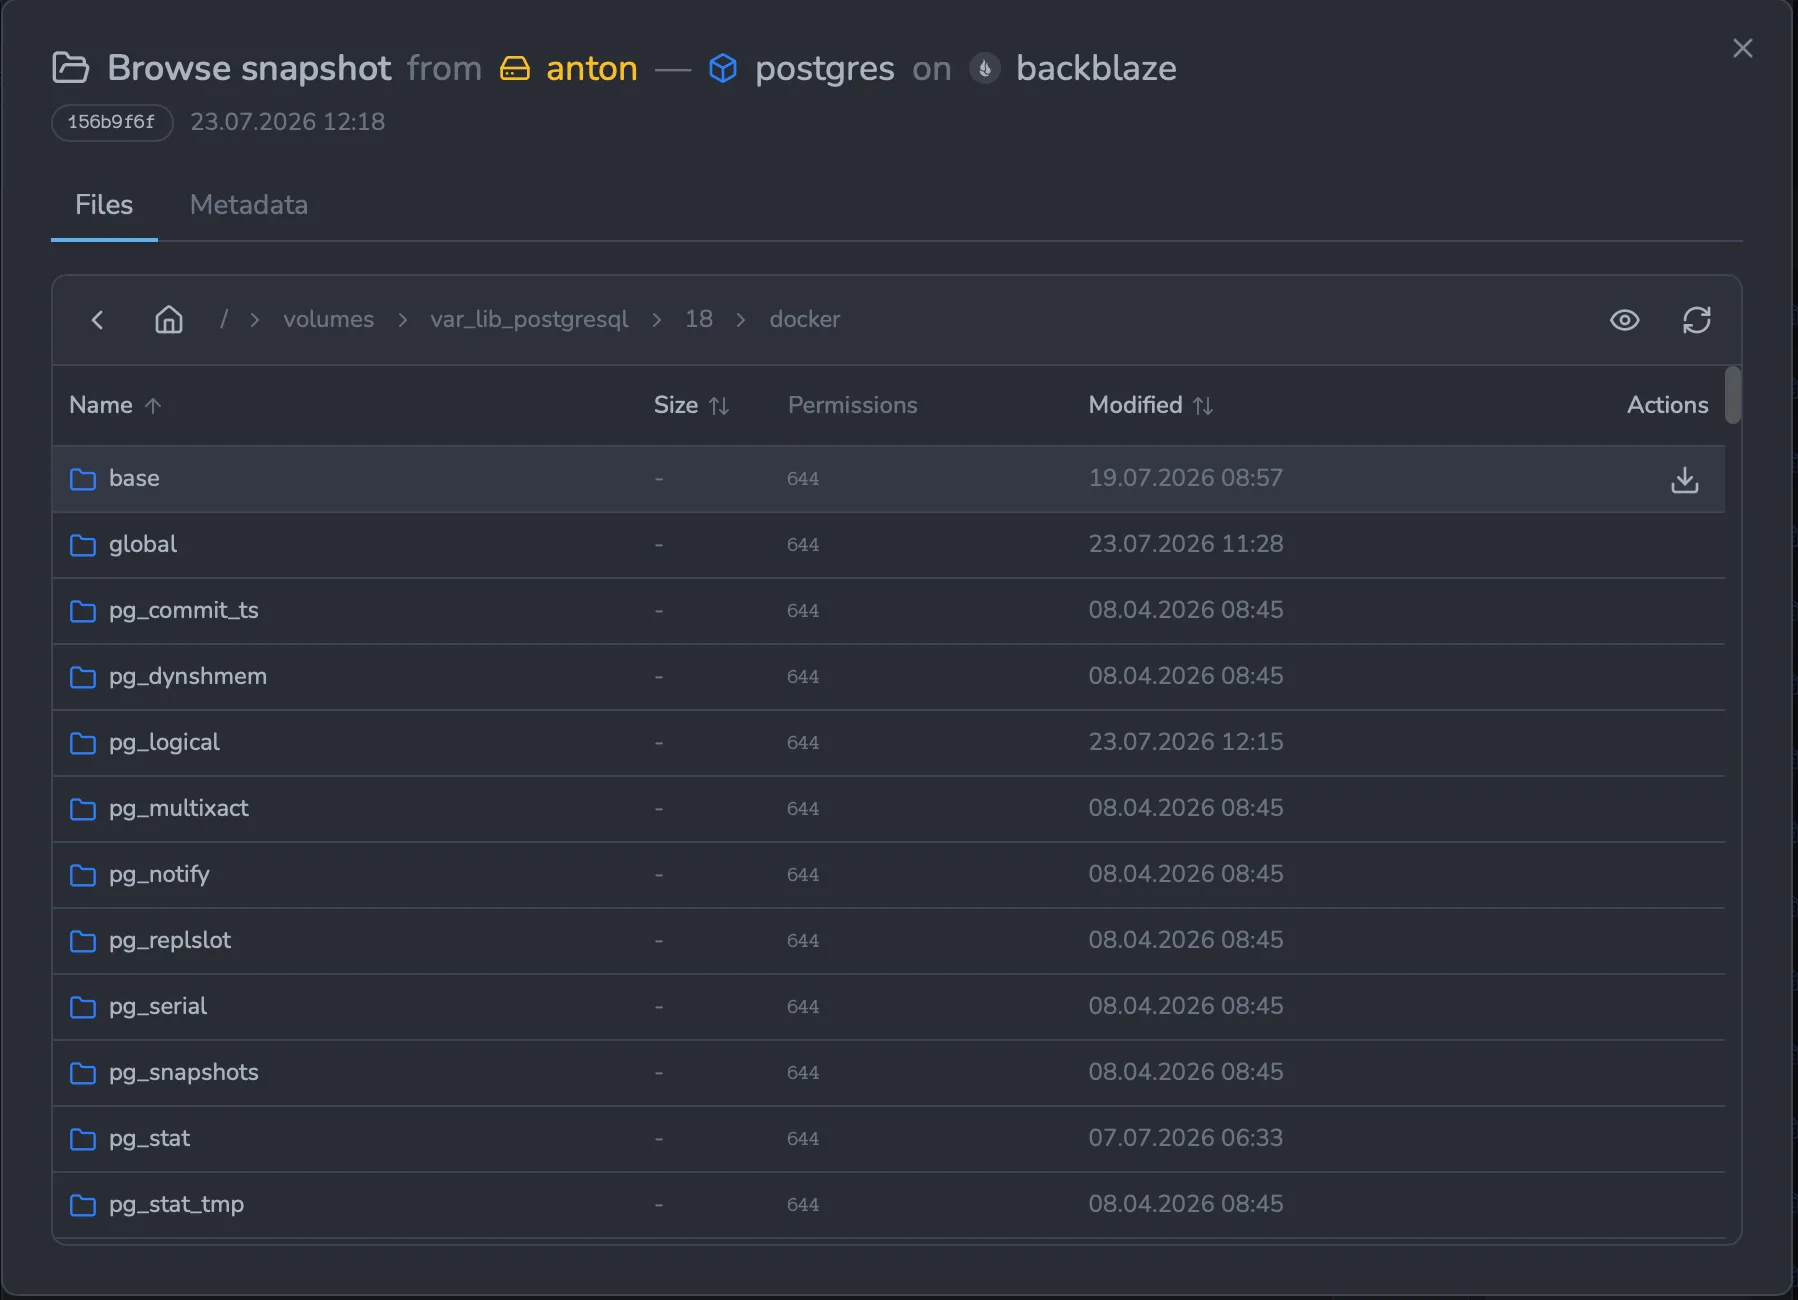
For a container, the Metadata tab adds the full recorded configuration — image, container ID, state at backup, command, entrypoint, exposed ports, restart policy, network mode, mounts, labels, and masked environment variables — so you can see exactly what the snapshot would recreate.
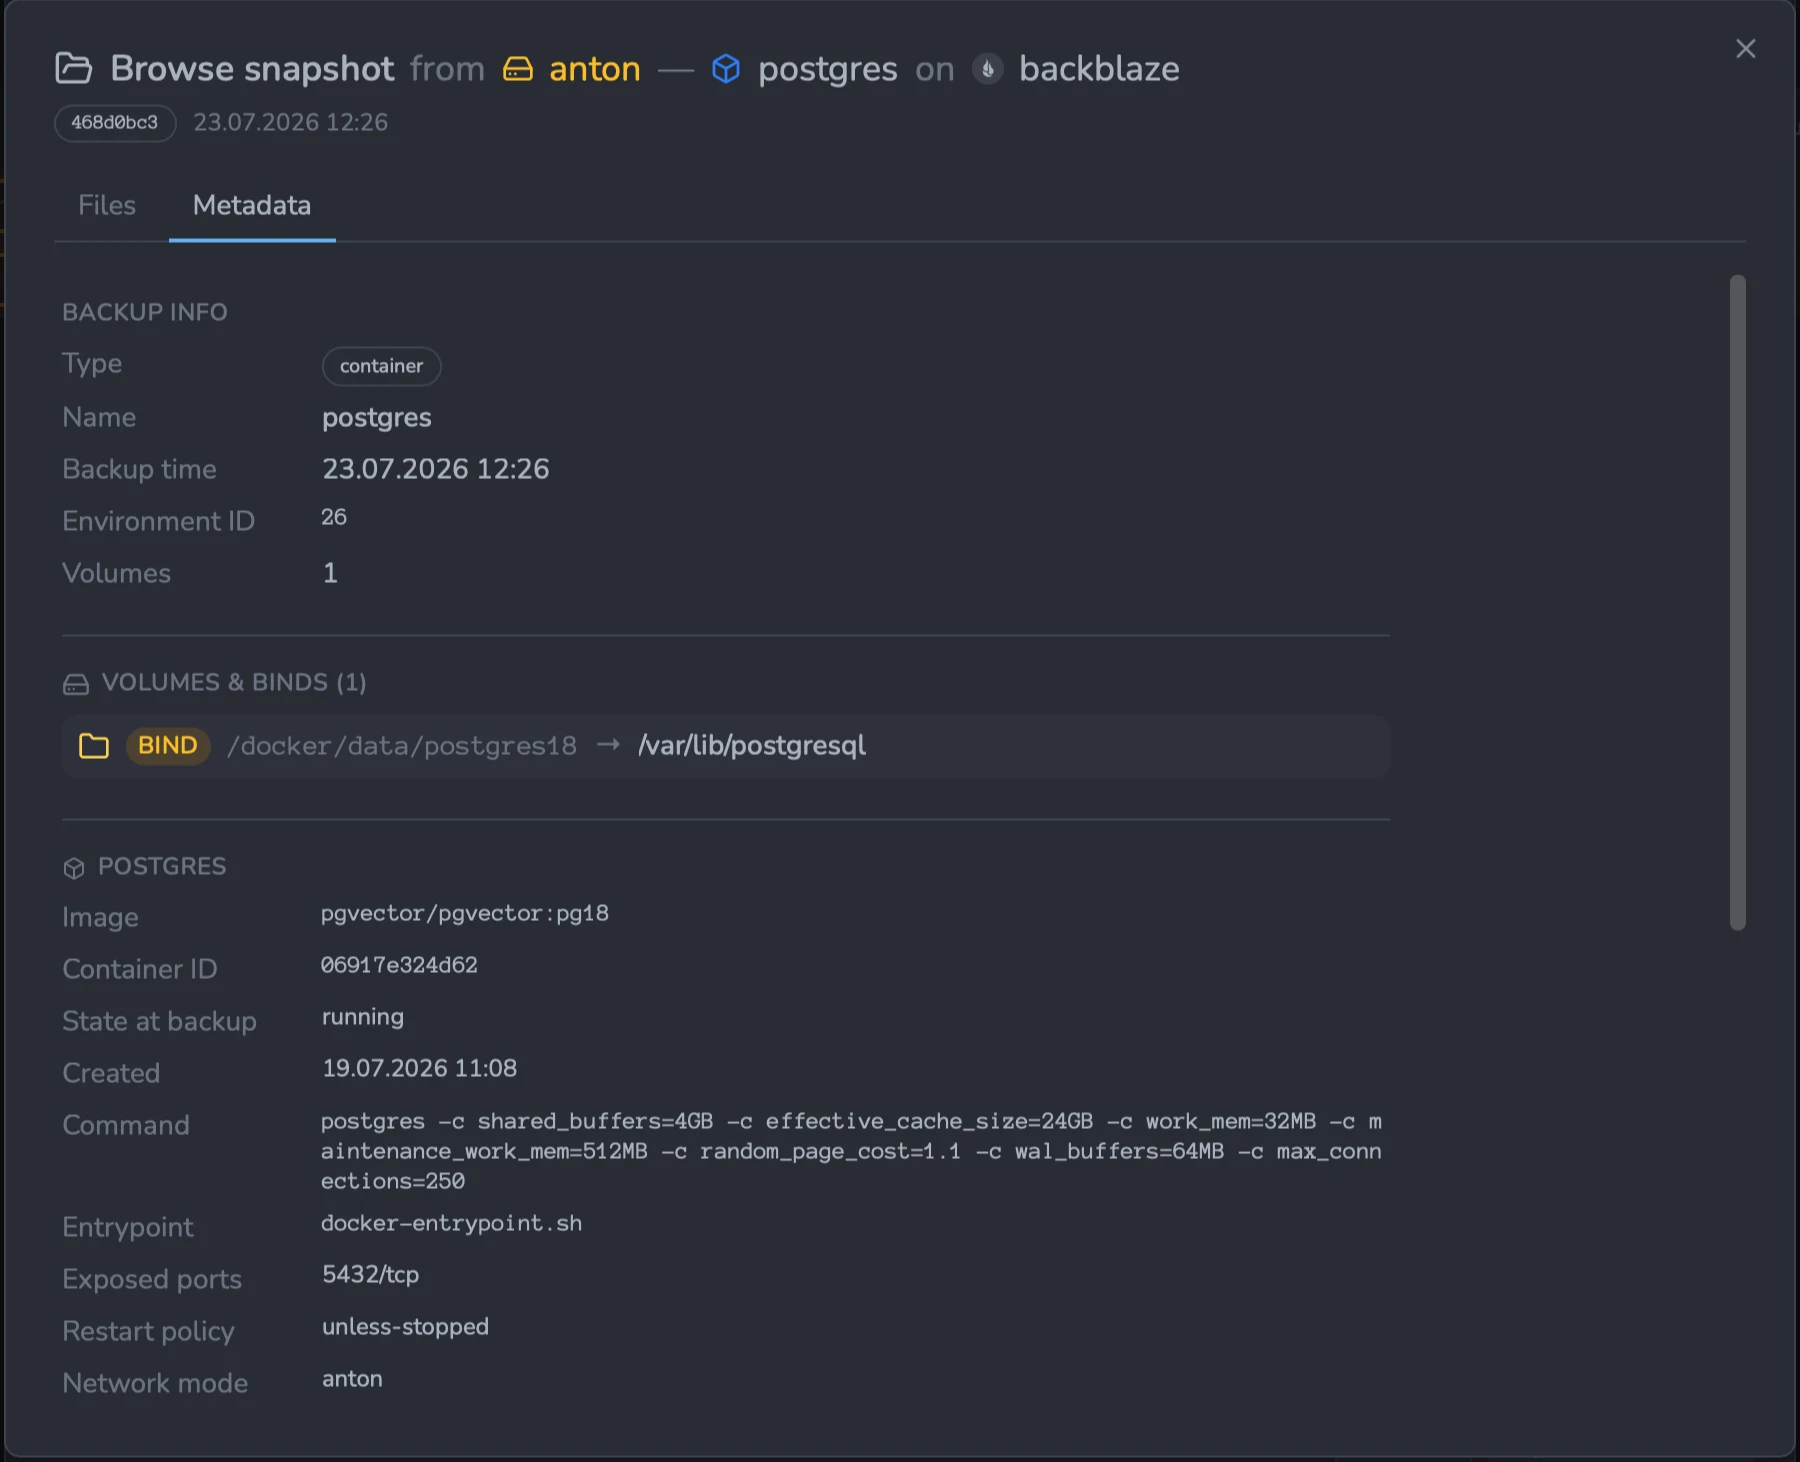
For a stack, there is no single container config; instead the tab records the compose file name and confirms the stack's files were captured, and adds a Stack files list of every file backed up from the stack directory — the compose file (badged) and any sibling files, each with its size. This is how you confirm a stack will restore 1:1: the original compose filename and all its accompanying files are in the snapshot.
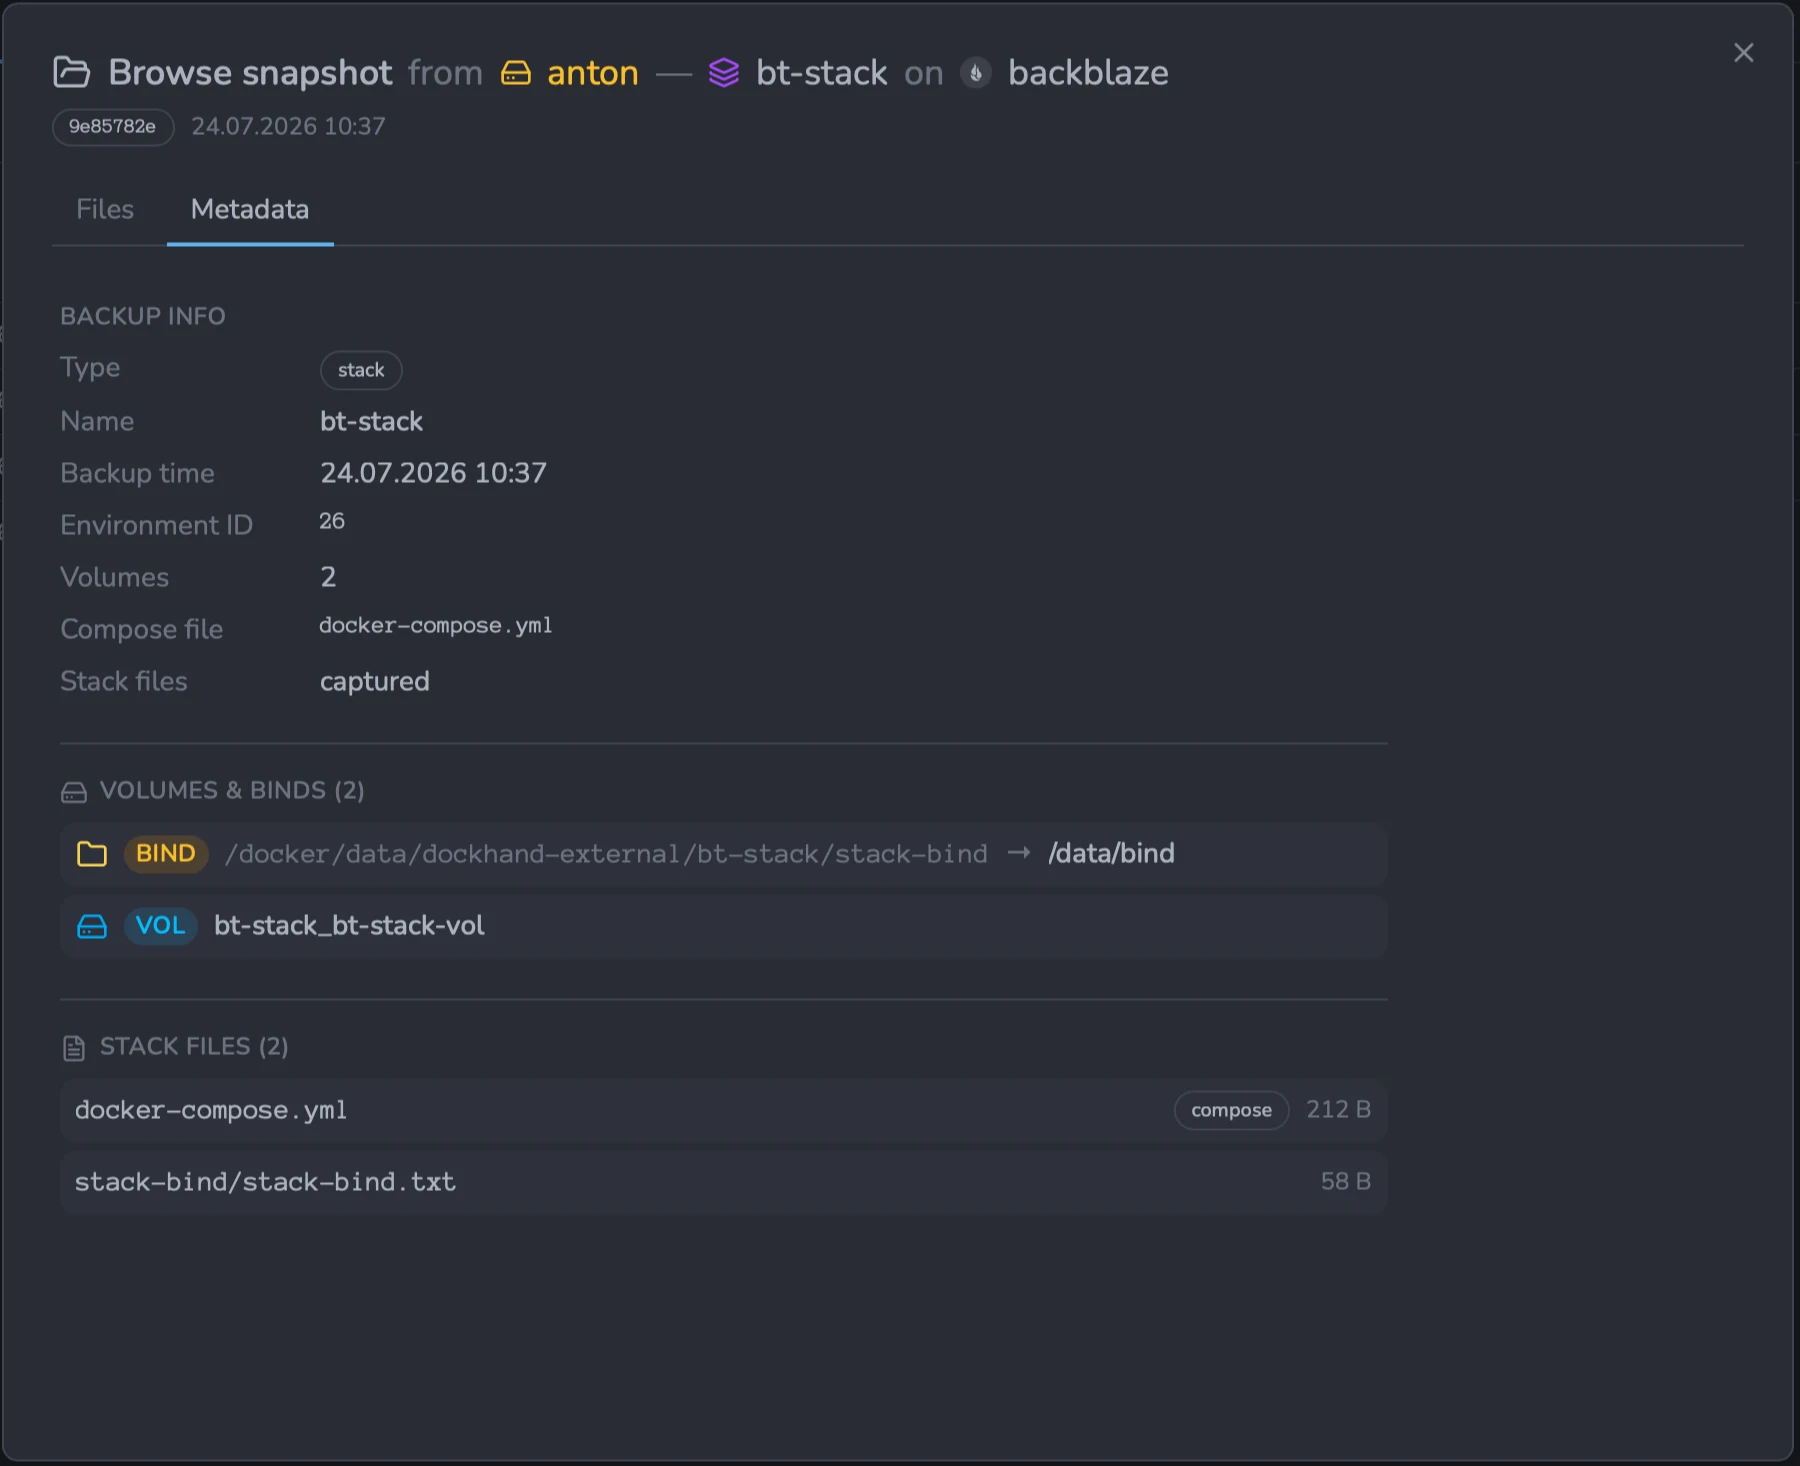
How snapshots are stored, and why deleting one is safe
Snapshots are not full copies stacked on top of each other, and they're not a fragile incremental chain where deleting an old one breaks the newer ones. Under the hood restic deduplicates: every file is split into content-addressed blocks, each unique block is stored in the repository once, and a snapshot is just a manifest of pointers to the blocks that made up the target at that moment.
So when your second backup only changed a little, it stores just the few new blocks and points at the unchanged blocks the first snapshot already put there — that's why the run reports "0 new, 1 changed" and adds only kilobytes. The two snapshots share those blocks; neither owns them.
Deleting a snapshot never loses data from the ones you keep. Dockhand deletes with restic forget --prune, which does two things: forget drops the snapshot's manifest, and --prune then removes only the blocks that no remaining snapshot references. Delete the first snapshot and every block still used by the second (or any other) snapshot is kept — the survivors stay fully restorable. This holds for deleting any snapshot, not just the oldest: each one is a complete, independent point-in-time view, so there is no "base" that the others depend on.
Both snapshots point at the same A B C; snapshot 2 adds only D. Nobody "owns" a block — they're shared.
restic forget --prunePrune keeps A B C D — every block is still referenced by snapshot 2. Nothing is lost.
The only way a block actually disappears is if every snapshot that referenced it is gone — which is exactly correct: if no snapshot you're keeping contains a file, that file is no longer in any backup. And retention won't strand you there by accident: Dockhand refuses to apply a policy that would delete every snapshot in a config's group, so a repository is never pruned empty in one step.
Comparing snapshots
The Diff action compares two snapshots of the same target and reports what changed between them: files added, removed, and modified, per volume. It's a quick way to see what a backup actually captured since the last one — useful for spotting unexpected churn (a log directory ballooning, a database rewriting its whole data dir) or confirming that a change you made is present in the newer snapshot. The diff reads the two snapshots' file trees from the repository; it doesn't touch the live target. There's also a metadata.json row that will often show as modified even when nothing meaningful changed — that's the capture timestamp and recorded container state inside it differing between backups, not a config change.
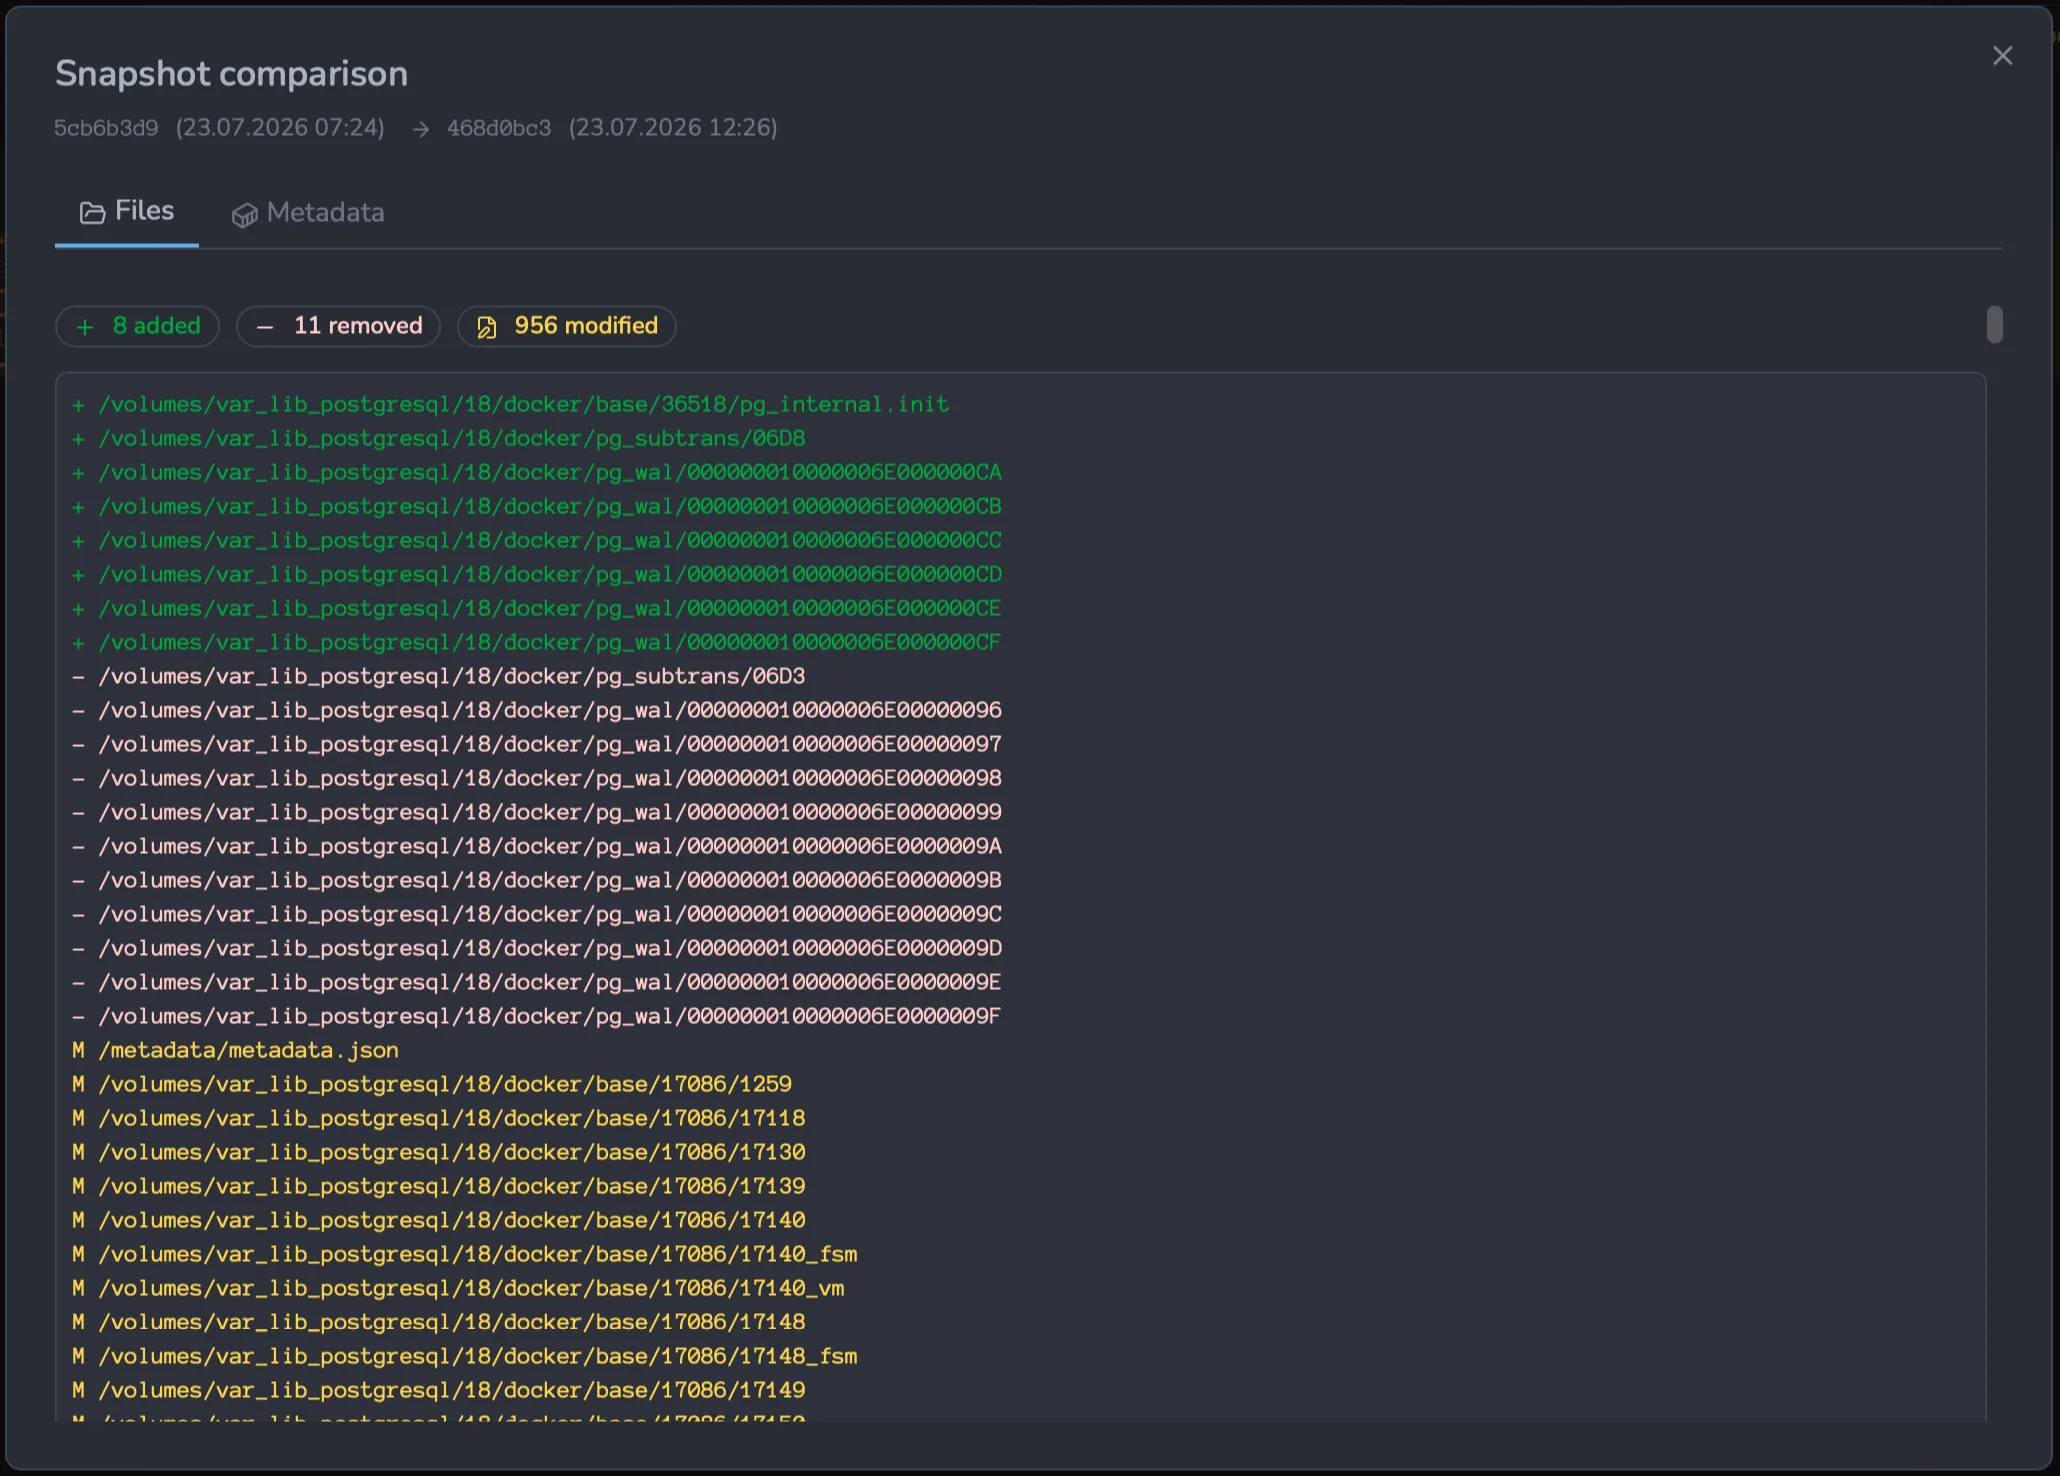
Restore
Restore operates on a single snapshot. Open the restore dialog from the snapshots list (per-snapshot menu) or from the target's edit modal Backups tab. A restore extracts the snapshot's volume data (a config-only snapshot has none — it restores the stored configuration instead); the mode you pick decides where that data lands and whether the live target is touched. Your data is restored point-in-time, but the container image is pulled fresh from the registry by the reference the snapshot recorded — see Container images are not stored in the snapshot for why to pin by digest.
Choose a restore mode
The dialog asks one question first — Where to restore — and it's a choice of destination, not of "safe versus destructive":
- To an environment default — pick a target environment (any one you can access, including a different host) and give each volume a destination on it. Then optionally bring the container/stack up there. What each destination points at decides the outcome — see below. Nothing on the source is touched.
- Overwrite live destructive — overwrites the live volume data of the existing target on its source environment. It is guarded: you must tick “I understand this replaces the live volume data” before the button enables, and the button turns red (Overwrite & restore).
The dialog walks three numbered steps — Where does it go?, What gets restored? (per-volume destinations), and Then what? (the post-restore action) — and a What will happen panel spells out the exact outcome before you commit. The panel changes with the mode, so you always see whether the source is safe or about to be overwritten.
Destinations decide the outcome (“To an environment”)
Each selected volume gets an editable destination, pre-filled to its original location (a 1:1 clone). You steer the restore by editing it:
- A named volume — Dockhand creates that volume on the target environment and fills it with the snapshot's data. When you then recreate/redeploy, the container mounts it with its data — a working clone. This is the portable choice.
- A host path — the data is written to that absolute path on the target environment's host (a bind). Use it when the target mounts a bind, or to place data somewhere specific.
A host-path destination is a path on the target environment's host — the machine its Docker daemon runs on — not a path on the Dockhand host (unless they are the same machine). If you point at a path the target daemon can't see, Docker silently creates an empty directory there and the container starts with no data while the restore still reports success.
Named volumes are portable (the daemon manages them by name); host paths are host-specific. For cross-host clones, prefer named-volume destinations.
A host-path destination may be any absolute path on the target host (no ..) — Dockhand doesn't restrict which directory. The restore writes there with the daemon's privileges, so point it at a data directory you intend, not a system path.
If a destination names a volume that already exists on the target environment, Dockhand refuses the restore rather than overwrite it — the dialog flags the row and the button stays disabled until you remove that volume on the target or pick a different name. Dockhand never clobbers a named volume you didn't create for this restore.
The same applies to the container or stack name: when the After restore action would bring the target up (Recreate container or Redeploy stack) and a container/stack of that name already exists on the target environment, the restore is refused. Dockhand will not start or redeploy over a workload you didn't restore here. Choosing Do nothing (extract the data only) is unaffected, since nothing is brought up.
What will happen
- Each selected volume is restored to its destination on the target env: a named volume Dockhand creates (refusing if it already exists) and fills with the snapshot's data, or a host path the data is written straight to.
- The chosen After restore action then brings the target up on that environment: Recreate container (rebuild from the snapshot's stored config), Redeploy stack (from the stored compose files), or Do nothing. Because the volumes were just populated, the target comes up with its data.
- A config-only snapshot (no volumes) has nothing to populate, so it goes straight to the after-restore action — pick Recreate/Redeploy to rebuild the target from its saved config, or Do nothing to just materialize it. The post-restore step is best-effort: if it fails, you finish bringing the service up manually.
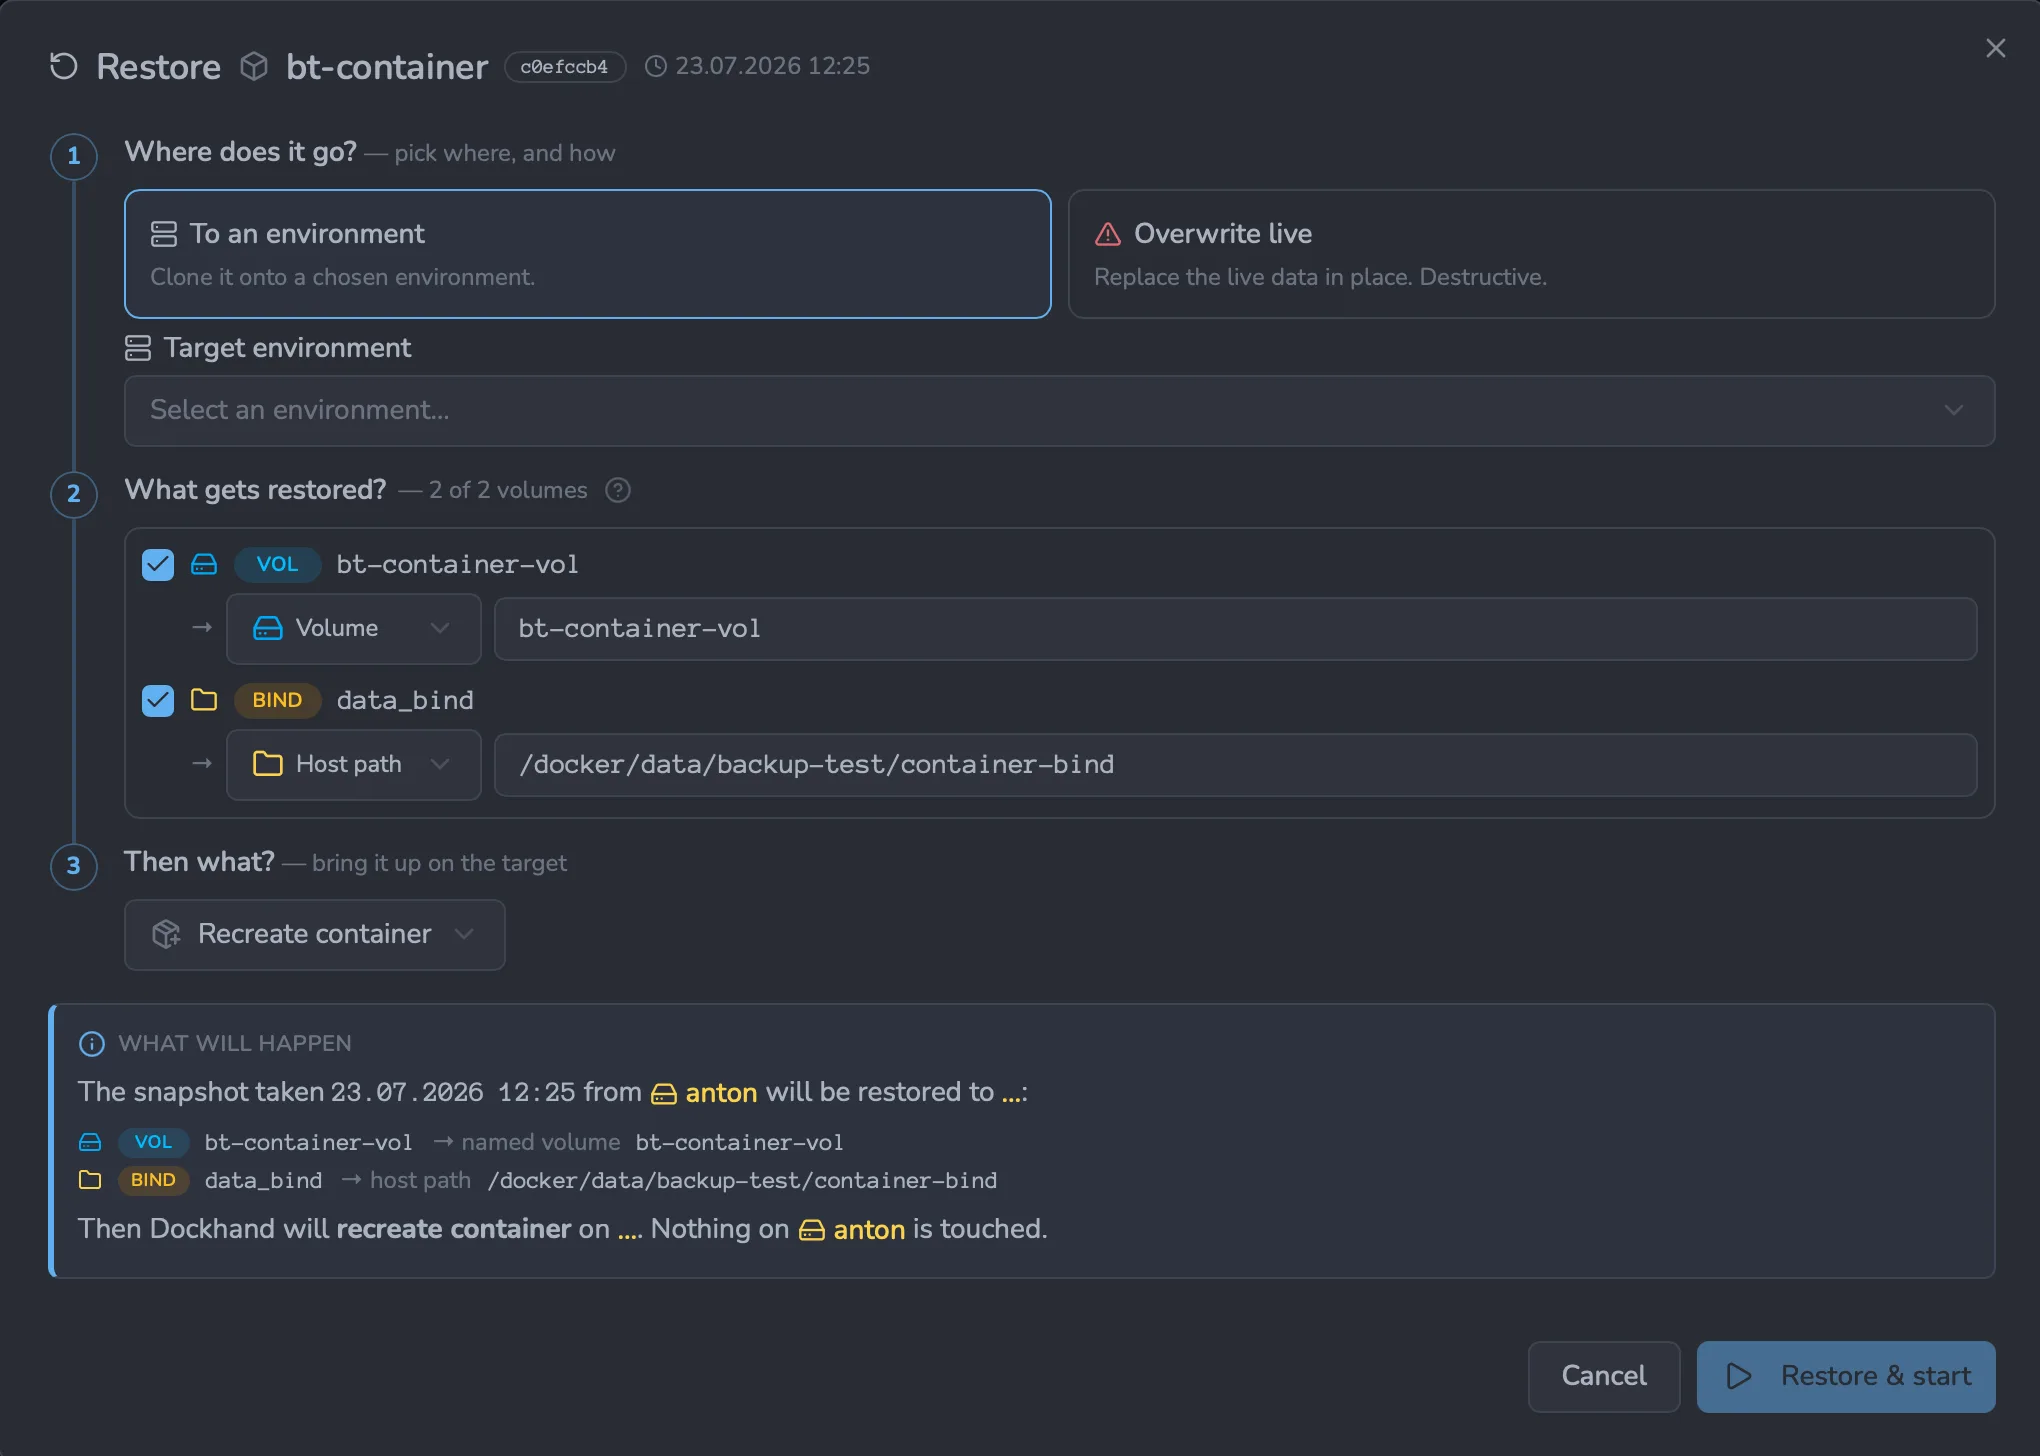
- The existing target is stopped first (a container is stopped; a stack is brought down with
docker compose stop). If the stop fails, the restore aborts before any data is touched. - Each selected volume is wiped and replaced with the snapshot's contents. The swap is staged and only committed once the new data is fully in place — a crash or failure mid-restore leaves the original volume intact (it is never deleted before its replacement is ready), and Dockhand recovers the pending swap on the next startup. For a config-only snapshot there is no volume data, so this step is skipped and the restore goes straight to the after-restore action below.
- The target is brought back up. For a container, the chosen After restore action runs: Start container (default), Recreate if missing (rebuild from the stored config when it's gone), or Do nothing. For a stack, it is always redeployed from the snapshot's stored compose files (there is no per-action choice). The volume restore always succeeds independently — if this final step fails, the data is still restored and you finish bringing the service up manually.
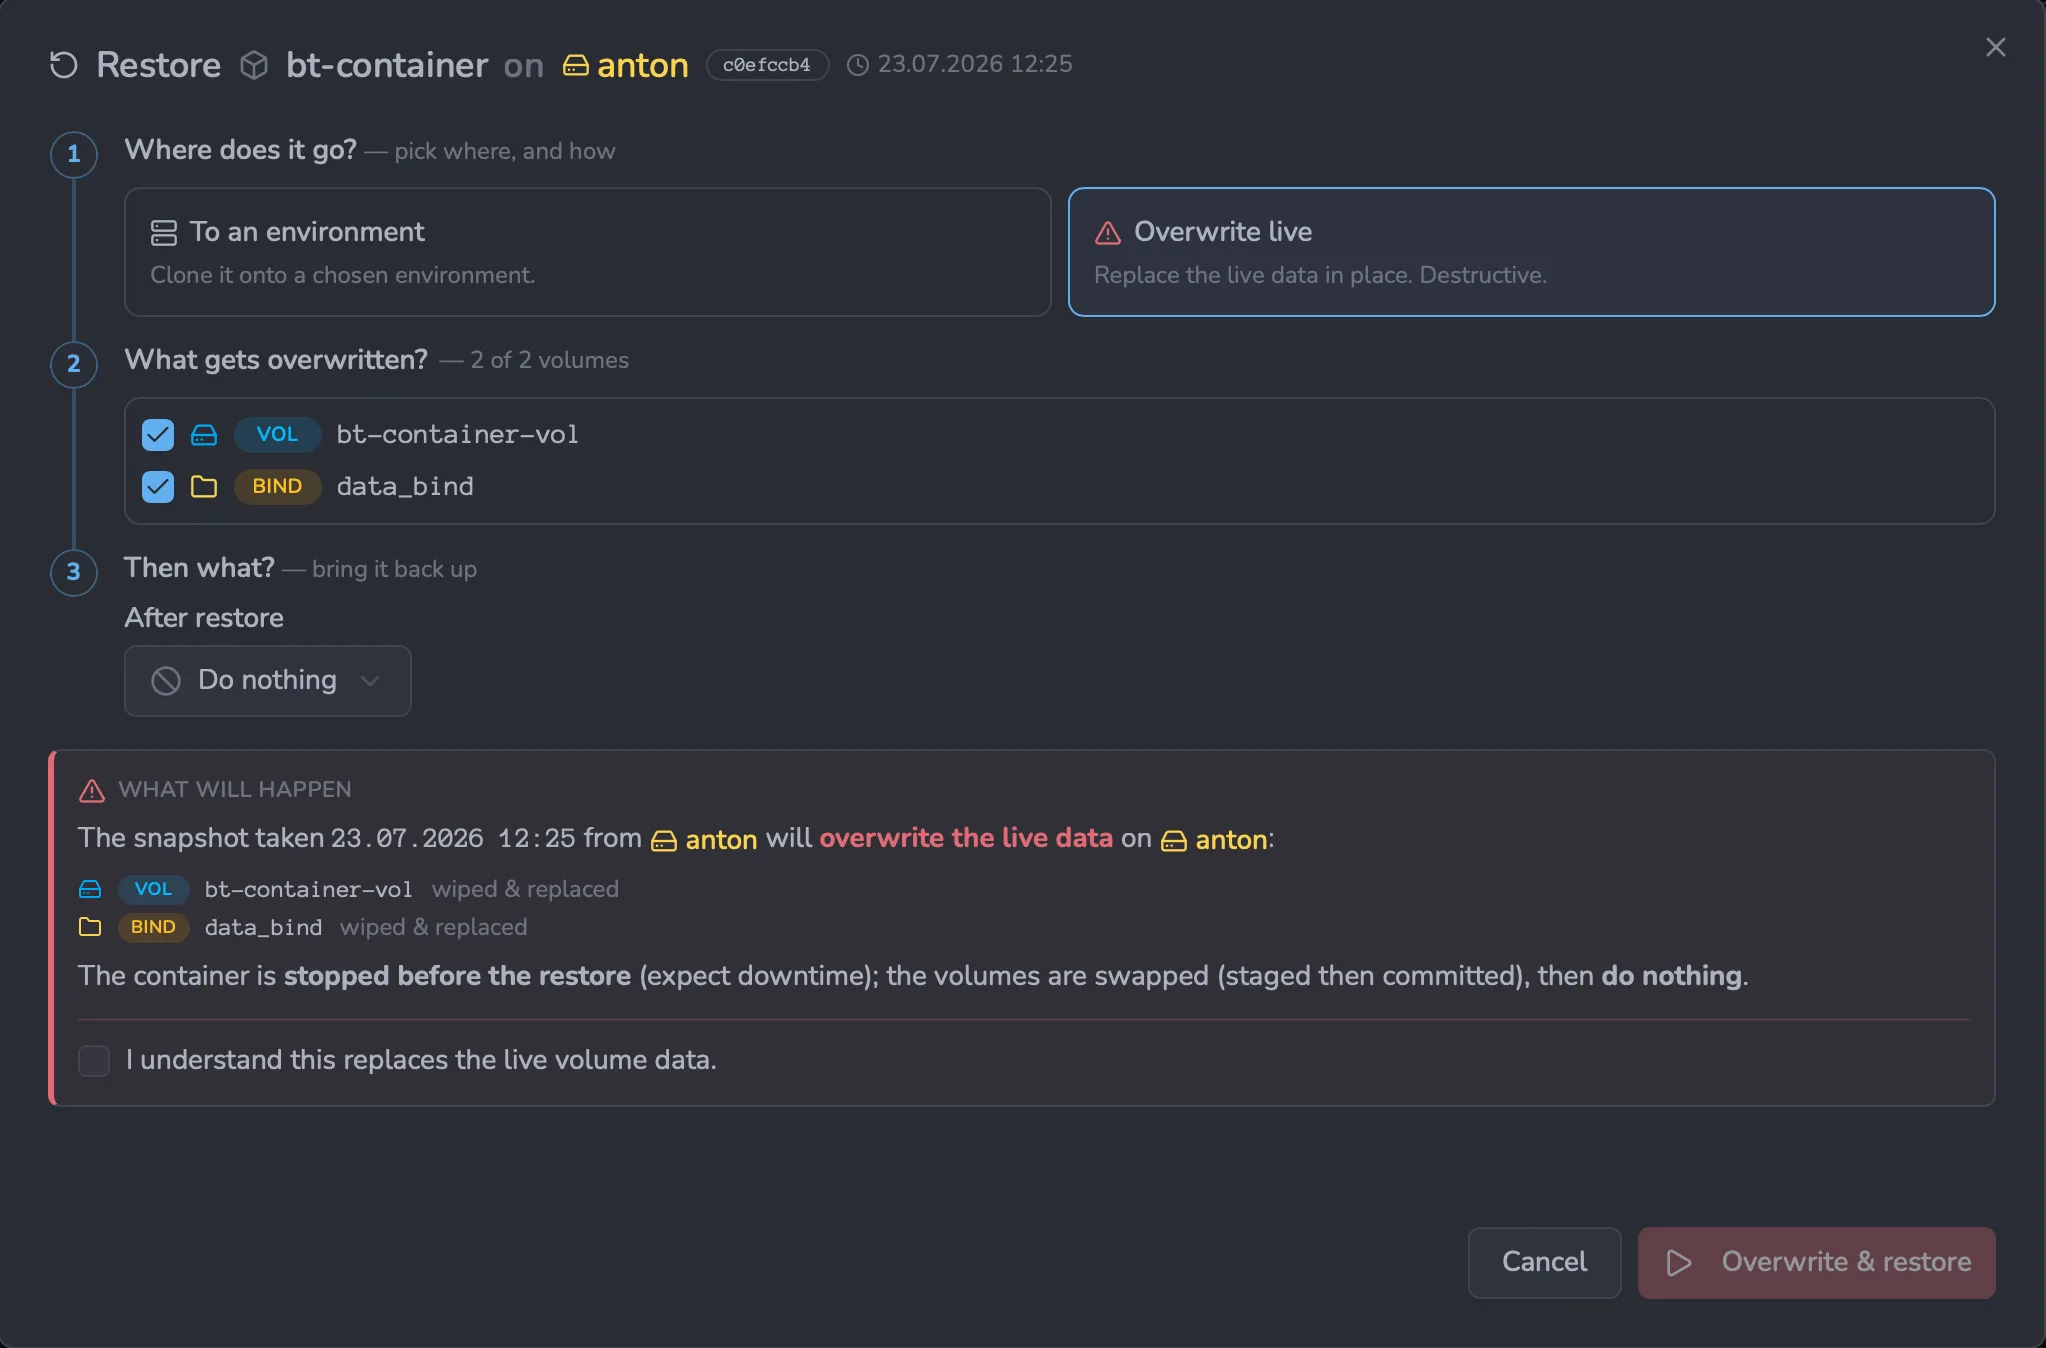
If you rename a volume or change its type
Restore puts the data wherever you point each volume — but the after-restore step (recreate a container, redeploy a stack) rebuilds the target from the snapshot's stored configuration, which still references the original mounts. So if you redirect a volume to a new name, or change a named volume to a host path (or the reverse), the data lands where you asked, but the target comes up mounted on the original volume — it won't see the restored data. Dockhand does not rewrite your container config or compose file for you; that change is yours to make.
When the restore dialog detects a redirected name or type, it shows a warning in What will happen and sets After restore to Do nothing (you can override it if your config already matches). Restore the data, then apply the matching mount change:
data-a
data-b
holds the restored files
data-a
data-a
doesn't see the restored data in data-b
data-a), not your remap, so the freshly-restored data-b is left unmounted. Dockhand doesn't rewrite your config; it defaults After restore to Do nothing when it detects a remap, so you finish the last step yourself.
data-b → Update
volumes: entry + service ref) to data-b → redeploy
data-b and sees the restored data. A plain 1:1 restore (same name and type) skips all of this — recreate/redeploy just works.
| What you changed | Result | How to fix it |
|---|---|---|
| Nothing — restored 1:1 to the original name and type | Works | The target comes up using the restored data. Recreate/Redeploy is safe. |
Renamed a named volume (a → b) |
Mounts the original volume | Container: Edit container → change the volume mapping to b → Update.Stack: edit the compose file (the volumes: entry and the service reference) to b → redeploy. |
Changed a bind path (/x → /y) |
Mounts the original path | Container: Edit container → change the bind's host path to /y → Update.Stack: edit the compose bind to /y → redeploy. |
| Restored a named volume to a host path (volume → bind) | Mounts the original volume | Container: Edit container → replace the named-volume mount with a bind to the host path → Update. Stack: change name:/dest to /host:/dest and remove the top-level volumes: entry → redeploy. |
| Restored a bind into a named volume (bind → volume) | Mounts the original path | Container: Edit container → replace the bind with the named volume → Update. Stack: change /host:/dest to name:/dest and add a top-level volumes: entry → redeploy. |
Restore options
- Volume selection — restore all volumes from the snapshot, or only some (tick the ones you want).
- Target environment — restore to any environment you can access, including a different host than the backup came from (see Cross-environment restore). “Overwrite live” always uses the source environment.
- Destination (“To an environment”) — a named volume or host path per volume, as described above.
- After restore — for a container: start (overwrite-live only), recreate, or do nothing. A stack is always redeployed from its stored compose files.
The engine restores the volume data and rebuilds the target from its stored config as it was at backup time — the container's inspect config, or the stack's compose files. There are no per-field container/image/port/env overrides at restore time: you get the target as it was, not a modified version. Recreate a container with Recreate, or redeploy a stack with Redeploy stack.
How volume restore works
Overwrite-live wipes the target volume's existing contents before extracting the snapshot; To an environment instead populates a fresh volume (or writes to the host path you chose) and touches nothing live. Either way a restore is point-in-time — what was in the snapshot is exactly what ends up on disk. If the snapshot's volume was empty, the restored volume is empty too.
If you ask for a volume that isn't in the snapshot, the restore fails fast with <name> not found in snapshot. Available: … — nothing is touched.
Backups and restores run restic inside a short-lived helper container that runs as root, regardless of the PUID/PGID you set on Dockhand itself. This is required for correctness: to back up a volume the helper must read files owned by any user (a database volume owned by postgres, root-owned config, etc.), and to restore it must re-create those files with their original owners. Only root can read arbitrary files and set arbitrary ownership, so a volume backed up as postgres restores as postgres, byte-for-byte and owner-for-owner.
For a local-path repository, the helper (root) writes the repo files, then re-owns them to Dockhand's own user so the app can read the snapshots back — you do not need to chmod 777 or chown the repo yourself. The ownership recorded inside each snapshot is separate from the repo files' ownership and is always preserved.
Cross-environment restore
Restoring a snapshot from environment A to environment B works for any combination of connection types (socket, direct TCP, Hawser standard, Hawser edge). The volume contents travel through the restic repository, so the source environment doesn't even need to be online. Pick the target environment in the To an environment mode; a named-volume destination gives you a clean, portable clone (see the Restore section).
What works cleanly cross-env:
- Named volumes — Dockhand creates the destination volume on the target and fills it with the snapshot's data (refusing if a volume of that name already exists there)
- Container metadata — env/labels/ports/restart policy reapplied when you recreate, from the stored inspect config. The image is not re-pulled: it must already be present on the target daemon, or the recreate fails (pull it first)
- Stack files (compose.yaml, .env, sibling configs) — restored from the snapshot and used to redeploy the stack on the target
- Networks — a recreated container connects to its networks by name; they must already exist on the target (a missing network is logged as a warning, not created). A stack redeploy creates its networks via
docker compose up. Pre-create networks by name for container recreates.
What requires attention:
- Bind mounts — see the warning under Volumes & bind mounts. A host-path destination is resolved by the target's Docker daemon and must exist on that host. By default a bind is restored to the same host path it was backed up from; edit that volume's destination in the restore dialog to a path (or a named volume) that suits the target. For portable cross-host clones, prefer named-volume destinations.
- Network IDs — Docker generates fresh IDs for auto-created networks. Containers using
networkMode: "container:<id>"won't translate automatically.
Crash safety
An in-place restore never overwrites the live volume directly. It extracts the restored data into a staging directory on the volume's own filesystem and commits it with an atomic rename, guarded by a small on-disk phase marker. The destructive window is a handful of same-filesystem renames — milliseconds, regardless of how much data is restored. If Dockhand (or the whole host) dies inside that window, the live data is left either fully-old or fully-new, never half-swapped.
Recovery needs nothing from you: the next time you run a restore for that volume, Dockhand reads the phase marker first and rolls back any interrupted prior swap before staging the new data, so a re-run always starts from a clean, consistent volume. If a backup or restore stopped a container for consistency and the process died before restarting it, the container is simply left stopped — start it again from the containers page.
Repository maintenance
Restic repositories accumulate garbage over time (orphaned data blobs from deleted snapshots, stale locks from interrupted operations, index drift). Dockhand exposes the standard maintenance operations from the destination's row in Settings > Backups. Each row lists the repository's type, name, URL, usage, and status, and ends in a per-row action toolbar — browse snapshots, stats, check, verify data, unlock, prune, repair, rotate password, test connection, edit, and delete:
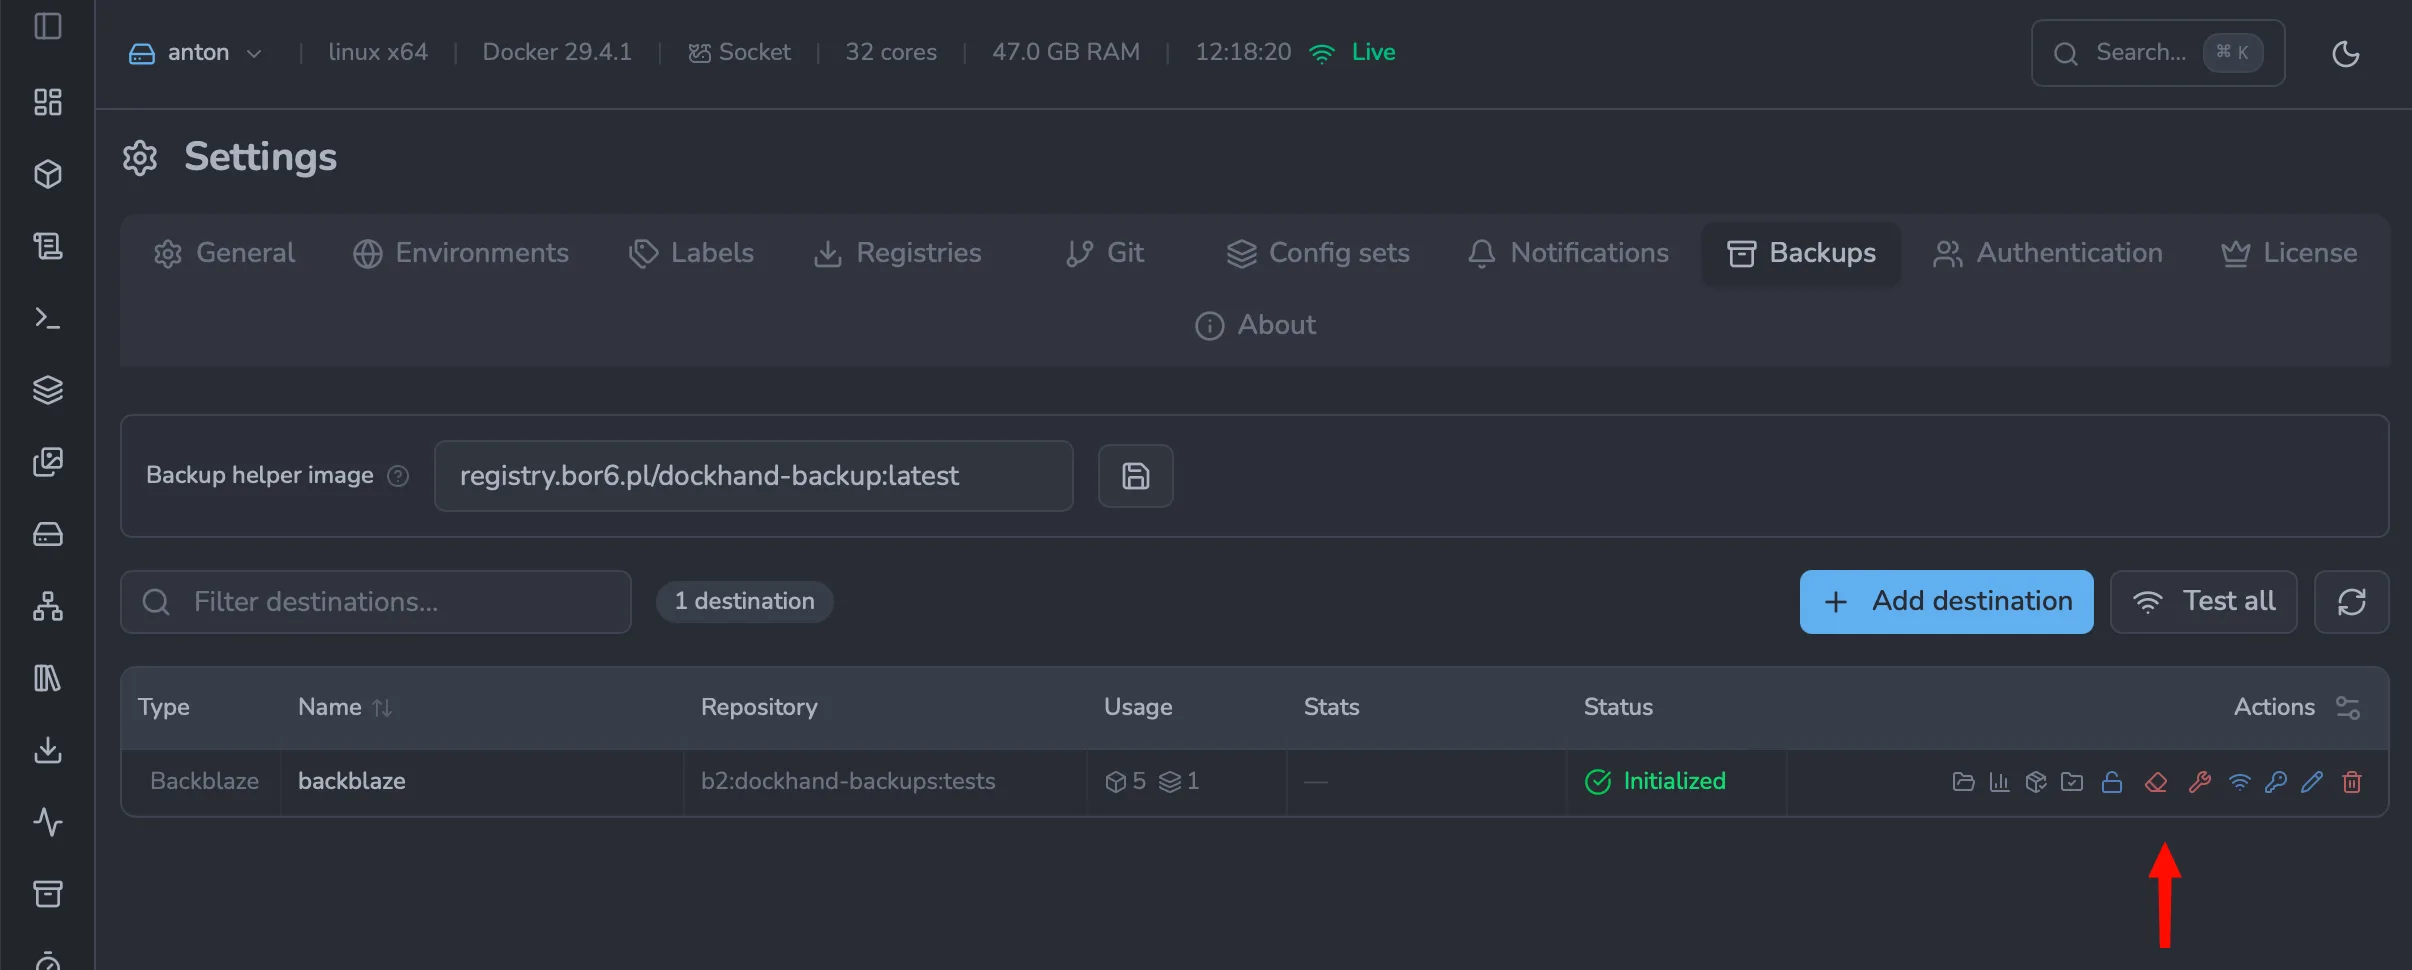
| Operation | What it does | When to run |
|---|---|---|
| Check | Verifies repository structure — every snapshot is reachable, every referenced pack exists, the index is consistent. Does not read pack contents. | Cheap. Run weekly or monthly. |
| Verify data | Same as Check, plus actually reads and re-hashes a configurable subset of pack data (5% / 10% / 25% / 50% / 100%) to detect bit rot on the destination. | Run monthly or quarterly, depending on how much you trust the storage backend. Reads bandwidth scales with the subset percentage. |
| Prune | Frees space occupied by data that no surviving snapshot references (typically left over after forget or retention policy removes snapshots). Rewrites pack files; can be I/O-heavy. |
After bulk snapshot deletion, or on a schedule (the default policy prunes monthly). |
| Unlock | Removes stale locks left behind when a previous restic operation crashed or was killed. Safe if no other operation is currently running against the repo. | When a backup or maintenance task fails with "repository is already locked". |
| Stats | Reports total repository size, snapshot count, deduplication ratio, and uncompressed-vs-compressed size. | Anytime, for capacity planning. |
| Repair index | Rebuilds the repository index from scratch by scanning all pack files. Fixes "pack not in index" errors. | When Check reports index inconsistencies. |
| Repair snapshots | Walks every snapshot and rewrites references to any missing data. Snapshots with missing files are still usable, just with the missing entries removed. | When Check reports missing data and you'd rather salvage what's left than restore from an older snapshot. |
Rotate repository password
The key-icon button on the destination row opens the Rotate password dialog. Enter the current password (required so the change can be authenticated against the repository) and the new password twice. Dockhand runs restic key passwd against the repository, then writes the new password back to the destination's encrypted DB row. From that moment forward all backup, restore, and maintenance operations use the new password — no further action required.
In the rare event the restic rotation succeeds but Dockhand fails to write the new password back to its database, the dialog surfaces this explicitly. The repository now expects the new password but the DB still holds the old one — every subsequent backup will fail with a "wrong password" error. Open the destination's Edit dialog and manually set the password field to the new value to recover.
Schedules
Both backup configs and repository maintenance tasks can run on cron schedules. They all show up in the unified Schedules view alongside the destination and backup config rows that own them.
What gets registered when
Schedule creation is driven by the options you toggle when configuring destinations and backup configs — Dockhand never creates a cron entry you didn't ask for, and never silently keeps one for a config you disabled. The full conditional matrix:
| Schedule | Created when | Removed when |
|---|---|---|
repo_prune |
A destination is created (default policy: monthly, enabled). | Destination is deleted, or Prune is disabled in the destination's Policies dialog. |
repo_check |
A destination is created (default: monthly, enabled). | Destination is deleted, or Check is disabled in the destination's Policies dialog. |
repo_verify |
A destination is created (default: monthly, disabled — costs bandwidth on cloud destinations). | Destination is deleted, or remains disabled (which is the default). |
backup |
A backup config has both Enabled on and a non-empty cron expression in the Schedule field. | Config is deleted, disabled, or the schedule field is cleared. Manual Run now works regardless. |
The default maintenance cron is 0 0 1 * * (the 1st of every month at 00:00). Each schedule can be edited — cron expression, enabled/disabled, and the data-subset percentage for verify — via the destination's Policies dialog.
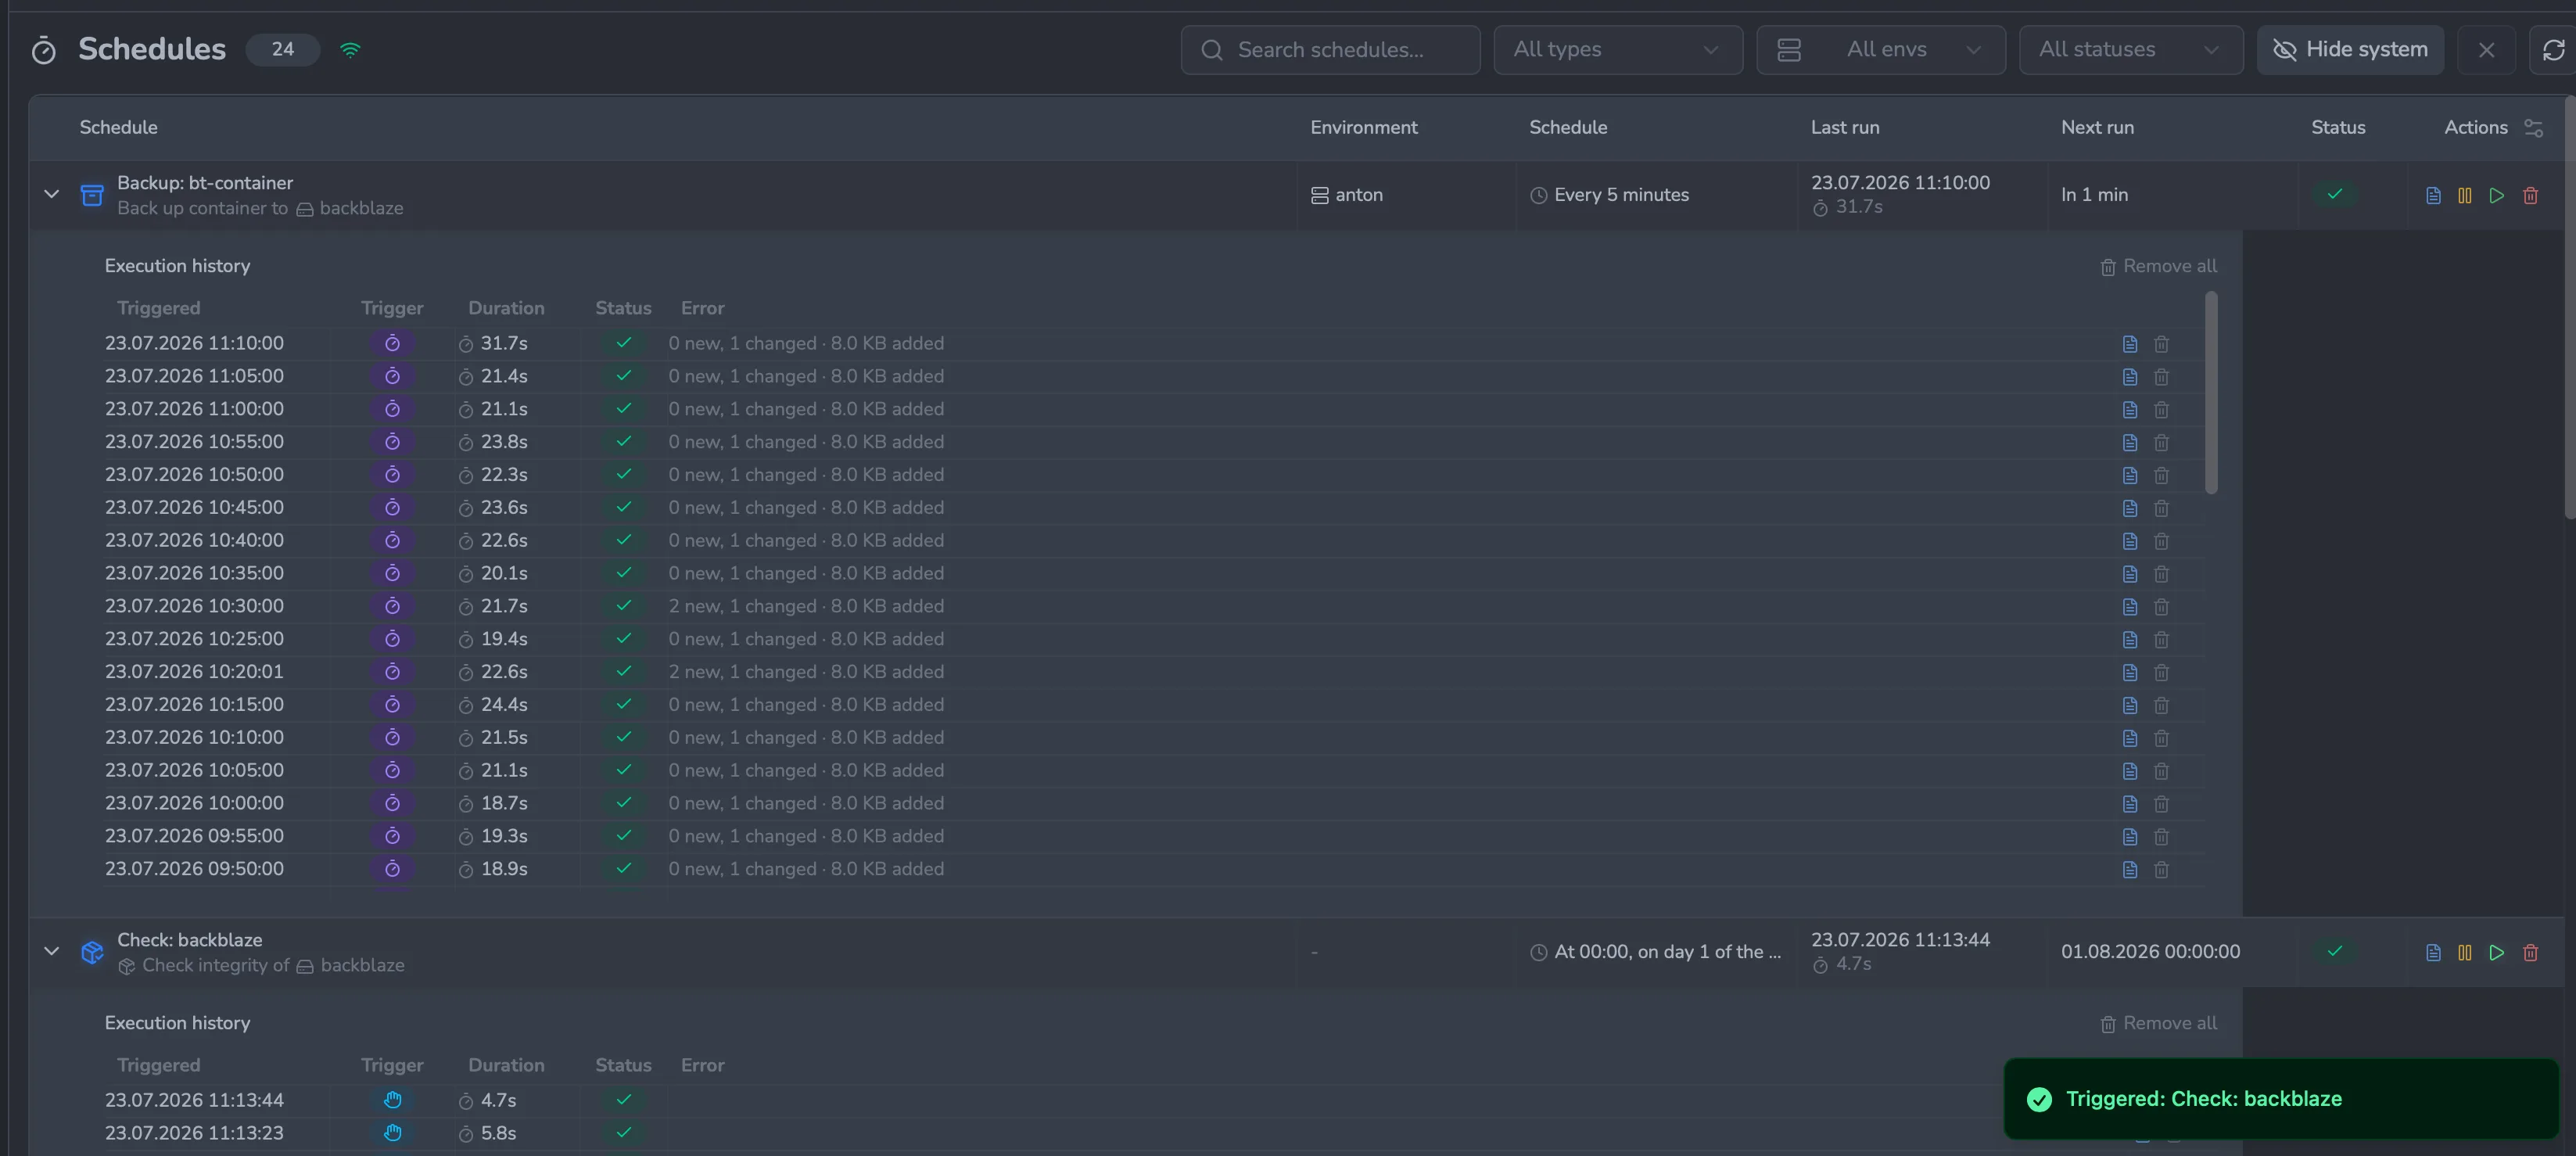
Execution history
Every scheduled run records an execution row with status, duration, line-by-line log, and (for backups) statistics like files added and bytes processed. View execution history on the Schedules page — expand any backup or maintenance row to its run history — or from the target's edit modal Backups tab under the History sub-tab.
Stack secrets & backups
For compose stacks, Dockhand separates non-secret env vars (written to the on-disk .env file) from secrets (stored encrypted in the Dockhand database and injected via shell at deploy time). Both are captured in a stack backup:
- The snapshot's stack files include the
.envfile as it exists on disk — so non-secret values are in the backup - Secrets are carried in the snapshot too, stored as ciphertext — encrypted with this Dockhand instance's encryption key. Their plain values are never written to the backup
- Restoring a stack brings back the compose file,
.env, and the secrets — so the stack comes up working, even if the original stack was deleted entirely. On the restore screen you can turn Restore secrets from this backup off to bring the stack up without them and set them by hand
The above covers Dockhand's own stack env vars. Values pulled from an external secret provider (1Password, HashiCorp Vault, Infisical, Doppler) are a different thing: they are fetched fresh at every deploy, injected via shell env, and never written to disk or to the snapshot — so they cannot leak into a backup. The provider configuration (its tokens/hosts) lives only in the Dockhand database and is likewise not part of a stack or container snapshot. After restoring a stack that uses a provider onto a fresh or rebuilt Dockhand, re-add the secret provider under Settings > Secrets (and re-enter its token) before the stack can resolve its secrets again.
Secrets in a snapshot are encrypted with the instance's encryption key (.encryption_key or the ENCRYPTION_KEY environment variable). Restoring on the same instance decrypts them transparently. Restoring on a different or rebuilt instance — the disaster-recovery case — only works if that instance has the same key. Treat the encryption key as a separate recovery artifact: keep a copy of it alongside (but not inside) your backups. Without it, restored secret values stay unreadable.
Backups of git-managed stacks
A git-managed stack is conceptually two things: a working copy of the repo on Dockhand's filesystem, and the running containers Docker built from it. Backups operate on the working copy in place — Dockhand does not read commits, branches, or remotes during a backup.
What that means in practice:
- The snapshot is a frozen copy of the files on disk at backup time, including any uncommitted local edits, the working tree's current branch state, and the rendered
.env.dockhand. There's no pointer back to the git commit. - The
.gitdirectory itself is excluded from the stack-files capture — only the compose file,.env, and other sibling files are stored. The snapshot is enough to redeploy the stack but not to recover its git history. - Restoring a git stack restores files, not the git binding. The recovered stack is an internal stack with the original compose and config files; it is no longer linked to the source repository. There is currently no flow to re-attach a restored stack to its git origin — if you need the stack to keep tracking the repo, delete the restored stack and add it again as a git stack from Stacks > New stack > Git, then restore the volume data on top of the fresh deployment.
- Secrets are captured in the snapshot (encrypted) — see Stack secrets & backups. This works the same whether the stack is internal or git-managed.
For stacks where every change goes through git first, the snapshot is mainly about the data (volumes) — you could redeploy the compose from the repo at any time. Configure backups for the volumes you need to recover; the compose file capture is still useful as a frozen-in-time record but isn't your primary recovery artifact.
Known limits
- External stacks can't be backed up — a stack that is running in Docker but has not been adopted into Dockhand has no known compose file path. Creating a backup config for such a stack is rejected, and a manual run fails with the same error. Adopt the stack first (Stacks > Import) so Dockhand knows where its compose and
.envfiles live. - Targets that don't exist are rejected — if the backup target has zero containers at run time (the container or the whole stack was deleted, so nothing matches its name), the run fails fast so an empty run can't get the retention policy applied and prune the previous good snapshots. Recreate the target and retry. A stopped container or stack is not rejected — as long as it still exists it backs up normally (its volumes still hold data worth capturing). A target with no volumes or binds also backs up fine — as a config-only snapshot.
- Bind mounts aren't portable by default — see Volumes & bind mounts. The data is captured in the snapshot, but a bind's host path won't exist on another host unless you put it there. At restore you can edit its destination to any absolute host path on the target (or to a named volume) to make it portable. The path you type (any absolute path, no
..) is exactly where the data is written on the target daemon's host — Dockhand doesn't restrict which directory, so a host-path destination can point anywhere on that host and the write happens with the daemon's privileges. Only users with backup management access can run a restore; choose destinations deliberately, and prefer named volumes when you don't specifically need a host path. - Stack compose files with relative bind mounts (
./html:/web) deploy against the path on Dockhand's filesystem, not the target host's. For Hawser-managed stacks, file transfer is automatic; for direct-TCP environments, the bind effectively maps to a path that may not exist on the remote daemon. - One operation per target's data at a time — a run is rejected outright (not queued) while another backup or restore is already touching the same target's volumes/binds. (This is keyed on the data, so two different configs backing up the same volumes also collide.) Operations on different data run concurrently — except that anything sharing one restic repository is serialized (restic locks the repo exclusively while writing), so they queue behind each other. Serialization keys on the repository itself, so two destinations pointing at the same repo queue together.
- Container images are not stored in the snapshot — a snapshot captures your data (volume and bind-mount contents) plus the container/stack configuration, but not the image itself. On restore, Dockhand recreates the container (or redeploys the stack) using the image reference it recorded, and Docker pulls that reference from the registry. If the reference is a moving tag like
myapp:latest, the restore brings back your data from backup time but the current image behind that tag — which may be newer than the one that was running when the backup was taken. Your volume data is always point-in-time; the image is only as point-in-time as the reference you pinned.
To get a true point-in-time restore of the image too, pin by digest so the reference is immutable:- Containers — run them from a digest, e.g.
myapp@sha256:<digest>rather thanmyapp:latest. A digest always resolves to exactly one image. - Compose stacks — pin each service's
image:to a digest in the compose file (image: myapp@sha256:<digest>). Because the restore redeploys from the compose file it backed up, a pinned digest there is redeployed verbatim.
docker saveit) — Dockhand's snapshots deliberately do not carry image layers. - Containers — run them from a digest, e.g.
- Networks are matched by name, IDs aren't translated — a recreated container connects to its networks by name (they must exist on the target; a stack redeploy creates them via compose). Containers that reference a specific network ID (e.g.
networkMode: "container:<id>") can't be translated automatically and need manual remapping.
Backup & restore via the API
Everything the Backups UI does is a plain HTTP call, so you can script the whole lifecycle. The long-running steps (run, restore) follow Dockhand's job pattern for long-running operations: send Accept: application/json and the request runs synchronously and returns the final result — no polling needed, ideal for curl. Below is a complete flow against a container named postgres. Replace the host, and add your auth header (-H "Authorization: Bearer dh_…") if authentication is enabled.
1. Create a destination (where snapshots are stored). Returns the destination id.
curl -sf -X POST "https://dockhand.example.com/api/backup/destinations" \
  -H "Content-Type: application/json" \
  -d '{
    "name": "backblaze",
    "repository": "b2:my-bucket:dockhand",
    "password": "a-strong-restic-repo-password",
    "envVars": { "B2_ACCOUNT_ID": "…", "B2_ACCOUNT_KEY": "…" }
  }'
# → { "id": 25, "name": "backblaze", "repository": "b2:my-bucket:dockhand", ... }
The password encrypts the restic repository — keep it, it can't be recovered. envVars carries the backend credentials (S3/B2/Azure/GCS keys); omit it for a local or unauthenticated REST repo. Initialise the repo once (safe to re-run):
curl -sf -X POST "https://dockhand.example.com/api/backup/destinations/25/init"For a stack target, Dockhand can list the stack folder as it exists on the Docker host, so you can see exactly what will be captured and deselect entries you don't want (the compose file and .env are always kept). The folder is probed by mounting it read-only in a short-lived helper on the target daemon.
curl -sf "https://dockhand.example.com/api/backup/stack-dir-listing?target=immich&env=26"
# → { "kind": "listed", "hostPath": "/opt/immich",
#     "entries": [ { "name": "database", "type": "dir", "size": 4096 }, ... ] }
# → { "kind": "unknown", "reason": "..." }  when the folder can't be located on the host
Deselected entries are saved on the config as options.excludedStackFiles; the backup excludes them from the stack-folder capture.
2. Create a backup config — ties a target (container or stack) to a destination. environmentId is the env the target lives in (from GET /api/environments). An optional schedule (cron) makes it run automatically; omit it for manual-only. Returns the config id.
curl -sf -X POST "https://dockhand.example.com/api/backup/configs" \
  -H "Content-Type: application/json" \
  -d '{
    "targetName": "postgres",
    "type": "container",
    "destinationId": 25,
    "environmentId": 26,
    "schedule": "0 3 * * *",
    "retention": { "keepLast": 7 }
  }'
# → { "id": 1719, "targetName": "postgres", "type": "container", "destinationId": 25, ... }
3. Run a backup now — synchronous with Accept: application/json. This is where the initial snapshot (and every later incremental one) is written. The response carries the new snapshot id and a summary.
curl -sf -X POST "https://dockhand.example.com/api/backup/configs/1719/run" \
  -H "Accept: application/json"
# → {
#     "status": "success",
#     "executionId": 18041,
#     "snapshotId": "1b9017739d10e952529550b7631220dfe280fcc72f083c9b6f8bd09bb710dd8d",
#     "summary": { "filesNew": 2, "filesChanged": 0, "dataAdded": 8602, "totalFilesProcessed": 2 },
#     "retention": "applied"
#   }
4. List snapshots for the config. Each has a full id and a short shortId; use the full id for restore.
curl -sf "https://dockhand.example.com/api/backup/snapshots?configId=1719"
# → [ {
#     "id": "1b9017739d10e952529550b7631220dfe280fcc72f083c9b6f8bd09bb710dd8d",
#     "shortId": "1b901773",
#     "time": "2026-07-24T07:13:12Z",
#     "tags": [ "dockhand:configid=1719", "dockhand:name=postgres", "dockhand:type=container", … ],
#     "paths": [ "/metadata", "/volumes" ]
#   }, … ]
Optional — inspect what a snapshot holds before restoring: its metadata (GET /api/backup/snapshots/{id}/metadata?destinationId=25), a file listing (…/browse), or a dry-run restore preview (lists the volumes it will restore):
curl -sf -X POST "https://dockhand.example.com/api/backup/restore/preview" \
  -H "Content-Type: application/json" \
  -d '{ "destinationId": 25, "snapshotId": "1b9017739d10…" }'
# → { "volumes": [ "postgres-data" ], "volumeTypes": { "postgres-data": "volume" },
#     "backupTime": "…", "sourceEnvironmentId": 26, "hasMetadata": true }
Add a restore mode (and a target environment / destinations) to also get the exact host paths the restore will write to — resolved by the same logic the real restore uses — and a probe of whether each already holds data. helperOk: false means the backup helper cannot run on the target, so the restore would fail:
curl -sf -X POST "https://dockhand.example.com/api/backup/restore/preview" \
  -H "Content-Type: application/json" \
  -d '{ "destinationId": 25, "snapshotId": "1b9017739d10…", "mode": "new-location",
        "environmentId": 26, "targetType": "stack", "targetName": "blog",
        "volumeDestinations": [ { "volume": "html", "kind": "path", "target": "/srv/blog/html" } ] }'
# → { …, "targets": { "helperOk": true,
#       "volumes": [ { "key": "html", "type": "bind", "target": "/srv/blog/html", "hasData": "empty" } ],
#       "stackFiles": { "targetDir": "/app/data/stacks/prod/blog", "willWrite": true, "hasData": "has-data" },
#       "unresolved": [] } }
5. Restore a snapshot. Two modes — new-location (non-destructive: extracts the volume data to a fresh directory, nothing live is touched) and in-place (destructive: swaps the live volume's data). A new-location restore requires a targetPath — an absolute path on the target daemon's host where the data is extracted. This example does the safe, non-destructive restore:
curl -sf -X POST "https://dockhand.example.com/api/backup/restore" \
  -H "Content-Type: application/json" \
  -H "Accept: application/json" \
  -d '{
    "destinationId": 25,
    "snapshotId": "1b9017739d10…",
    "targetName": "postgres",
    "environmentId": 26,
    "mode": "new-location",
    "targetPath": "/tmp/postgres-restore"
  }'
# → { "status": "success", "executionId": 18042,
#     "restoredVolumes": [ "postgres-data" ], "targetPath": "/tmp/postgres-restore" }
For an in-place restore use "mode": "in-place" and "confirmOverwrite": true (no targetPath — it restores onto the live volume's own filesystem), plus a postRestore action (start | recreate for a container, redeploy for a stack, or none). The live target is stopped, its data is atomically swapped for the snapshot's, and the post-restore action brings it back.
For a stack restore the snapshot's secrets (stored encrypted) are restored to the target by default. Add "restoreSecrets": false to bring the stack up without them and set them by hand. Restoring secrets onto a different Dockhand instance requires that instance to have the same encryption key — see Stack secrets & backups.
A new-location stack restore also lands the captured compose and config alongside the volume data at targetPath, so you get a redeployable stack directory. Two options tune this:
"skipStackFiles": true— restore the volume data only, leaving out the captured compose/config (useful when you already have the compose and just want the data back).- Otherwise (default), the captured compose and config are restored and Dockhand registers the restored stack as managed — so you can edit and redeploy it. This always happens (it is not optional); for a remote environment the compose would otherwise live only on the remote host, leaving Dockhand nothing to manage.
To delete a snapshot: DELETE /api/backup/snapshots/{id}?destinationId=25. This runs restic forget --prune — safe to remove any snapshot without affecting the ones you keep (see How snapshots are stored).
Hawser remote agent
Hawser is a lightweight Go agent that enables Dockhand to manage Docker hosts in various network configurations, including hosts behind NAT, firewalls, or with dynamic IPs.
Connection modes
Hawser supports two operational modes:
| Mode | Use Case | How It Works |
|---|---|---|
| Standard | LAN, homelab, static IPs | Agent listens, Dockhand connects to it |
| Edge | VPS, NAT, dynamic IP, firewalls | Agent connects outbound to Dockhand via WebSocket |
Standard mode
Dockhand connects directly to the Hawser agent running on your Docker host. The agent exposes an HTTP API that proxies requests to the local Docker socket.
Pros
- Simple setup - just run the agent
- Lower latency (direct connection)
- Works on any network with IP connectivity
- Optional TLS encryption
Cons
- Requires inbound port access to Docker host
- Need static IP or DNS for the agent
- Firewall rules may be needed
Edge mode
The Hawser agent initiates an outbound WebSocket connection to Dockhand. All communication flows through this persistent connection - no inbound ports required on the Docker host.
Pros
- No inbound ports required
- Works behind NAT, firewalls, dynamic IPs
- Perfect for VPS and cloud instances
- Auto-reconnect with exponential backoff
Cons
- Dockhand must be publicly accessible (or via VPN)
- Slightly higher latency (WebSocket overhead)
- Token authentication is mandatory
Installation
Quick install script
The recommended way to install Hawser on Linux:
curl -fsSL https://raw.githubusercontent.com/Finsys/hawser/main/scripts/install.sh | bashThis script:
- Detects OS and architecture (Linux amd64/arm64)
- Downloads the latest release from GitHub
- Installs to
/usr/local/bin/hawser - Creates config directory at
/etc/hawser/ - Installs systemd service (or OpenRC on Alpine)
Docker installation
Standard mode:
docker run -d \
  --name hawser \
  --restart unless-stopped \
  -v /var/run/docker.sock:/var/run/docker.sock \
  -v /opt/hawser-stacks:/opt/hawser-stacks \
  -e STACKS_DIR=/opt/hawser-stacks \
  -p 2376:2376 \
  -e TOKEN=your-secret-token \
  ghcr.io/finsys/hawser:latest
Edge mode:
docker run -d \
  --name hawser \
  --restart unless-stopped \
  -v /var/run/docker.sock:/var/run/docker.sock \
  -v /opt/hawser-stacks:/opt/hawser-stacks \
  -e STACKS_DIR=/opt/hawser-stacks \
  -e DOCKHAND_SERVER_URL=wss://your-dockhand.example.com/api/hawser/connect \
  -e TOKEN=your-agent-token \
  -e AGENT_NAME=my-server \
ghcr.io/finsys/hawser:latestIf your compose stacks use relative file bind mounts (e.g., ./config.conf:/app/config.conf), you must use a host path bind mount for STACKS_DIR with matching paths inside and outside the container. Docker daemon resolves bind mount sources on the host filesystem, so the path must exist on the host at the same location Hawser writes to.
If your stacks only use named volumes or absolute paths, a named volume (-v hawser_stacks:/data/stacks) works fine.
Systemd service
Create /etc/systemd/system/hawser.service:
[Unit]
Description=Hawser - Remote Docker Agent for Dockhand
After=network-online.target docker.service
Wants=network-online.target
Requires=docker.service

[Service]
Type=simple
ExecStart=/usr/local/bin/hawser
Restart=always
RestartSec=10
EnvironmentFile=/etc/hawser/config

[Install]
WantedBy=multi-user.target
Enable and start:
sudo systemctl daemon-reload
sudo systemctl enable --now hawser
On Tailscale, WireGuard, or any dynamic-IP network, see Troubleshooting → Common issues for an important systemd-dependency caveat.
Configuration
Configure Hawser using environment variables or a config file at /etc/hawser/config:
Standard mode config
# Standard Mode Configuration
DOCKER_SOCKET=/var/run/docker.sock
PORT=2376
TOKEN=your-secret-token
AGENT_NAME=my-server
LOG_LEVEL=info

# Optional TLS
# TLS_CERT=/etc/hawser/server.crt
# TLS_KEY=/etc/hawser/server.key
Edge mode config
# Edge Mode Configuration
DOCKER_SOCKET=/var/run/docker.sock
DOCKHAND_SERVER_URL=wss://your-dockhand.example.com/api/hawser/connect
TOKEN=your-agent-token-from-dockhand
AGENT_NAME=my-server
LOG_LEVEL=info

# Connection settings
HEARTBEAT_INTERVAL=30
RECONNECT_DELAY=1
MAX_RECONNECT_DELAY=60
Environment variables reference
| Variable | Default | Mode | Description |
|---|---|---|---|
DOCKHAND_SERVER_URL |
- | Edge | WebSocket URL for Dockhand connection |
TOKEN |
- | Both | Authentication token |
PORT |
2376 | Standard | HTTP server port |
DOCKER_SOCKET |
/var/run/docker.sock | Both | Docker socket path |
STACKS_DIR |
/data/stacks | Both | Directory for compose stack files. Use a host path bind mount with matching paths if stacks use relative file bind mounts. |
AGENT_NAME |
hostname | Both | Human-readable agent name |
LOG_LEVEL |
info | Both | debug, info, warn, error |
TLS_CERT |
- | Standard | TLS certificate path |
TLS_KEY |
- | Standard | TLS private key path |
CA_CERT |
- | Edge | CA certificate path (for self-signed Dockhand) |
TLS_SKIP_VERIFY |
false | Edge | Skip TLS verification (insecure, for testing only) |
BIND_ADDRESS |
0.0.0.0 | Standard | Address to bind to (use 127.0.0.1 to restrict to localhost) |
AGENT_ID |
Auto-generated UUID | Both | Unique agent identifier |
HEARTBEAT_INTERVAL |
30 | Edge | Heartbeat interval in seconds |
REQUEST_TIMEOUT |
30 | Both | Request timeout in seconds |
RECONNECT_DELAY |
1 | Edge | Initial reconnect delay in seconds |
MAX_RECONNECT_DELAY |
60 | Edge | Maximum reconnect delay in seconds |
WELCOME_TIMEOUT |
30 | Edge | Timeout in seconds waiting for welcome after hello |
SKIP_DF_COLLECTION |
- | Both | Set to any value to disable disk usage collection (useful for NAS devices with many mounts) |
Global variables for stacks
Variables you set in the Hawser agent container's environment: (for example global folder paths like APP_DATA or LIB_GALLERY) are not visible to ${VAR} substitution when the agent runs your stacks. The agent runs docker compose with a clean environment on purpose — so a stray host or agent variable can never silently override a stack's value. Only the variables Dockhand sends for that stack are used.
So setting them on the agent has no effect — the stack sees nothing for ${APP_DATA}:
# Hawser agent compose (does NOT feed stack interpolation)
services:
  hawser:
    image: ghcr.io/finsys/hawser:latest
    environment:
      - APP_DATA=/srv/app        # invisible to your stacks
Instead, define those variables on the stack in Dockhand (the env panel or the stack's env file) — those reach compose interpolation on the agent:
# Stack env file in Dockhand
APP_DATA=/srv/app
LIB_GALLERY=/srv/pictures
Use absolute paths in these values. Compose does not re-expand a ${VAR} that appears inside another env-file value, so APP_DATA=${HOME}/app is taken literally and the deploy fails with refers to undefined volume ${HOME}/app. If you need a shell variable like ${HOME}, reference it directly in the compose file (- ${HOME}/app:/data), where the agent resolves it at deploy time.
TLS configuration
TLS certificate handling differs based on which side initiates the connection:
| Mode | Connection direction | TLS config location |
|---|---|---|
| Standard | Dockhand → Hawser | Dockhand UI (CA cert for self-signed) |
| Edge | Hawser → Dockhand | Hawser agent config (CA cert for self-signed Dockhand) |
Standard mode TLS
When Hawser uses a self-signed TLS certificate, configure the CA certificate in Dockhand:
- Go to Settings > Environments
- Edit the Hawser Standard environment
- Set protocol to HTTPS
- Paste the CA certificate in the CA certificate field
- Optionally enable Skip TLS verification for testing (insecure)
Edge mode TLS
When Dockhand uses a self-signed TLS certificate, configure the CA certificate on the Hawser agent:
# Edge mode with self-signed Dockhand certificate
DOCKHAND_SERVER_URL=wss://your-dockhand.example.com/api/hawser/connect
TOKEN=your-agent-token
CA_CERT=/etc/hawser/dockhand-ca.pem

# Or skip verification (insecure, for testing only)
# TLS_SKIP_VERIFY=trueThe CA certificate must be on the client side to verify the server's identity. In Standard mode, Dockhand connects to Hawser (Dockhand is client). In Edge mode, Hawser connects to Dockhand (Hawser is client).
Token management
Edge mode requires tokens generated in Dockhand:
- Go to Settings > Environments
- Create or edit an environment with "Hawser - Edge" connection type
- Click Generate Token
- Copy the token immediately (shown only once)
- Configure Hawser on your Docker host with this token
Tokens are stored as Argon2id hashes in the database. The full token is shown only once at generation time. If lost, you must generate a new token.
Troubleshooting
Common issues
| Issue | Cause | Solution |
|---|---|---|
| "Unauthorized" error | Token mismatch | Verify token matches between agent and Dockhand |
| "Edge agent not connected" | Agent not running | Start agent, check DOCKHAND_SERVER_URL |
| "Docker socket not found" | Wrong socket path | Set DOCKER_SOCKET=/var/run/docker.sock |
| Connection timeout | Network/firewall | Check firewall rules, WebSocket support |
| Agent stops after network reconnect (Tailscale, VPN, dynamic IP) | Requires= or BindsTo= on a network target in the systemd unit; when the target flaps, systemd stops Hawser |
Edit /etc/systemd/system/hawser.service — change network-target dependencies to After= + Wants= (see callout below). Keep Requires=docker.service. |
| Large image deploy over Hawser fails/times out while the pull is still in progress (e.g. Open WebUI, Immich) | Pulling a large image takes longer than Hawser's default REQUEST_TIMEOUT of 30 seconds, so the compose request times out even though Docker keeps pulling in the background |
Raise REQUEST_TIMEOUT on the agent to a value comfortably above your slowest pull, e.g. REQUEST_TIMEOUT=1800, then restart Hawser and redeploy. |
Requires= on network targetsIf Hawser exits cleanly (status=0/SUCCESS) when your network reconnects — common on Tailscale, WireGuard, or any dynamic-IP setup — your systemd unit probably has Requires=network-online.target or BindsTo= on a network target. When the target flaps, systemd treats Hawser as a failed dependency and stops it; the restart then fails because the target isn't yet healthy.
Use After= + Wants= instead. Hawser still waits for the network on first start, but a later flap won't kill it:
[Unit]
After=network-online.target docker.service
Wants=network-online.target
Requires=docker.service
# Do NOT use Requires= or BindsTo= for network targets

[Service]
Restart=always
RestartSec=5
Reload after editing:
sudo systemctl daemon-reload
sudo systemctl restart hawser
Debug mode
Enable detailed logging:
LOG_LEVEL=debug hawserCheck logs
# Systemd
sudo journalctl -u hawser -f

# Docker
docker logs -f hawser
Settings
Configure Dockhand behavior, environments, authentication, and integrations.
General settings
Theme and appearance Since 1.0.4
Customize the look and feel of Dockhand:
- Theme - Choose between light and dark themes. The theme toggle is also available in the header for quick switching
- Font family - Select a font for the interface (Inter, System, Monospace)
- Grid font size - Adjust the font size in data tables (Small, Medium, Large)
Navigation Since 1.0.41
Choose where Dockhand starts and where environment tiles lead:
- Open the app on - the page Dockhand lands on when you open it (Dashboard, Compose stacks, Containers, and any other sidebar page). Environment-scoped pages open on your last-used environment.
- Environment click - the page a click on an environment tile on the Dashboard navigates to (e.g. Compose stacks or Containers).
Set these globally under Settings → General → Navigation, and override them per-user under Profile → Navigation (each dropdown offers a Use global default option). The dropdowns only list pages you can actually reach - in Enterprise, environment-scoped RBAC and disabled features are respected, and a landing page pointing at an environment outside your scope falls back to an accessible one or the Dashboard.
Editor indentation guides Since 1.0.42
Toggles vertical indentation guides in the compose / YAML editor to make nested blocks easier to follow. Off by default; find it under Settings → General.
Column customization Since 1.0.4
Data grids throughout Dockhand support column customization:
- Resize columns - Drag column borders to adjust width
- Show/hide columns - Click the columns button to toggle visibility
- Reorder columns - Drag columns up/down in the settings popover
- Reset to defaults - Restore original column configuration
Column preferences are saved per user (when authenticated) or globally (when auth is disabled).
Display preferences
| Setting | Default | Description |
|---|---|---|
| Show stopped containers | On | Include stopped containers in lists |
| Time format | 24-hour | 12-hour or 24-hour time display |
| Date format | DD.MM.YYYY | Date display format |
| Download format | tar | Format for file exports (tar or tar.gz) |
| Confirm destructive actions | On | Show confirmations before delete operations |
| Log buffer size | 500 KB | Maximum log buffer per panel (100-5000 KB) |
Timezone handling
Dockhand runs scheduled tasks (container auto-updates, Git stack syncs) using cron expressions. Each environment can have its own timezone setting, which affects:
- Schedule execution - A "daily at 3:00 AM" schedule runs at 3:00 AM in the environment's local timezone, not the server's timezone
- Next run display - The "Next run" time shown in the Schedules page is calculated in the environment's timezone and displayed correctly
- Multi-region deployments - If you manage Docker hosts across different timezones, each environment can have updates scheduled for their local maintenance windows
If no timezone is set for an environment, schedules default to UTC. Configure the timezone in Settings > Environments by editing an environment and setting the Timezone field (e.g., Europe/Warsaw, America/New_York, Asia/Tokyo).
Vulnerability scanner defaults
Configure default CLI arguments for vulnerability scanners. These settings allow you to adjust scanner behavior if Trivy or Grype CLI options change in future versions, or to add custom flags for your environment:
- Grype CLI args - Default:
-o json -v {image} - Trivy CLI args - Default:
image --format json {image}
The {image} placeholder is replaced with the actual image name at scan time.
Cleanup jobs
Configure automatic cleanup of old data to prevent database growth:
| Job | What it cleans | Default retention |
|---|---|---|
| Schedule execution cleanup | Removes historical logs from auto-update and Git sync executions. These logs track when scheduled tasks ran, their success/failure status, and any error messages. Older logs are typically not needed once reviewed. | 30 days |
| Container event cleanup | Removes old container activity events (start, stop, restart, die, etc.) from the activity feed and dashboard. These events are collected from Docker and stored for the activity timeline. High-traffic environments can generate thousands of events daily. | 7 days |
Each cleanup job can be enabled/disabled independently with configurable retention periods (1-365 days). Jobs run automatically on a daily schedule.
Honor reverse-proxy labels Since 1.0.34
When enabled (the default), Dockhand reads labels written by Traefik, Pangolin, and caddy-docker-proxy and surfaces the resulting public URL as a clickable pill next to a container's ports. No network call, no extra configuration — the parser runs client-side on labels Docker already gives us. Turn the toggle off to hide all proxy-derived URLs; only explicit dockhand.url labels (see Container labels) will be shown.
Supported label vocabularies:
- Traefik — parses
traefik.http.routers.<name>.ruleforHost()entries, withPathPrefix()appended where present. MultipleHost()entries combined with||produce multiple URLs. Scheme is inferred fromtraefik.http.routers.<name>.tls=trueor theentrypointslabel (websecure/https→ https,web/http→ http; defaults to https). Rules usingHostRegexp()are skipped. - Pangolin — parses
pangolin.proxy-resources.<name>.full-domainand.protocol. The display label comes from the optional.namefield. Internal target ports (targets[N].port) are ignored — Pangolin terminates at the public host. See the Pangolin Blueprints docs. - caddy-docker-proxy — parses the site-address value of the bare
caddylabel (orcaddy_<N>for isolated groups). A comma-separated value produces multiple URLs; a path in the address (example.com/api/*) is kept. Directive labels (caddy.reverse_proxy,caddy_0.tls, ...) carry a dot after the prefix and are ignored. Scheme is https unless the address specifieshttp://.
Precedence: the explicit dockhand.url label always wins over both Traefik and Pangolin parsing — set it when you want a specific URL or display name regardless of what the proxy labels say. Per-port overrides via dockhand.port.<hostPort>.url apply only to that specific port badge.
Example showing both vocabularies on a stack:
services:
  grafana:
    image: grafana/grafana
    labels:
      # Pangolin blueprint
      - "pangolin.proxy-resources.grafana.name=Grafana"
      - "pangolin.proxy-resources.grafana.full-domain=grafana.example.com"
      - "pangolin.proxy-resources.grafana.protocol=https"

  whoami:
    image: traefik/whoami
    labels:
      # Traefik router
      - "traefik.http.routers.whoami.rule=Host(`whoami.example.com`)"
      - "traefik.http.routers.whoami.entrypoints=websecure"
      - "traefik.http.routers.whoami.tls=true"

  blog:
    image: ghost
    labels:
      # caddy-docker-proxy site address
      - "caddy=blog.example.com"
Show changelog links Since 1.0.34
When enabled (the default), Dockhand surfaces a release-notes icon next to an image name whenever an update is available. Clicking it opens the project's changelog in a new tab. The link is resolved client-side from image metadata you already have — no network call, no extra configuration on Dockhand's side. Turn the toggle off to hide the icon everywhere.
Resolution priority:
- The
dockhand.changelog.urllabel, if set on the container (see Container labels). Wins over the automatic tiers below. - The OCI standard
org.opencontainers.image.sourcelabel, when it points atgithub.com. The release page is<source>/releases. - The GHCR heuristic —
ghcr.io/<owner>/<repo>images map togithub.com/<owner>/<repo>/releases.
If none of the tiers resolves a URL (e.g. nginx:latest from Docker Hub with no labels), no icon is rendered. Add a dockhand.changelog.url label at container runtime to force a specific URL:
services:
  myapp:
    image: nginx:latest
    labels:
      - "dockhand.changelog.url=https://nginx.org/en/CHANGES"
Since 1.0.43 The label may contain a {{version}} (or {{tag}}) placeholder, replaced with the newer version tag so the link points at that exact release. This is handy for monorepos that publish an image under a prefixed release stream:
services:
  bifrost:
    image: maximhq/bifrost:1.6.11
    labels:
      - "dockhand.changelog.url=https://github.com/maximhq/bifrost/releases/tag/transports/{{version}}"
Appearance
Customize the look and feel of Dockhand:
| Setting | Options | Description |
|---|---|---|
| Theme | System / Light / Dark | Color theme preference (follows system by default) |
| Global font size | 80% - 120% | Scale all text throughout the application |
| Grid font size | 80% - 120% | Scale text in data tables and grids only |
| Grid columns | Per-page settings | Show/hide and reorder columns in container, image, and other grids |
When authentication is enabled, appearance settings are saved per user. When auth is disabled, settings are global for all users.
Environments
Manage Docker environment connections.
Connection types
| Type | Description | Use Case |
|---|---|---|
| Unix Socket | Local Docker socket | Dockhand on same host as Docker |
| Direct (HTTP/HTTPS) | Remote Docker API (or Docker socket proxy) | Docker with exposed port |
| Hawser Standard | Hawser agent listens | LAN with static IPs |
| Hawser Edge | Hawser agent connects out | VPS, NAT, dynamic IPs |
Where stack files live, per connection type
When you deploy a compose stack, Dockhand keeps the stack's files (the compose file, .env, and any relative-bind sources like ./nginx.conf or ./data) in a stack directory. A relative bind resolves against that directory, so Docker can only mount it if the files are on the same host as the daemon. How that works depends on the connection type:
| Connection | Where the daemon runs | How relative-bind files reach it |
|---|---|---|
| Unix socket | Same host as Dockhand | Shared filesystem - the stack dir on Dockhand's host is the daemon's host. Relative binds just work (with matching paths / HOST_DATA_DIR translation for containerized Dockhand). |
| Hawser Standard / Edge | Remote host, with an agent | The Hawser agent receives the stack files and writes them into its own stack directory on the remote host, then runs compose there. Relative binds resolve automatically - nothing to configure. |
| Direct (TCP) | Remote host, no agent | No shared filesystem and no agent. By default relative binds can't be delivered, so they map to empty directories on the remote host. Set a Remote stacks directory on the environment (below) to have Dockhand stage the files onto the remote host before deploying. |
A Direct (TCP) environment talks to a bare Docker API over the network (a plain daemon, or a socket-proxy published on the remote host). There is no agent to write files and no shared disk, so a compose stack with relative binds - ./nginx.conf, ./data, ./prometheus.yml - would otherwise deploy with those paths mounted as empty directories.
Set Remote stacks directory in the environment's settings to an absolute path on the remote host (e.g. /opt/dockhand/stacks). Dockhand then stages each stack's files onto that host under <dir>/<stack>/ - using a short-lived helper container and the Docker API - and points compose there, so relative binds mount the real files. This applies to every deploy path: creating a stack, git-stack sync, and restoring a backup.
Leave it empty to keep the previous behavior: stacks on a direct environment must use named volumes or absolute host paths that already exist on the remote host. Named volumes and absolute binds are never staged (an absolute bind is your deliberate "mount this from the remote host"); only relative binds inside the stack directory are.
Environment options
- Name - Display name for the environment
- Remote stacks directory Since 1.0.41 (Direct environments only) - absolute path on the remote host where Dockhand stages compose and relative-bind files before deploying, so stacks with
./config/./databinds work. See Where stack files live. Leave empty to require named volumes or absolute paths. - Icon - Custom icon from icon library
- Labels - Tags for filtering (with colors)
- Public IP - IP address or hostname for clickable port links. When set, port badges on containers become clickable links that open services in your browser (e.g.,
http://192.168.1.100:8080) - Timezone - Local timezone for this environment (e.g.,
Europe/Warsaw,America/New_York). Used for scheduling auto-updates and displaying "Next run" times correctly. See General settings for more details on timezone handling - Default environment - Selected by default on page load
- Collect metrics - Enable CPU/memory monitoring
- Collect activity - Track container events
- Highlight changes - Visual indicators for stat changes
Renaming or deleting an environment
Every environment owns two directories on the Dockhand host, both named after the env:
$DATA_DIR/stacks/<envName>/— the in-app editor source for every stack on this env (and for socket/direct envs, the actual deploy directory)$DATA_DIR/git-repos/<envName>/— the local clone cache for every git stack on this env
This affects what you can safely do on rename and delete.
Renaming
When you change the name in the edit modal, Dockhand atomically moves both directories from the old name to the new name before updating the database. If either rename fails (target directory already exists, cross-filesystem move, permission error), the database stays at the old name and an error is shown — you never end up with a database that points at directories that don't exist.
You'll see a confirmation dialog listing the exact paths that will be moved and a count of the stacks tracked on this env. For socket and direct environments the dialog also warns that each stack must be redeployed after the rename. The reason: running containers carry the old absolute path in their compose project labels (com.docker.compose.project.working_dir). They keep running until they restart, then the old path is gone and compose can't find them. Redeploying recreates the containers with the new path baked in.
For Hawser standard and Hawser edge environments the deploy directory lives on the agent host and doesn't include the env name — running containers there don't care about the rename, only the Dockhand-side editor source and git clone cache move.
Deleting
Deleting an environment shows a confirmation dialog listing the same two directories that will be permanently removed plus the count of stacks tracked. Containers running on the Docker or Hawser host are not stopped — only the Dockhand-side records and on-disk staging directories are wiped. Stop or remove those containers separately before or after the delete if you want them gone too.
Activity collection mode Since 1.0.7
When activity collection is enabled, you can choose how Dockhand receives container events:
| Mode | Description | Best For |
|---|---|---|
| Stream | Maintains a persistent connection to Docker's event stream (/events API). Events are received instantly as they occur. |
Real-time monitoring, low-latency notifications |
| Poll | Periodically queries Docker for events at a configurable interval. Uses less resources but events may be delayed. | Resource-constrained systems, many environments |
Event poll interval - When using Poll mode, how often Dockhand queries for new container events. Default 60 seconds; selectable values are 30 / 60 / 120 / 300 seconds. Lower values mean faster event detection but higher CPU usage. (Ignored in Stream mode, where events arrive instantly.)
Metrics collection interval - A separate setting for how often CPU and memory metrics are collected. Default 30 seconds; selectable values are 10 / 30 / 60 / 120 seconds.
Stream mode is recommended for most users as it provides real-time event tracking. Switch to Poll mode if you notice high CPU usage from Dockhand, especially when managing many environments. Each streaming connection consumes resources, so Poll mode with a longer interval can significantly reduce load.
Updates tab
Configure scheduled update checks for all containers in the environment:
- Scheduled update check - Enable periodic checks for image updates
- Schedule - When to check (daily, weekly, or custom cron)
- Auto-update - Automatically deploy updates when found
- Vulnerability criteria - Block updates based on scan results (when scanning is enabled)
- Timezone - Local timezone for scheduling (affects when cron jobs run)
Vulnerability scanning
Per-environment scanner configuration:
- Scanner - None, Grype, Trivy, or Both
Scanner CLI arguments are configured globally in Settings > General > Vulnerability scanner defaults.
Registries
Configure Docker registries for image operations.
- Name - Display name
- URL - Registry endpoint
- Username/Password - Authentication credentials
- Default - Set as default for pull operations
Git
Manage Git credentials and repositories for stack deployment.
Credentials
- SSH keys - For SSH authentication
- HTTPS credentials - Username/password or token
Repositories
- URL - Git repository URL
- Branch - Default branch to track
- Credential - Link to saved credential
Config sets
Config sets are reusable configuration templates that can be applied when creating containers. They help maintain consistency and save time when deploying multiple containers with similar configurations.
What's included in a config set
- Environment variables - Predefined key-value pairs
- Labels - Container labels for organization and filtering
- Port mappings - Common port configurations
- Volume mounts - Standard volume configurations
- Network mode - Network settings (bridge, host, etc.)
- Restart policy - Container restart behavior
Using config sets
- Go to Settings > Config sets
- Click Add config set
- Enter a name and configure the desired options
- Save the config set
- When creating a new container, select the config set from the dropdown to pre-fill values
Values from config sets are copied when creating a container. Changes to a config set won't affect existing containers.
Notifications
Configure notification channels for alerts.
Channel types
- SMTP — Email notifications via SMTP server
- Webhooks — One or more webhook URLs per channel. Supports Discord, Slack, Mattermost, Telegram, ntfy, Gotify, Pushover, MQTT, Bark, Signal, Apprise (passthrough to any caronc/apprise-supported provider), Microsoft Teams (via Workflows), Zabbix (via history.push), and generic JSON.
Webhook URL formats
A webhook channel takes one or more URLs (one per line). The URL scheme picks the provider Dockhand talks to:
| Service | URL format |
|---|---|
| Discord | discord://webhook_id/webhook_token |
| Slack | slack://token_a/token_b/token_c or a webhook URL |
| Mattermost | mmost://hostname/token (HTTPS: mmosts://) |
| Telegram | tgram://bot_token/chat_id |
| ntfy | ntfy://topic (public) or ntfy://host/topic (HTTPS: ntfys://) |
| Gotify | gotify://host/token (HTTPS: gotifys://) |
| Pushover | pushover://user_key/api_token (optionally append /device1/device2 to target specific devices; also accepts pover://user_key@api_token/device1) |
| MQTT Since 1.0.44 |
mqtt://host[:port]/topic (TCP, default port 1883)mqtts://host[:port]/topic (TLS, default port 8883)mqtt://user:pass@host/topic (with broker credentials)mqtt://host/dockhand/events?qos=1&retain=true (multi-segment topic, QoS and retain)Publishes each event as a JSON message to the topic, so Home Assistant or any subscriber can consume it. QoS defaults to 0, retain to false. A literal # in a topic must be percent-encoded (%23), since it is otherwise read as a URL fragment.
|
| Signal Since 1.0.33 |
signal://host[:port]/+sender/+recipient1[/+recipient2/...]signals://... for HTTPS. Requires signal-cli-rest-api.
|
| Apprise passthrough Since 1.0.33 |
apprise://host[:port]/key (HTTPS: apprises://) — forwards to a caronc/apprise-api server you run yourself. Use this to reach any provider Apprise upstream supports that Dockhand doesn't speak natively (Matrix, IFTTT, AWS SNS, …).
|
| Bark (iOS) Since 1.0.33 |
bark://device_key (official api.day.app)bark://host[:port]/device_key (self-hosted, HTTP)barks://host[:port]/device_key (self-hosted, HTTPS)bark://host/key1/key2/... (multi-device batch)
|
| Microsoft Teams (via Workflows) |
Take the webhook URL from your Power Automate "When a Teams webhook request is received" flow and change its scheme from https:// to workflows:// - paste the whole URL, including its full path and the ?...&sig= query. This works with both the current Power Automate URLs (*.environment.api.powerplatform.com, with a /cu/<n>/ segment) and the older *.logic.azure.com ones.workflows://<the full webhook URL with https:// replaced by workflows://>The short form workflows://hostname/workflow/signature is still accepted for older setups.
|
| Zabbix Since 1.0.43 |
zabbix://host/api_jsonrpc.php?token=TOKEN&host=HOST&key=ITEM_KEY (HTTPS: zabbixs://)Sends each event to Zabbix 7.x via the history.push API. token is a Zabbix API token (Bearer auth), host and key target the Zabbix host and trapper item that receives the JSON event payload.
|
| Generic JSON | json://host/path (HTTPS: jsons://) |
Bark options Since 1.0.33
Bark URLs accept these optional query parameters (e.g. bark://host/key?sound=minuet&level=critical&group=dockhand):
| Parameter | Effect |
|---|---|
level | active (default for info), timeSensitive (default for warning, cuts through Focus), critical (default for error, cuts through silent mode), or passive |
sound | Ringtone name — see the Bark sounds list |
group | Notification group label — Dockhand events stack together |
icon | URL to a custom icon (iOS 15+) |
url | URL to open when tapping the notification |
badge | Numeric app badge value |
copy | Value copied to clipboard on long-press |
call, autoCopy, isArchive | Each =1 to enable (continuous ringtone, auto-copy, archive on receipt) |
Event types
Each event below is an individual toggle. Environment-scoped events are configured per environment (Settings → Environments → the environment's Notifications), so different environments can notify on different channels. System-scoped events are not tied to an environment and are configured on the notification channel itself.
| Group | Events | Scope |
|---|---|---|
| Container | started, stopped, restarted, exited, unhealthy, healthy, OOM-killed, updated, image pulled | Environment |
| Auto-update | update success, update failed, update blocked (by vulnerability policy), updates detected, newer version tag available, batch update success | Environment |
| Git stack | sync success, sync failed, sync skipped (no changes) | Environment |
| Stack | started, stopped, deployed, deploy failed | Environment |
| Security | critical vulnerabilities, high vulnerabilities, any vulnerabilities | Environment |
| Backup | backup success, backup failed, restore success, restore failed | Environment |
| System | environment offline, environment online, disk-space warning, image prune success/failed | Environment |
| System (repository / license) | repository prune success/failed, repository check success/failed, repository verify success/failed, license expiring | System |
Authentication
Configure user authentication and access control.
General settings
- Enable authentication - Toggle auth for the application
- Session timeout - Session expiration (1 hour to 7 days), or toggle "Never expire" to keep sessions signed in until logout
Local users
Create and manage local user accounts:
- Username, display name, email
- Password (Argon2id hashed)
- Admin role toggle
- Avatar upload
- Enable/disable account
OIDC/SSO
Configure Single Sign-On with OpenID Connect providers.
Supported providers
- Microsoft Azure AD
- Okta
- Keycloak
- Auth0
- Any OIDC-compliant provider
Configuration
- Name - Provider display name
- Issuer URL - OIDC discovery endpoint
- Client ID - OAuth client ID
- Client secret - OAuth client secret
- Scopes - OAuth scopes (default: openid profile email)
See the OIDC Configuration Guide for detailed setup instructions with Keycloak and other providers.
LDAP/Active Directory Enterprise
Connect to LDAP or Active Directory for user authentication.
LDAP/Active Directory integration requires an Enterprise license.
Connection settings
- Server URL - LDAP server (e.g.,
ldap://ldap.example.com:389) - Bind DN - Service account DN for searching
- Bind password - Service account password
- Base DN - Search base (e.g.,
dc=example,dc=com)
User search
- User filter - LDAP filter template
- OpenLDAP:
(uid={{username}}) - Active Directory:
(sAMAccountName={{username}})
- OpenLDAP:
- Username attribute - Attribute for username (uid, sAMAccountName)
- Email attribute - Attribute for email (mail)
- Display name attribute - Attribute for display name (cn)
Group settings
- Group base DN - Where to search for groups
- Admin group - Group DN for admin access
- Member filter - Filter to find user's groups
TLS settings
- Enable TLS - Use LDAPS or StartTLS
- CA certificate - Custom CA for verification
See the LDAP/AD Configuration Guide for detailed setup instructions.
Roles (RBAC) Enterprise
Configure role-based access control for granular permissions.
System roles
- Admin - Full access to everything
- Operator - Manage containers, images, stacks
- Viewer - Read-only access
Custom roles
Create roles with granular permissions:
- Containers - view, create, edit, start/stop, remove, exec, logs
- Images - view, pull, remove
- Volumes - view, create, remove, browse
- Networks - view, create, remove
- Stacks - view, create, edit, deploy, remove
- And more...
Environment scoping
Custom roles can be scoped to specific environments:
- All environments - Role applies everywhere
- Specific environments - Role only applies to selected environments
License
Activate and manage your Enterprise license.
Enterprise features
An Enterprise license unlocks:
- Role-based access control (RBAC)
- LDAP/Active Directory integration
- Audit logging
- Priority support
Activation
- Enter your license name (customer name)
- Enter your license key
- Click Activate
The license is validated against:
- Customer name
- Hostname (or wildcard)
- Expiration date
- Cryptographic signature
Enterprise features
Enterprise edition adds advanced security and compliance features for organizations.
Role-based access control
RBAC provides fine-grained control over who can access what:
- Users can be assigned multiple roles
- Roles define permissions for resources and actions
- Environment scoping limits role access to specific environments
Free vs Enterprise
| Feature | Free Edition | Enterprise |
|---|---|---|
| Authentication | Yes (SSO + local users) | Yes |
| Permissions | All users have full access | Granular RBAC |
| Environment scoping | No | Yes |
Audit logging
Track all user actions for compliance and security auditing.
Audit logs capture:
- Who performed the action (user)
- What action was performed (create, update, delete, start, stop, etc.)
- What resource was affected (container, image, stack, etc.)
- When the action occurred (timestamp)
- Additional context (IP address, user agent)
Multi-factor authentication
Add an extra layer of security with TOTP-based MFA. This feature is available in both free and enterprise editions for local user accounts.
Compatible authenticator apps
Any TOTP-compatible authenticator app works with Dockhand:
- Google Authenticator (iOS, Android)
- Microsoft Authenticator (iOS, Android)
- Authy (iOS, Android, Desktop)
- 1Password, Bitwarden, and other password managers with TOTP support
Setup process
- Go to your Profile page (click your avatar in the header)
- Click Enable MFA in the Security section
- Scan the QR code with your authenticator app, or manually enter the secret key
- Enter the 6-digit verification code from your app to confirm setup
- Important: Save the backup codes displayed - these are your recovery codes
Logging in with MFA
After entering your username and password, you'll be prompted for the 6-digit code from your authenticator app. Codes refresh every 30 seconds.
Recovery options
- Backup codes - Each backup code can be used once to bypass MFA
- Admin reset - Administrators can disable MFA for a user in Settings → Auth → Users
- Emergency script - Use
/app/scripts/reset-mfa.sh usernameif locked out (see Emergency scripts)
Save your backup codes immediately after setup. They cannot be viewed again - only regenerated (which invalidates old codes).
Disabling MFA
To disable MFA on your account:
- Go to your Profile page
- Click Disable MFA
- Enter your current password to confirm
Keyboard shortcuts
Global
| Shortcut | Action |
|---|---|
| Esc | Close modal / Clear search |
| ⌘ + K / Ctrl + K | Open command palette - quick navigation and actions |
Terminal
| Shortcut | Action |
|---|---|
| Cmd + L | Clear terminal |
| Cmd + C | Copy selection |
| Cmd + V | Paste |
Troubleshooting
Dockhand won't start
- Check Docker socket is accessible:
docker ps - Verify port 3000 is not in use
- Check container logs:
docker logs dockhand
Can't connect to environment
- Verify Docker is running on the target host
- Check firewall rules allow connection
- For Hawser: verify agent is running and token is correct
Terminal / live updates don't work behind a reverse proxy
The container terminal, container logs, real-time dashboard updates, and the Hawser Edge connection all rely on WebSocket and server-sent-event upgrades. If the page loads but the terminal never connects, logs don't stream, or tiles never refresh, the reverse proxy in front of Dockhand is almost certainly dropping the connection upgrade.
The proxy must forward the Upgrade and Connection headers and speak HTTP/1.1 to the upstream. See the Nginx reverse proxy example for the full location / block. The three lines that matter:
proxy_http_version 1.1;
proxy_set_header Upgrade $http_upgrade;
proxy_set_header Connection "upgrade";
If a static Connection "upgrade" still doesn't fix it (some setups need the header to vary per request), use the canonical Nginx WebSocket map instead — define it once in the http { } block and reference it in the location:
map $http_upgrade $connection_upgrade {
    default upgrade;
    ''      close;
}

location / {
    proxy_pass http://dockhand:3000;
    proxy_http_version 1.1;
    proxy_set_header Upgrade    $http_upgrade;
    proxy_set_header Connection $connection_upgrade;
    proxy_set_header Host       $host;
}
A proxy missing these headers lets the UI load over plain HTTP while silently blocking every WebSocket/SSE feature, so the symptom looks like a broken terminal or frozen dashboard rather than a connection error. Traefik and Caddy handle the upgrade automatically; Nginx and Apache need it configured explicitly.
Environment offline after Docker engine update
After updating the Docker engine on the host, Dockhand may show the local environment as offline and report ECONNREFUSED errors — even though docker ps works fine on the host.
Why this happens: This is a Linux kernel limitation, not a Dockhand issue. When the Docker engine restarts, it creates a new Unix socket (/var/run/docker.sock) with a new inode. However, the bind mount inside the Dockhand container still references the old inode — Linux provides no way to rebind or refresh a changed inode inside an existing mount namespace. The container is left holding a stale file descriptor, and all connections to the socket fail. This affects any containerized application that mounts the Docker socket.
Solution: Restart the Dockhand container to get a fresh mount of the new socket:
docker restart dockhandThere is no data loss — Dockhand picks up right where it left off after restart.
If you update Docker frequently, consider adding a post-update hook. For example, in a docker.service systemd override:
ExecStartPost=/usr/bin/docker restart dockhandRelative volume paths mounted as empty directories
If your compose stack uses relative paths like ./config.toml:/config.toml and the files appear as empty directories in the container, this is a path mapping issue.
Why this happens: Dockhand runs inside a container but communicates with the Docker daemon on the host. When docker-compose resolves ./config.toml, it becomes an absolute path like /app/data/stacks/mystack/config.toml. The Docker daemon looks for this path on the host filesystem where it doesn't exist, so Docker creates an empty directory instead.
Solution: Use matching paths with DATA_DIR:
docker run -d \
  --name dockhand \
  -v /var/run/docker.sock:/var/run/docker.sock \
  -v /opt/dockhand:/opt/dockhand \
  -e DATA_DIR=/opt/dockhand \
  fnsys/dockhand:latest
See Data storage & volume paths for detailed instructions, including how to migrate from a named volume.
Stack deploys fail with ParseAddr / IPv6 CIDR error
If a stack deploy fails with an error like:
ParseAddr("fd11:8343:8dee:2::1/64"): unexpected character, want colon (at "/64")this is a Docker Compose bug, not a Dockhand issue. Compose iterates Docker networks and calls Go's netip.ParseAddr() on subnet gateway addresses that include CIDR notation. ParseAddr expects a bare IP, not a CIDR — it should be using ParsePrefix instead. Reported most often on TrueNAS Scale and similar setups where the Docker daemon creates IPv6-enabled networks with CIDR-style gateways.
Quickest fix — disable IPv6 in the Docker daemon (if you don't need IPv6):
Edit /etc/docker/daemon.json and set:
{
  "ipv6": false
}
Restart the Docker daemon. New networks won't carry the broken CIDR gateways. Existing broken networks must still be removed or recreated.
If you need IPv6 — find and fix the offending network:
docker network inspect $(docker network ls -q) \
  --format '{{.Name}}: {{json .IPAM.Config}}' 2>/dev/null | grep /
For each network whose gateway includes a /N suffix (e.g. fd11:8343:8dee:2::1/64), recreate it with a bare gateway:
# If no containers use it:
docker network rm <network-name>

# Recreate with proper gateway (no CIDR):
docker network create --ipv6 \
  --subnet fd11:8343:8dee:2::/64 \
  --gateway fd11:8343:8dee:2::1 \
  <network-name>
OIDC/SSO login fails with fetch failed
If the OIDC connection test passes but login (or a background request like a registry check) fails with a bare Connection failed: fetch failed, the container can't actually reach the provider over the network — even though it can from the host.
The tell-tale check, run inside the Dockhand container (replace the host):
docker exec dockhand sh -c 'H=https://your-idp.example.com/.well-known/openid-configuration; \
  curl -s4 -o /dev/null -w "IPv4: %{http_code} %{remote_ip}\n" $H; \
  curl -s6 -o /dev/null -w "IPv6: %{http_code} %{remote_ip}\n" $H; true'
If IPv4 fails but IPv6 works (or vice-versa), it's a Docker networking issue on the host — the container can't reach the target over that address family. A common cause is a host firewall: when the provider is on the same host behind a reverse proxy, the container's request hairpins back to the host, but the firewall rules only match the host's own source IP and drop packets whose source is the Docker bridge. Fixes that worked: allow the bridge, e.g. iptables -I INPUT -i br-+ -p tcp --dport 443 -m conntrack --ctstate NEW -j ACCEPT; give the provider a Docker network alias so the request never leaves the Docker network; or restart the Docker daemon so it reinstalls its NAT/forward rules after a firewall reload.
If you can't fix the host networking and only one family works, set DNS_RESULT_ORDER=verbatim so Dockhand stops pinning outbound requests to IPv4 and can fall back to whichever family is reachable. By default Dockhand forces IPv4-first (to avoid IPv6 hangs on networks without IPv6 routing), so on an IPv6-only-reachable container the default guarantees the failure.
Since 1.0.38 the error message also includes the underlying cause (e.g. EHOSTUNREACH, ETIMEDOUT, ENOTFOUND), which tells a DNS/egress problem apart from a TLS/cert one.
Locked out of authentication
Use emergency scripts to regain access:
# Disable authentication entirely
docker exec -it dockhand /app/scripts/disable-auth.sh

# Or create an admin user (admin/admin123)
docker exec -it dockhand /app/scripts/create-admin.sh

# Or reset a user's password
docker exec -it dockhand /app/scripts/reset-password.sh username NewPassword123
After running disable-auth.sh, access the UI without credentials and reconfigure authentication in Settings. See Emergency scripts for the full list of available recovery commands.
Slow dashboard on NAS devices Since 1.0.12
If Dockhand's dashboard loads slowly or times out on NAS devices (Synology, QNAP, etc.), this is likely caused by Docker's /system/df API call which can be extremely slow on certain storage backends.
To disable disk usage collection entirely, set the SKIP_DF_COLLECTION environment variable:
docker run -d \
  --name dockhand \
  -e SKIP_DF_COLLECTION=true \
  -v /var/run/docker.sock:/var/run/docker.sock \
  -v dockhand_data:/app/data \
  fnsys/dockhand:latest
When enabled, Dockhand will skip all disk usage calculations. The dashboard will not display disk-related statistics, but all other functionality works normally.
Proton Mail SMTP
Proton Mail's SMTP Submission works with the following configuration:
| Setting | Value |
|---|---|
| Host | smtp.protonmail.ch |
| Port | 465 |
| TLS/SSL | Yes |
| Username | Your Proton email address |
| Password | App-specific password from Proton SMTP settings |
| From email | Same as username |
Update check fails (socket proxy)
The self-update check in Settings > About needs to reach the Docker daemon that runs the Dockhand container itself. If you use a socket proxy (socat, linuxserver/socket-proxy, etc.) instead of mounting docker.sock directly, and Dockhand has no way to reach that daemon, the check reports an error like ENOENT / "cannot reach Docker" instead of a version.
Recommended fix: add an environment that points at your Docker host (the proxy), under Settings > Environments — a direct connection to the proxy's host and port. Dockhand automatically detects when one of your configured environments hosts its own container and uses it for the update check, self-update, and image scanning. No extra variables are needed.
DOCKER_HOST. Setting DOCKER_HOST=tcp://… also makes the check work, but it forces the vulnerability scanner onto TCP too, which can put the scanner container on the wrong network on split-network / socket-proxy hosts and break its access to the daemon. Adding an environment keeps the scanner on its normal host-socket path. Only set DOCKER_HOST if you understand that trade-off. (DOCKER_HOST is also unrelated to HOST_DOCKER_SOCKET, which only controls the host-side path used for scanner bind mounts.)
No memory metrics on Raspberry Pi
Container memory usage shows 0B for all containers on Raspberry Pi (ARM64). This happens because cgroup_memory is not enabled by default on Raspberry Pi OS.
Fix: Add cgroup_enable=memory and cgroup_memory=1 to /boot/firmware/cmdline.txt, then reboot.
Open the file in an editor:
sudo nano /boot/firmware/cmdline.txtAppend cgroup_enable=memory cgroup_memory=1 to the end of the existing line. The result should look something like:
console=serial0,115200 console=tty1 root=PARTUUID=xxx rootfstype=ext4 ... cgroup_enable=memory cgroup_memory=1Save the file and reboot:
sudo rebootVerify after reboot:
# Should show cgroup_enable=memory
grep cgroup_enable /boot/firmware/cmdline.txt

# Should list "memory" among the controllers
cat /sys/fs/cgroup/cgroup.controllersDocker API version mismatch (older Docker)
If stack deployments fail with "client version 1.53 is too new. Maximum supported API version is 1.43", your Docker daemon is older than the Docker CLI bundled in Dockhand.
This happens when the host runs an older Docker version (e.g. Docker 24.x with API 1.43) while Dockhand ships Docker CLI 29.x (API 1.53).
Fix: Set the DOCKER_API_VERSION environment variable on the Dockhand container to match your daemon's API version:
docker run -e DOCKER_API_VERSION=1.43 ... fnsys/dockhandTo find your Docker API version, run docker version on the host and look for API version under the Server section.
docker compose operations (stack deploy, build). Regular container management (start, stop, inspect) uses Dockhand's own HTTP client which negotiates the API version automatically.
Disabling local login Since 1.0.13
If you use SSO (OIDC) or LDAP exclusively and want to hide the local username/password login form, set the DISABLE_LOCAL_LOGIN environment variable:
docker run -d \
  --name dockhand \
  -e DISABLE_LOCAL_LOGIN=true \
  -v /var/run/docker.sock:/var/run/docker.sock \
  -v dockhand_data:/app/data \
  fnsys/dockhand:latest
When enabled, the login page will only show SSO buttons and LDAP providers. Direct API calls to the local login endpoint will be rejected with a 403 error. This is useful for organizations that require all authentication to go through a central identity provider.
Emergency scripts
Recovery scripts are located in /app/scripts/ inside the container:
# Disable authentication
docker exec -it dockhand /app/scripts/disable-auth.sh

# Create admin user (admin/admin123)
docker exec -it dockhand /app/scripts/create-admin.sh

# Reset a user's password
docker exec -it dockhand /app/scripts/reset-password.sh username NewPassword123

# List all users
docker exec -it dockhand /app/scripts/list-users.sh

# Clear all sessions (force re-login)
docker exec -it dockhand /app/scripts/clear-sessions.sh

# Backup database
docker exec -it dockhand /app/scripts/backup-db.sh /app/data/backups

# Relocate stored stack paths after changing DATA_DIR (see "Moving data")
docker exec -it dockhand /app/scripts/relocate-stack-paths.sh /old/data/dir /new/data/dirEmergency scripts require shell access to the container. In production, restrict access to the Docker socket and container.
Relocating stack paths after moving DATA_DIR
Managed stacks store the absolute path to their compose and .env files in the database. If you change where DATA_DIR is mounted (see Moving data), those stored paths still point at the old location and the stack shows an empty compose. The relocate-stack-paths.sh script updates the stored paths to the new location.
The script does not move, copy, or delete anything on disk. It only updates where Dockhand looks for each stack in its database, and only rewrites a path when the old file is gone and the new file already exists. Copy your data to the new location first, then run it.
Pass the old and new DATA_DIR explicitly. By default it runs as a dry run and prints exactly what it would change (and what it would skip, with the reason) - nothing is written until you add --apply:
# 1. Dry run - review the planned changes, change nothing
docker exec -it dockhand /app/scripts/relocate-stack-paths.sh /app/data /mnt/pool/dockhand

# 2. Apply, reviewing each change one by one (answer y / n / q)
docker exec -it dockhand /app/scripts/relocate-stack-paths.sh /app/data /mnt/pool/dockhand --apply

# 3. Apply every planned change at once, without prompting
docker exec -it dockhand /app/scripts/relocate-stack-paths.sh /app/data /mnt/pool/dockhand --apply --all
Each stored path is classified as: WILL UPDATE (old file missing, new file present), or skipped because the old file still exists (nothing to move), the new file isn't there yet (copy the files across first), or the path is outside the old DATA_DIR (an adopted stack in its own location, left untouched). It works with both SQLite and PostgreSQL. Restart Dockhand afterwards. Make a database backup first if you want a safety net.
Repairing a corrupt SQLite database
If Dockhand logs SqliteError: database disk image is malformed (error code SQLITE_CORRUPT), the on-disk database file has page-level damage.
Why this happens: SQLite corruption is almost never a Dockhand bug — it's overwhelmingly caused by the storage layer underneath. NAS volumes with aggressive write caching (QNAP, Synology, Unraid), power loss during a write, the container being SIGKILLed mid-write, or filesystem issues are the usual culprits. Dockhand writes container events and metrics continuously, so it tends to surface underlying storage flakiness before less write-heavy apps would.
Step 1 — diagnose. Run an integrity check against the database file:
docker exec -it dockhand sqlite3 /app/data/db/dockhand.db "PRAGMA integrity_check;"The output tells you what kind of corruption you have. Interpret it before acting:
| Output | What it means | Severity |
|---|---|---|
ok |
No corruption. Look elsewhere. | — |
Page N: never used |
Orphan pages, cosmetic. VACUUM reclaims them. |
Low |
wrong # of entries in index ... / row N missing from index ... |
Index out of sync with table. Underlying rows are fine. REINDEX rebuilds it. |
Low |
wrong # of entries in table ... / page-level errors on tables |
Actual data damage. Needs .recover. |
High |
Step 2 — fix index and orphan-page corruption (the common case):
docker exec -it dockhand sqlite3 /app/data/db/dockhand.db "REINDEX; VACUUM; PRAGMA integrity_check;"REINDEX rebuilds every index from the underlying table data (zero data loss). VACUUM rewrites the file, dropping orphan pages. The final integrity_check should print ok. Dockhand doesn't need to be stopped — the DB is briefly locked during VACUUM; if that disrupts anything, restart Dockhand afterward.
Step 3 — recover from real data damage. Only run this if step 2's integrity_check still reports table-level errors. Stop Dockhand, then rebuild the database by extracting every readable row:
docker stop dockhand
docker exec dockhand cp /app/data/db/dockhand.db /app/data/db/dockhand.db.broken
docker exec dockhand sh -c "sqlite3 /app/data/db/dockhand.db.broken '.recover' | sqlite3 /app/data/db/dockhand.db.new"
docker exec dockhand sh -c "mv /app/data/db/dockhand.db /app/data/db/dockhand.db.old && mv /app/data/db/dockhand.db.new /app/data/db/dockhand.db"
docker start dockhand
.recover pulls every salvageable row out of the broken file and writes a clean database. You'll likely lose the most recent metrics and events history, but settings, environments, stacks, users, tokens, and similar persistent state survive. The .broken and .old files are kept for forensics — delete them once Dockhand is back to normal.
PRAGMA wal_checkpoint(RESTART) is a routine maintenance command, not a recovery tool. If pages are bad, a checkpoint can propagate the corruption from the WAL into the main database file rather than repair it.
Preventing recurrence. If the same host keeps hitting this, the storage layer is the suspect:
- Move
DATA_DIRoff network-mounted, snapshot-heavy, or aggressively-cached volumes onto a local ext4/xfs path. - Make sure the container always gets a clean shutdown (
docker stop, notkill, and avoid host force-reboots). - Check the disk for SMART errors (
smartctl -a /dev/sdX) and the host RAM for ECC errors.
Moving Dockhand's data to another directory
If you started Dockhand with a Docker named volume (dockhand_data) and want to move to a directory path for easier access or backup, follow these steps:
# 1. Stop Dockhand
docker stop dockhand

# 2. Create target directory and copy data from named volume
mkdir -p /opt/dockhand
docker run --rm \
  -v dockhand_data:/source:ro \
  -v /opt/dockhand:/target \
  busybox cp -a /source/. /target/

# 3. Remove old container and start with matching paths
docker rm dockhand
docker run -d \
  --name dockhand \
  --restart unless-stopped \
  -p 3000:3000 \
  -v /var/run/docker.sock:/var/run/docker.sock \
  -v /opt/dockhand:/opt/dockhand \
  -e DATA_DIR=/opt/dockhand \
  fnsys/dockhand:latest

# 4. (Optional) Remove old named volume after verifying everything works
docker volume rm dockhand_dataIf using Docker Compose:
services:
  dockhand:
    volumes:
      - /opt/dockhand:/opt/dockhand
    environment:
- DATA_DIR=/opt/dockhandManaged stacks store the absolute path to their compose and .env files, so after changing DATA_DIR those paths still point at the old location. Run the relocate stack paths emergency script to update them to the new location. It never touches your files - it only updates the stored paths in the database.
API reference
Dockhand exposes a REST API that can be used for automation and integration with other tools. All endpoints are available at /api/.
Interactive API docs (OpenAPI) Since 1.0.43
Dockhand can serve a full OpenAPI 3 specification of its own REST API, generated directly from the server routes so it always matches the running version. Two endpoints are provided:
| Endpoint | What it serves |
|---|---|
GET /api/docs |
The raw OpenAPI 3 document (JSON). Import it into Postman, Insomnia, an SDK generator, or any OpenAPI-aware tool. |
GET /api/docs/ui |
An interactive, self-hosted Scalar viewer that lets you browse every endpoint and copy ready-made request samples in curl, Go, Python, JavaScript, PHP and more. All assets are bundled — nothing is loaded from a CDN, so it works on air-gapped and internal-only deployments. |
Off by default. Because these two routes are unauthenticated (they describe the whole API surface), they are disabled unless you explicitly turn them on. Set the environment variable FEAT_API_DOCS=true on the Dockhand container to enable them; while it is unset, both endpoints return 404.
docker run \
  -e FEAT_API_DOCS=true \
  -p 3000:3000 \
  fnsys/dockhand
Once enabled, open https://your-dockhand-host/api/docs/ui in a browser for the interactive viewer. If your instance has authentication enabled, the endpoints themselves are public once the flag is on, but every other API call they document still requires a session cookie or a bearer token as described below.
MCP server — the community mcp-dockhand project (by @strausmann) exposes Dockhand to LLM tools over the Model Context Protocol. It drives the API from this same OpenAPI document, so it stays in sync with your Dockhand version — enable FEAT_API_DOCS=true and point it at your instance.
Authentication Since 1.0.25
When authentication is enabled, API requests must be authenticated using one of the following methods:
| Method | Header | Use case |
|---|---|---|
| Session cookie | Automatic (set by browser) | Web UI, browser-based access |
| Bearer token | Authorization: Bearer dh_... |
CI/CD pipelines, scripts, automation |
Creating an API token
- Go to Profile (click your avatar in the sidebar)
- Scroll to API tokens
- Click Generate token, enter a name and optional expiry date
- Copy the token immediately — it is shown only once
All Dockhand API tokens start with dh_. Store them securely — the full token value cannot be retrieved after creation.
Security details
- Tokens are hashed with Argon2id before storage (never stored in plain text)
- Failed authentication attempts are rate-limited per IP (15 failures/min → 5-minute cooldown)
- Each user can have up to 25 active tokens
- A Bearer token cannot create new tokens (prevents leaked-token bootstrapping)
- Token creation requires an active cookie session with password confirmation
Containers
| Method | Endpoint | Description |
|---|---|---|
GET |
/api/containers |
List all containers |
POST |
/api/containers |
Create a new container |
GET |
/api/containers/[id] |
Get container details |
DELETE |
/api/containers/[id] |
Remove container |
POST |
/api/containers/[id]/start |
Start container |
POST |
/api/containers/[id]/stop |
Stop container |
POST |
/api/containers/[id]/restart |
Restart container |
POST |
/api/containers/[id]/pause |
Pause container |
POST |
/api/containers/[id]/unpause |
Unpause container |
POST |
/api/containers/[id]/rename |
Rename container. Body: {"name": "new-name"} |
GET |
/api/containers/[id]/inspect |
Full container inspect data |
GET |
/api/containers/[id]/logs |
Get container logs |
POST |
/api/containers/[id]/update |
Update container configuration |
GET |
/api/containers/check-updates |
List containers with a pending image update (cached result of the last check; does not trigger one) |
POST |
/api/containers/check-updates |
Trigger a check for available image updates (runs a job) |
GET |
/api/containers/pending-updates |
List pending container updates for an environment |
POST |
/api/containers/batch-update |
Batch update containers. Body: {"containerIds": [...]} |
Stacks
| Method | Endpoint | Description |
|---|---|---|
GET |
/api/stacks |
List all compose stacks |
POST |
/api/stacks |
Create and deploy a stack (target environment from the env query, or envId/environmentId in the body) |
POST |
/api/stacks/[name]/start |
Start stack |
POST |
/api/stacks/[name]/stop |
Stop stack |
POST |
/api/stacks/[name]/restart |
Restart stack |
POST |
/api/stacks/[name]/deploy |
Redeploy stack. Body: {"pull": bool, "build": bool, "forceRecreate": bool} |
POST |
/api/stacks/[name]/down |
Down stack (remove containers and networks). Body: {"removeVolumes": bool} |
DELETE |
/api/stacks/[name] |
Remove stack |
GET |
/api/stacks/[name]/icon?env=X |
Get a stack's uploaded custom icon (raw image bytes) |
POST |
/api/stacks/[name]/icon?env=X |
Set a stack's icon. Body is either {"icon": "<name>"} (a built-in icon reference) or {"image": "<base64 data URL>"} (upload a custom image) |
DELETE |
/api/stacks/[name]/icon?env=X |
Clear a stack's custom icon |
GET |
/api/git/stacks |
List git stacks |
POST |
/api/git/stacks |
Create a git stack |
PUT |
/api/git/stacks/[id] |
Update a git stack |
DELETE |
/api/git/stacks/[id] |
Delete a git stack |
POST |
/api/git/stacks/[id]/deploy |
Deploy a git stack |
POST |
/api/git/stacks/[id]/sync |
Sync git stack (pull latest changes) |
Images
| Method | Endpoint | Description |
|---|---|---|
GET |
/api/images |
List all images |
POST |
/api/images/pull |
Pull an image from registry |
POST |
/api/images/load |
Load an image from an uploaded .tar (docker load); local and direct-TCP environments |
DELETE |
/api/images/[id] |
Remove image |
POST |
/api/images/push |
Push an image to a registry |
POST |
/api/images/[id]/tag |
Tag an image. Body: {"repo": "name", "tag": "latest"} |
GET |
/api/images/[id]/export |
Export image as tar archive |
POST |
/api/images/scan |
Scan image for vulnerabilities |
GET |
/api/images/scan/export |
Export a single image's cached scan. Params: imageId, env, format=json|csv|sarif Since 1.0.37 |
GET |
/api/vulnerabilities/export |
Export aggregated findings for an environment. Params: env, format=json|csv|sarif, plus optional filters (q, severity, image, container, stack) Since 1.0.37 |
Vulnerability exports are read-only over cached scan results (no new scanning). They require the images:view permission and honor environment access control on enterprise; authenticate with a session cookie or a Bearer API token for CI use. Example — export an environment's findings as SARIF 2.1.0 and post them to a security platform:
# All findings for environment 1, as SARIF 2.1.0
curl -H "Authorization: Bearer $DOCKHAND_TOKEN" \
  "https://dockhand.example.com/api/vulnerabilities/export?env=1&format=sarif" \
  -o vulnerabilities.sarif

# Only critical/high, filtered to one stack, as CSV
curl -H "Authorization: Bearer $DOCKHAND_TOKEN" \
  "https://dockhand.example.com/api/vulnerabilities/export?env=1&format=csv&severity=critical,high&stack=frontend"

# A single image's cached scan as SARIF (for DefectDojo / GitHub code scanning ingestion)
curl -H "Authorization: Bearer $DOCKHAND_TOKEN" \
  "https://dockhand.example.com/api/images/scan/export?imageId=sha256:abc123&env=1&format=sarif"
Query parameters (both endpoints):
| Param | Applies to | Description |
|---|---|---|
format | both | json (default), csv, or sarif |
env | both | Environment id. Also used in the download filename. |
imageId | images/scan/export | Image SHA256 (required). Alias: image. |
q | vulnerabilities/export | Free-text match on CVE, package, image, container, or stack name. |
severity | vulnerabilities/export | Comma-separated: critical,high,medium,low,negligible,unknown. |
image, container, stack | vulnerabilities/export | Comma-separated names to filter by. |
Responses set Content-Type to application/sarif+json, text/csv, or application/json, with a Content-Disposition filename such as vulnerabilities-<env>-<date>.sarif. The json format returns Dockhand's normalized findings ({ summary, findings }); sarif emits a SARIF 2.1.0 log with one rule per CVE and one result per finding (severity mapped to SARIF level, a security-severity property, and a stable fingerprint so re-imports de-duplicate). Native Grype/Trivy JSON passthrough is not provided — the stored data is Dockhand's normalized shape.
Example — CI pipeline uploading to DefectDojo:
# In CI, after Dockhand has scanned the built image:
curl -sf -H "Authorization: Bearer $DOCKHAND_TOKEN" \
  "$DOCKHAND_URL/api/images/scan/export?imageId=$IMAGE_SHA&env=$ENV_ID&format=sarif" \
  -o results.sarif

# Upload the SARIF to DefectDojo's import-scan API
curl -sf -H "Authorization: Token $DEFECTDOJO_TOKEN" \
  -F "scan_type=SARIF" \
  -F "engagement=$ENGAGEMENT_ID" \
  -F "file=@results.sarif" \
  "$DEFECTDOJO_URL/api/v2/import-scan/"
Registries
Manage configured registries and browse their contents. Browsing endpoints take a registry query parameter (the configured registry id); omit it to target Docker Hub.
| Method | Endpoint | Description |
|---|---|---|
GET |
/api/registries |
List configured registries |
POST |
/api/registries |
Add a registry. Body: {"name": "...", "url": "...", "username": "...", "password": "..."} |
GET |
/api/registries/[id] |
Get one registry |
PUT |
/api/registries/[id] |
Update a registry |
DELETE |
/api/registries/[id] |
Remove a registry |
POST |
/api/registries/test |
Test connectivity. Body: {"url": "...", "username": "...", "password": "..."} |
GET |
/api/registry/catalog |
List repositories. Params: registry, last (pagination cursor) |
GET |
/api/registry/search |
Search images. Params: registry, term, limit |
GET |
/api/registry/tags |
List tags. Params: registry, image, page, pageSize. For self-hosted registries this returns names only; size and date come from tag-info |
GET |
/api/registry/tag-info |
Per-tag size and date from the manifest. Params: registry, image, tag. Loaded on demand for each visible tag when a repository is expanded; unavailable values return null with a reason rather than an error |
DELETE |
/api/registry/image |
Delete a tag from the registry. Params: registry, image, tag |
Bulk operations
| Method | Endpoint | Description |
|---|---|---|
POST |
/api/batch |
Bulk operation on containers, images, volumes, networks, or stacks. Body: { operation, entityType, items } |
Volumes & Networks
| Method | Endpoint | Description |
|---|---|---|
GET |
/api/volumes |
List all volumes |
POST |
/api/volumes |
Create a volume |
GET |
/api/volumes/[name] |
Get volume details |
DELETE |
/api/volumes/[name] |
Remove volume |
POST |
/api/volumes/[name]/clone |
Clone a volume. Body: {"name": "new-volume-name"} |
GET |
/api/volumes/[name]/export |
Export volume as tar archive |
GET |
/api/networks |
List all networks |
POST |
/api/networks |
Create a network |
GET |
/api/networks/[id] |
Get network details |
DELETE |
/api/networks/[id] |
Remove network |
POST |
/api/networks/[id]/connect |
Connect container to network. Body: {"containerId": "..."} |
POST |
/api/networks/[id]/disconnect |
Disconnect container from network. Body: {"containerId": "..."} |
Backups Since 1.1.0
All backup endpoints require backups:manage access. Most take an optional environment via the request body, not a query string.
| Method | Endpoint | Description |
|---|---|---|
GET | /api/backup/destinations | List backup destinations (repositories) |
POST | /api/backup/destinations | Create a destination (also runs restic init and registers maintenance schedules) |
POST | /api/backup/destinations/test | Test a destination config before saving |
GET | /api/backup/destinations/[id] | Get one destination |
PUT | /api/backup/destinations/[id] | Update a destination |
DELETE | /api/backup/destinations/[id] | Delete a destination (and its schedules) |
POST | /api/backup/destinations/[id]/init | Initialize the restic repository |
POST | /api/backup/destinations/[id]/test | Test connectivity to the destination |
POST | /api/backup/destinations/[id]/task | Run a maintenance task. Body: {"task": "check|prune|unlock|stats|repair-index|repair-snapshots"} |
POST | /api/backup/destinations/[id]/verify | Verify repository data (re-reads a data subset) |
POST | /api/backup/destinations/[id]/rotate-key | Rotate the repository password |
GET | /api/backup/configs | List backup configs |
POST | /api/backup/configs | Create a backup config |
GET | /api/backup/stack-path | Preview where a stack's directory is captured from on the host (?target=<stack>&env=<id>); returns the resolved host path or unknown with a reason |
GET | /api/backup/configs/[id] | Get one config |
PUT | /api/backup/configs/[id] | Update a config |
DELETE | /api/backup/configs/[id] | Delete a config. With ?deleteSnapshots=true the config's snapshots are also forgotten and pruned (best-effort; snapshots survive by default so a restore stays possible) |
POST | /api/backup/configs/[id]/run | Run the backup now (job-based; poll /api/jobs/{id}) |
POST | /api/backup/configs/[id]/stop | Cancel a running backup |
GET | /api/backup/snapshots | List snapshots (filter by configId / destination) |
GET | /api/backup/instance | This install's stable instance id (used to tell own snapshots from foreign ones in a shared repository) |
DELETE | /api/backup/snapshots/[id] | Delete a snapshot (restic forget --prune) |
POST | /api/backup/snapshots/batch-delete | Delete many snapshots from one destination in a single restic forget --prune (body { destinationId, snapshotIds }); each is ownership- and environment-checked, ids that fail are skipped |
GET | /api/backup/snapshots/[id]/browse | Browse the file tree inside a snapshot |
GET | /api/backup/snapshots/[id]/dump | Download a file or directory from a snapshot (the stored metadata.json is served redacted and cannot be downloaded raw, so container secrets are never exposed) |
GET | /api/backup/snapshots/[id]/metadata | Read a snapshot's stored metadata (secrets and captured container environment variables are redacted) |
GET | /api/backup/snapshots/diff | Diff two snapshots |
POST | /api/backup/restore/preview | Preview a snapshot (volumes, types, sources, stack-file presence). With a mode + target it also resolves the exact host target paths and probes whether they already hold data (targets). |
POST | /api/backup/restore | Restore a snapshot (job-based). See the request shapes below. |
POST | /api/backup/restore/stop | Cancel a running restore |
The restore body selects one of the two modes. Overwrite live (in-place) restores into the existing target on its source environment:
curl -X POST https://dockhand.example.com/api/backup/restore \
  -H "Authorization: Bearer dh_..." -H "Content-Type: application/json" \
  -d '{
    "destinationId": 1,
    "snapshotId": "<snapshot-id>",
    "environmentId": 3,
    "mode": "in-place",
    "targetName": "postgres",
    "volumes": ["pgdata"],
    "confirmOverwrite": true,
    "postRestore": "start"
  }'
To an environment (a cross-env clone) maps each volume to a destination on the chosen environment, then recreates/redeploys the target there. kind is "volume" (a named volume Dockhand creates — refused if it already exists) or "path" (an absolute host path on the target daemon):
curl -X POST https://dockhand.example.com/api/backup/restore \
  -H "Authorization: Bearer dh_..." -H "Content-Type: application/json" \
  -d '{
    "destinationId": 1,
    "snapshotId": "<snapshot-id>",
    "environmentId": 5,
    "mode": "new-location",
    "targetName": "postgres",
    "volumes": ["pgdata"],
    "volumeDestinations": [
      { "volume": "pgdata", "kind": "volume", "target": "pgdata-clone" }
    ],
    "postRestore": "recreate"
  }'
For a new-location stack restore, the captured compose/config are restored and the stack is registered in Dockhand as managed by default. Add "skipStackFiles": true to restore volume data only (skip the compose/config and leave the stack unmanaged).
Both return { "jobId": "..." }; poll GET /api/jobs/{jobId} for progress and the final success | warning | error result.
Other endpoints
| Method | Endpoint | Description |
|---|---|---|
GET |
/api/health |
Health check |
GET |
/api/activity |
Get activity log |
GET |
/api/environments |
List environments |
GET |
/api/dashboard/stats |
Get dashboard statistics |
GET |
/api/schedules |
List scheduled tasks |
Labels Since 1.0.29
| Method | Endpoint | Description |
|---|---|---|
GET |
/api/labels |
List all unique environment labels with usage counts and environment details |
POST |
/api/labels |
Bulk label operations: rename or delete a label across all environments |
Rename a label
POST /api/labels
Content-Type: application/json

{ "action": "rename", "oldLabel": "prod", "newLabel": "production" }
Delete a label
POST /api/labels
Content-Type: application/json

{ "action": "delete", "label": "deprecated" }
Both operations return { "success": true, "affected": N } where N is the number of environments modified.
Query parameters
Most endpoints accept an env query parameter to specify the target environment:
GET /api/containers?env=1
GET /api/images?env=2
Request headers
All endpoints that accept a JSON body require the Content-Type: application/json header. Sending a POST/PUT request with a body but without this header will result in a parse error.
| Header | When to use |
|---|---|
Authorization: Bearer dh_... |
Required for all requests when authentication is enabled |
Content-Type: application/json |
Required for POST/PUT requests that include a JSON body |
Accept: application/json |
For long-running operations, returns a synchronous JSON result instead of a job ID |
Long-running operations
Several endpoints perform long-running operations (deploying stacks, pulling images, running batch operations). By default they return a job reference immediately so the UI can poll for progress:
{ "jobId": "abc123" }The UI polls GET /api/jobs/{jobId} every 500 ms to retrieve progress lines and the final result. For scripting and automation, send Accept: application/json instead — the server runs the full operation and returns a single JSON result directly with no polling required.
Without an Accept header these endpoints return { "jobId": "..." } for async polling. Add Accept: application/json to get a synchronous JSON result — ideal for shell scripts and CI pipelines.
The following endpoints support the Accept: application/json synchronous mode:
| Endpoint | Description |
|---|---|
POST /api/stacks |
Create and deploy a stack |
POST /api/stacks/[name]/start |
Start a stack |
POST /api/stacks/[name]/stop |
Stop a stack |
POST /api/stacks/[name]/restart |
Restart a stack |
POST /api/stacks/[name]/deploy |
Redeploy a stack |
POST /api/stacks/[name]/down |
Down a stack |
POST /api/git/stacks |
Create a git stack |
POST /api/git/stacks/[id]/deploy |
Deploy a git stack |
POST /api/images/pull |
Pull an image |
POST /api/images/push |
Push an image |
POST /api/images/scan |
Scan image for vulnerabilities |
POST /api/batch |
Bulk operations on containers, images, volumes, networks, or stacks |
Example: using curl
# List containers
curl -s -H "Authorization: Bearer dh_your_token_here" \
  http://localhost:3000/api/containers | jq

# Restart a container
curl -X POST -H "Authorization: Bearer dh_your_token_here" \
  http://localhost:3000/api/containers/abc123/restart

# Pull an image - returns JSON when complete (no job polling needed)
curl -X POST http://localhost:3000/api/images/pull \
  -H "Authorization: Bearer dh_your_token_here" \
  -H "Accept: application/json" \
  -H "Content-Type: application/json" \
  -d '{"image": "nginx:latest"}' | jq

# Start a stack
curl -X POST "http://localhost:3000/api/stacks/mystack/start?env=1" \
  -H "Authorization: Bearer dh_your_token_here" \
  -H "Accept: application/json" | jq

# Redeploy a stack (pull latest images and force recreate)
curl -X POST "http://localhost:3000/api/stacks/mystack/deploy?env=1" \
  -H "Authorization: Bearer dh_your_token_here" \
  -H "Accept: application/json" \
  -H "Content-Type: application/json" \
  -d '{"pull": true, "build": false, "forceRecreate": true}' | jq

# Down a stack (remove containers and networks)
curl -X POST "http://localhost:3000/api/stacks/mystack/down?env=1" \
  -H "Authorization: Bearer dh_your_token_here" \
  -H "Accept: application/json" \
  -H "Content-Type: application/json" \
  -d '{"removeVolumes": false}' | jq

# Bulk remove containers
curl -X POST http://localhost:3000/api/batch \
  -H "Authorization: Bearer dh_your_token_here" \
  -H "Accept: application/json" \
  -H "Content-Type: application/json" \
  -d '{
    "operation": "remove",
    "entityType": "containers",
    "items": [
      {"id": "abc123", "name": "my-container"}
    ]
  }' | jq
Appendix: OIDC/SSO configuration guide
This guide explains how to configure OpenID Connect (OIDC) Single Sign-On in Dockhand.
Overview
Dockhand supports OIDC authentication, allowing users to log in using external identity providers:
- Microsoft Azure AD
- Okta
- Keycloak
- Auth0
- Any OIDC-compliant provider
Keycloak setup example
1. Create a realm
- Log in to Keycloak Admin Console
- Create a new realm (e.g.,
dockhand)
2. Create a client
- Go to Clients > Create client
- Configure:
- Client ID:
dockhand-app - Client type: OpenID Connect
- Client authentication: ON (for confidential client)
- Client ID:
- Click Next and configure:
- Valid redirect URIs:
https://your-domain/api/auth/oidc/callback - Web origins:
https://your-domain
- Valid redirect URIs:
- Click Save
- Go to Credentials tab and copy the Client secret
3. Configure group mapper
To pass group membership to Dockhand for role mapping:
- Go to Clients > dockhand-app > Client scopes
- Click on dockhand-app-dedicated scope
- Click Add mapper > By configuration > Group Membership
- Configure:
- Name:
groups - Token Claim Name:
groups - Full group path: OFF
- Add to ID token: ON
- Add to access token: ON
- Add to userinfo: ON
- Name:
- Click Save
4. Create groups
Create groups in Keycloak that map to Dockhand roles:
- Go to Groups > Create group
- Create groups such as:
dockhand-admins- for administrator accessdockhand-operators- for operator accessdockhand-viewers- for read-only access
5. Assign users to groups
- Go to Users > [select user] > Groups
- Click Join Group
- Select the appropriate group(s)
Dockhand configuration
1. Enable Enterprise license
Role mapping features require an Enterprise license:
- Go to Settings > License
- Enter your license name and key
- Click Activate
2. Configure OIDC provider
- Go to Settings > Auth > SSO
- Click Add provider
- Fill in the basic settings:
| Field | Example Value |
|---|---|
| Name | Keycloak |
| Issuer URL | https://keycloak.example.com/realms/dockhand |
| Client ID | dockhand-app |
| Client secret | (from Keycloak) |
| Redirect URI | https://your-domain/api/auth/oidc/callback |
| Scopes | openid profile email |
3. Configure claim mappings (optional)
| Field | Default | Description |
|---|---|---|
| Username claim | preferred_username |
Claim for username |
| Email claim | email |
Claim for email address |
| Display name claim | name |
Claim for display name |
4. Configure admin mapping
Grant admin access based on group membership:
- Edit the OIDC provider
- Scroll to Groups/roles claim section
- Configure:
- Claim name:
groups - Admin value(s):
dockhand-admins
- Claim name:
Users with dockhand-admins in their groups claim will automatically receive Admin role.
5. Configure role mappings (Enterprise)
Map additional groups to Dockhand roles:
- Edit the OIDC provider
- Scroll to Claim to role mappings section
- Click Add mapping
- For each mapping, configure:
- Claim name:
groups - Claim value: e.g.,
dockhand-operators - Role: Select from dropdown
- Claim name:
| Keycloak Group | Dockhand Role |
|---|---|
dockhand-admins |
Admin (via admin mapping) |
dockhand-operators |
Operator |
dockhand-viewers |
Viewer |
Other identity providers
Issuer URL: https://accounts.google.com
Scopes: openid profile email
Note: Google doesn't support custom claims for role mapping. All Google users will need manual role assignment.
Azure AD
Issuer URL: https://login.microsoftonline.com/{tenant-id}/v2.0
Scopes: openid profile email
For role mapping, configure Azure AD to include group claims in the token.
Okta
Issuer URL: https://{your-domain}.okta.com
Scopes: openid profile email groups
Configure a groups claim in the Authorization Server.
Troubleshooting OIDC
User has no permissions after login
- Verify the user is assigned to groups in your IdP
- Check that the groups mapper is configured correctly
- Ensure Add to ID token is enabled for the groups mapper
- Verify the claim name matches in Dockhand config (case-sensitive)
Admin mapping not working
- Verify the admin claim name matches exactly (case-sensitive)
- Check that the admin value matches the group name exactly
- Ensure the user is a member of the admin group in your IdP
Redirect URI mismatch error
- Ensure the redirect URI in Dockhand matches exactly what's configured in your IdP
- Check for trailing slashes
- Verify the protocol (http vs https) matches
Token claims not appearing
For Keycloak:
- Go to Clients > [client] > Client scopes
- Verify mappers are configured
- Use Keycloak's Evaluate feature to test token contents:
- Go to Clients > [client] > Client scopes > Evaluate
- Select a user and click Generated ID token
- Verify the
groupsclaim is present
- Use HTTPS in production - Never use HTTP for OIDC in production environments
- Protect client secrets - Store client secrets securely, never commit to version control
- Validate redirect URIs - Only allow specific, known redirect URIs
- Use short token lifetimes - Configure appropriate token expiration in your IdP
- Regular audits - Review OIDC user access and role mappings periodically
Appendix: LDAP/Active Directory configuration guide
This guide explains how to configure LDAP or Active Directory authentication in Dockhand.
LDAP/Active Directory integration requires an Enterprise license.
Supported directories
- OpenLDAP
- Microsoft Active Directory
- FreeIPA
- 389 Directory Server
- Any LDAP v3 compliant directory
How LDAP authentication works
- User enters username and password in Dockhand
- Dockhand connects to LDAP server using bind credentials (service account)
- Searches for the user entry using the configured filter
- Attempts to bind as the found user with the provided password
- If successful, retrieves user attributes (email, display name)
- Optionally checks group membership for admin/role assignment
- Creates or updates user in Dockhand and establishes session
Key terminology
| Term | Description |
|---|---|
| DN (Distinguished Name) | Unique identifier for an entry, e.g., cn=john,ou=users,dc=example,dc=com |
| Base DN | Starting point for searches, e.g., dc=example,dc=com |
| Bind DN | Service account DN used to search the directory |
| Filter | LDAP query to find entries, e.g., (uid=john) |
| Attribute | Property of an entry, e.g., mail, cn, uid |
OpenLDAP configuration
Example directory structure
dc=example,dc=com
├── ou=users
│   ├── uid=john (cn=John Doe, mail=john@example.com)
│   └── uid=jane (cn=Jane Smith, mail=jane@example.com)
└── ou=groups
    ├── cn=dockhand-admins (member: uid=john,ou=users,dc=example,dc=com)
    └── cn=dockhand-users (member: uid=jane,ou=users,dc=example,dc=com)
Dockhand configuration for OpenLDAP
| Field | Value |
|---|---|
| Name | Corporate OpenLDAP |
| Server URL | ldap://ldap.example.com:389 |
| Bind DN | cn=readonly,dc=example,dc=com |
| Bind Password | (service account password) |
| Base DN | ou=users,dc=example,dc=com |
| User filter | (uid={{username}}) |
| Username attribute | uid |
| Email attribute | mail |
| Display name attribute | cn |
| Group base DN | ou=groups,dc=example,dc=com |
| Admin group | cn=dockhand-admins,ou=groups,dc=example,dc=com |
Active Directory configuration
Example AD structure
DC=corp,DC=example,DC=com
├── OU=Users
│   ├── CN=John Doe (sAMAccountName=jdoe, mail=jdoe@example.com)
│   └── CN=Jane Smith (sAMAccountName=jsmith, mail=jsmith@example.com)
└── OU=Groups
    ├── CN=Dockhand Admins
    └── CN=Dockhand Users
Dockhand configuration for Active Directory
| Field | Value |
|---|---|
| Name | Corporate AD |
| Server URL | ldap://dc01.corp.example.com:389 |
| Bind DN | CN=Service Account,OU=Service Accounts,DC=corp,DC=example,DC=com |
| Base DN | OU=Users,DC=corp,DC=example,DC=com |
| User filter | (sAMAccountName={{username}}) |
| Username attribute | sAMAccountName |
| Email attribute | mail |
| Display name attribute | displayName |
| Group base DN | OU=Groups,DC=corp,DC=example,DC=com |
| Admin group | CN=Dockhand Admins,OU=Groups,DC=corp,DC=example,DC=com |
Alternative AD user filters
# By sAMAccountName (most common)
(sAMAccountName={{username}})

# By userPrincipalName (email-style login)
(userPrincipalName={{username}})

# By both (allow either format)
(|(sAMAccountName={{username}})(userPrincipalName={{username}}))

# Only enabled accounts
(&(sAMAccountName={{username}})(!(userAccountControl:1.2.840.113556.1.4.803:=2)))
Group membership filters
# OpenLDAP with groupOfNames
(&(objectClass=groupOfNames)(member={{user_dn}}))

# OpenLDAP with posixGroup
(&(objectClass=posixGroup)(memberUid={{username}}))

# Active Directory
(&(objectClass=group)(member={{user_dn}}))
The {{user_dn}} placeholder is replaced with the user's full DN.
Role mappings (Enterprise)
Map LDAP groups to Dockhand roles:
- Click Add mapping
- Enter the full group DN
- Select the Dockhand role
| LDAP Group DN | Dockhand Role |
|---|---|
cn=dockhand-admins,ou=groups,dc=example,dc=com |
Admin (via admin group) |
cn=dockhand-operators,ou=groups,dc=example,dc=com |
Operator |
cn=dockhand-viewers,ou=groups,dc=example,dc=com |
Viewer |
TLS/SSL configuration
Server URL formats:
ldap://hostname:389- Plain LDAP (port 389)ldaps://hostname:636- LDAP over SSL (port 636)ldap://hostname:389with TLS enabled - StartTLS
For self-signed certificates, add the CA certificate in TLS settings.
Troubleshooting LDAP
Connection refused
- Verify LDAP server is running and accessible
- Check firewall rules (ports 389/636)
- Test connectivity:
telnet ldap.example.com 389
Invalid credentials (Bind DN)
- Verify Bind DN is correct and complete
- Check password is correct
- Ensure service account is not locked/disabled
User not found
- Verify Base DN includes the user's location
- Test user filter manually with
ldapsearch:
# OpenLDAP
ldapsearch -x -H ldap://localhost:389 \
  -D "cn=admin,dc=example,dc=com" \
  -W \
  -b "ou=users,dc=example,dc=com" \
  "(uid=john)"

# Active Directory
ldapsearch -x -H ldap://dc01.corp.example.com:389 \
  -D "CN=Service Account,DC=corp,DC=example,DC=com" \
  -W \
  -b "DC=corp,DC=example,DC=com" \
  "(sAMAccountName=jdoe)"
User logs in but has no permissions
- Verify user is member of appropriate LDAP group
- Check group DN matches exactly (case-sensitive)
- Verify member filter is correct for your directory type
- Ensure role mappings are configured
TLS/SSL certificate errors
- For self-signed certificates, add the CA certificate in TLS settings
- Verify server hostname matches certificate CN/SAN
- Check certificate is not expired
- Use TLS in production - Never send credentials over plain LDAP in production
- Principle of least privilege - Bind account should only have read access
- Protect bind credentials - Store bind password securely
- Audit group membership - Regularly review who has admin access
- Monitor failed logins - Watch for brute force attempts
Tips & tricks
Updating Hawser agent
When Dockhand recreates the Hawser container during an update, the connection between Dockhand and the remote host is severed mid-operation. This causes the update to hang indefinitely. Use the dockhand.update=false label (see Container labels) to prevent Dockhand from attempting to update Hawser automatically.
Since Hawser manages the communication channel between Dockhand and the remote Docker host, it cannot update itself through Dockhand — it would be cutting the branch it's sitting on. Instead, use a companion "updater" container that pulls and restarts Hawser independently.
Solution: Hawser updater container
Add a one-shot updater service alongside your Hawser compose stack. When started (manually or on a schedule), it pulls the latest Hawser image and recreates the container:
services:
  hawser:
    container_name: hawser
    restart: unless-stopped
    image: ghcr.io/finsys/hawser:latest
    volumes:
      - /var/run/docker.sock:/var/run/docker.sock
    ports:
      - 2376:2376
    environment:
      - TOKEN=your-secret-token
    labels:
      - dockhand.update=false

  hawser-updater:
    image: docker:24-cli
    container_name: hawser-updater
    restart: "no"
    volumes:
      - /var/run/docker.sock:/var/run/docker.sock
      - .:/host/hawser:ro
    working_dir: /host/hawser
    entrypoint: >
      sh -c "
        echo 'Pulling latest Hawser image...';
        docker compose pull hawser;
        echo 'Recreating Hawser container...';
        docker compose up -d hawser;
        echo 'Done.';
      "
How to use
- Deploy this compose file on each remote host running Hawser.
- When you want to update Hawser, simply start the
hawser-updatercontainer from the Dockhand UI (click the play button). - The updater pulls the latest image, recreates Hawser, and exits. Refresh the page after a few seconds.
The dockhand.update=false label on the Hawser container ensures Dockhand's auto-update feature never attempts to update it. This is critical for both Standard and Edge mode agents.
Based on a solution shared by the Dockhand community.